
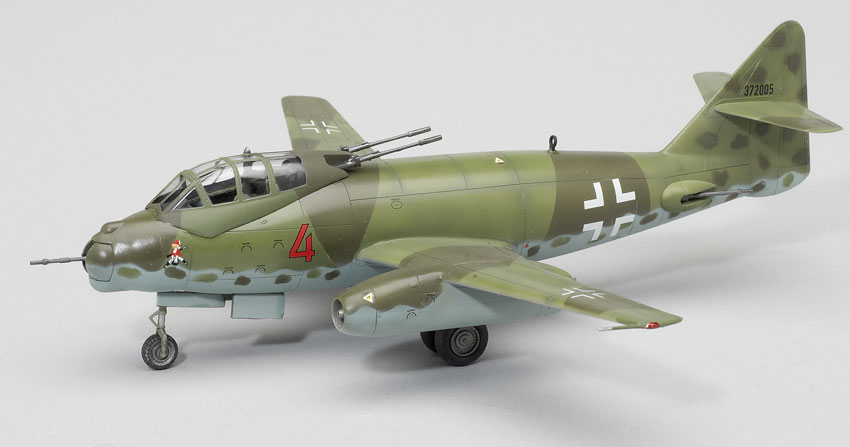
The Messerschmitt P.1099B is another in Revell Germany’s line of “Luft ’46” aircraft, modeled from German designs that were experimental or still on the drawing board at the end of World War II. This particular concept was a heavy fighter or bomber destroyer derived from the Me 262 jet.
Revell Germany’s kit is a neat little model with no major faults, and a diversion for those of us stuck on operational aircraft. Crisply molded in light gray, flash-free plastic with recessed panel lines, it features a few parts – particularly the landing gear retraction arms – which are so delicate you’ll need to take special care removing them from the sprue. Good fits required filler only around the nose wheel housing, the engine mounts, and the underside of the wings at the fuselage.
I followed the instruction sequence for this straightforward build. However, from the beginning I decided against having the nose turret or side gun blisters move. This made construction a little easier. I left off the backing plates (Part No. 60) for the side barbettes; the holes were a convenient place to insert a paintbrush handle to hold the model while painting.
The cockpit has nice detail, with instruments represented by decals. It looks convincing under the clear canopy, but there’s plenty of room to add detail. The final step is adding the canopy, which includes hefty side panels that fit over the fuselage. It was slightly wider than the fuselage and left a gap I filled with white glue after painting.
Both marking options have the late-war camouflage scheme of RLM 81/82/78. After pre-shading the panel lines, I airbrushed Gunze Sangyo paints throughout with some touches of Tamiya light blue (XF-23) on the underside. Initially, I tried to hand-spray the mottled pattern, but it didn’t look right based on the cover painting – my edges were too fuzzy. After re-spraying the RLM 78, I made a template from clear acetate with two different openings to better reproduce the mottle shown on the cover. The clear backing helped me locate the splotches close to the lower fuselage demarcation line. If you want to try this, leave the wings off until after painting the fuselage and touch up the wing seam later; it was awkward getting the template between the engines and the fuselage.
Two clear gloss coats provided a base for the decals, which include markings for two hypothetical aircraft. The decals are printed flat, and I had some silvering around the wing walks.
Though it’s not my usual subject area, I enjoyed building this kit. If I were to do another, I’d make up my own exotic camouflage scheme, though. It took me about 20 hours to complete this model, including repainting the undersurfaces, and it’s a high-quality kit beginners can handle if they are comfortable with small parts.


