
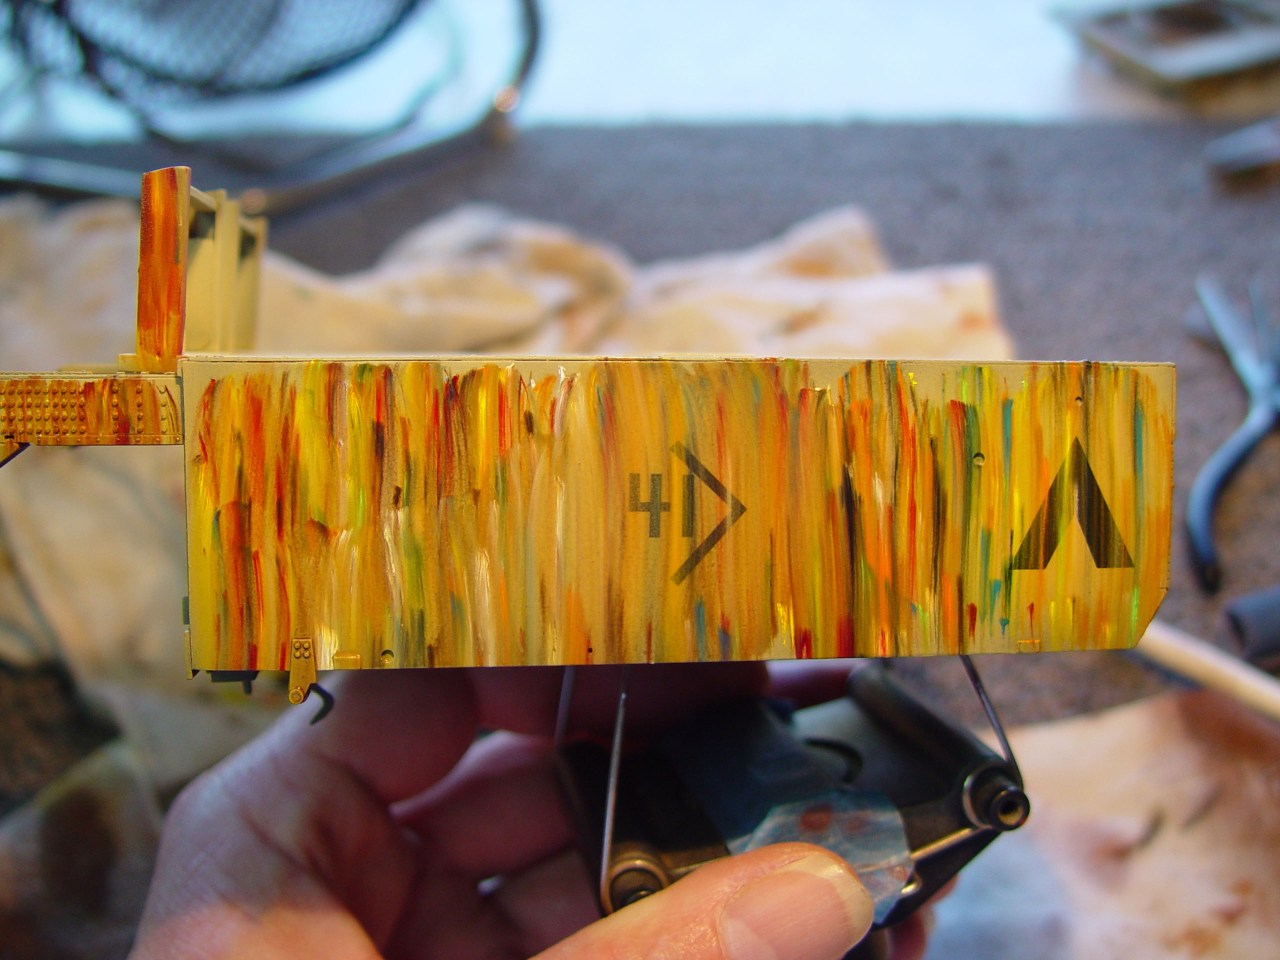
We’ve all seen those subtly weathered models. The ones that truly look realistic thanks to the hints of dirt, dust, and wear in multiple light coats. How does a modeler achieve these fantastic results? The answer is dot filters.
Is it complicated? While it may look intense, truthfully, it’s a very easy process consisting of only three steps. This is how you do it.
First, make sure you seal your paint and decals with a coat of semigloss or flat clear. Why flat or semigloss? Because those finishes give the filter a bit of texture to hold to. Then randomly apply a multicolored array of artist’s oils over the surface. Yes, there are a lot of colors involved, but you can use the ones you already have on your workbench. Throw them over markings and details with abandon.
Then, using a broad, thick brush wet with Turpernoid, draw the colors down the surface. Each time you pass over the colors you’ll remove the bright hues and leave behind only a fraction of a color. Drag downwards to imitate gravity’s effects on dirt and dust. Two things: First, Turpenoid typically effects only oil paints. This technique is perfect over acrylics and lacquers. Be cautious over enamels: Make sure your clear coat is COMPLETELY dry, which may take up to several days depending upon humidity. Second, watch out for tide marks; you aren’t creating a wash, but using the Turpenoid to thin and remove the paint.
After multiple passes, you’re left with a filter that varies a monochromatic scheme and lends depth, even to feature-less panels. Notice the subtle light and dark shades streaked down the side. That’s all it takes to master dot filters.

