
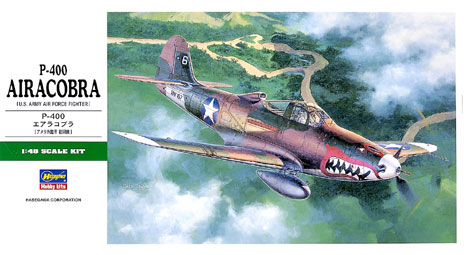
Kit: No. 8061
Scale: 1/48
Manufacturer: Eduard Model Accessories, Obrince 170, 43521 Obrince, Czech Republic
Price: $29.99
Comments: Injection-molded, 132 parts (1 metal nose weight), decals, canopy mask
Pros: High molding quality, many optional parts, good fit, accurate shapes, canopy mask works well
Cons: Clear doors don’t fit opening, decals are translucent
Called the “Iron Dog” by some, Bell Aircraft’s Airacobra had an advanced design for its day. Its sleek aerodynamic shape was complemented by solid construction, good speed, heavy armament (six machine guns and a 37mm cannon), not to mention the unique mid-fuselage engine placement. However, the U.S. Army shortsightedly modified the design by removing the turbocharger, turning the quick interceptor into a low-altitude ground attack aircraft, and giving the Airacobra a reputation as a poor performer.
Yet when flown by determined pilots, such as Boyd “Buzz” Wagner, Tommy Lynch, and George Welch (all scored multiple victories in the Airacobra), it could amaze its enemies. The Soviet Air Force was supplied with more than 4,700 Airacobras, and its pilots praised the ‘Cobra. The P-400s were British-ordered aircraft diverted to U.S. use.
Eduard’s parts are flash-free with crisp panel lines and excellent molding that’s up to the best of today’s standards. The cockpit doors are molded separately in clear plastic. Optional parts include a centerline drop tank or bomb, flattened and standard tires, three upper nose gun panels, three styles of propeller blades, four and three-blade prop hubs, and covered and uncovered wheels. I appreciate the seated pilot figure and the metal nose weight to help balance the model. Also included is a set of Eduard’s Express Masks to assist in painting the well-molded clear canopy.
Following the clear instructions I started by building the cockpit module. This is nicely detailed, featuring the many levers and heavy bulletproof glass. Part No. C47 is the landing gear emergency crank and it fits into the hole in the floor to the right of the stick pedestal, not on the left as shown in the diagram. The cockpit module also includes parts of the nose wheel well, radio shelf, and engine air intake, so take your time to get everything lined up correctly. As the nose weight takes up the cannon bay no armament detail is provided. The front bulkhead to the nose-wheel bay is mislabeled as C9; look for it on sprue A as part A9.
After installing the cockpit module to the right fuselage half I glued both fuselage parts together and encountered no problems. The instructions call for the installation of the antenna mast but photos show most USAAF P-400s lacking it.
The separate cockpit doors are a nice feature but unfortunately the window portions do not conform to the shape of the canopy cross section when installed closed. They also seem to be raked at too great an angle when compared to photos. I installed the left door closed and the right open. It’s been said the pilots preferred to enter from the right as entry from the left was hindered by the throttle quadrant.
Construction of the wings went smoothly. Eduard captures the wing-tip washout accurately, but the trailing edges are a bit thick for the scale. The wing-to-fuselage fit is OK but requires a little sanding. I thinned the lower wing where it mated the fuselage fillet, and had to use a tiny amount of filler at the wing roots, the only filling needed on the entire kit.
The propeller blades are separate but are not keyed to guide installation. A drawing in the instructions shows you the angle. I didn’t check the fit of the spinner until after painting, and found it to be just slightly undersized and that it mounted slightly off center.
The addition of the Express Masks is a great idea. Masks are provided for the canopy panes, the wheels, the black wing walks, and the black shark-mouth “interior.” First you paint those rough areas black, then cover them with the masks. Many of the larger items are given only as the outer borders; you fill in the middle with tape or liquid masker. I used trusty white glue for the interior areas of the masked panels; it’s paint-proof when dry. The masks lifted off without leaving adhesive behind. I used Polly Scale acrylic paints.
Decals feature two different machines from the USAAF in the Southwest Pacific. They applied very well over a gloss coat, but the lighter colors, especially the yellow “Wahl Eye II” and “Pat,” are translucent. The white wing-leading-edge numbers should be black, so I replaced them with spares.
I used Bert Kinzey’s Detail & Scale Vol. 63 P-39 Airacobra as my prime reference. The kit’s dimensions are right on the money. Another useful reference was Cobra in the Clouds by John Stanaway; it features a picture of “Wahl Eye II” and a description of the pilots’ experiences.
I finished my P-400 in 22 hours with only about 12 hours going to basic construction. Overall I found this kit to be a fun and rewarding project. I highly recommend the Eduard Airacobra to the World War II aircraft modeler. Anyone who has built a few aircraft kits should have a good time with this one.