
Manufacturer: Hasegawa, distributed by Marco Polo Import, 532 S. Coralridge Place, City of Industry, CA 91746, 626-333-2328,
www.marcopoloimport.com
Kit: No. PT23 Scale: 1/48
Price: $39.98
Comments: Injection-molded, 311 parts (4 vinyl), decals
Pros: Excellent detail and fit
Cons: Some assemblies are tricky, lots of small parts

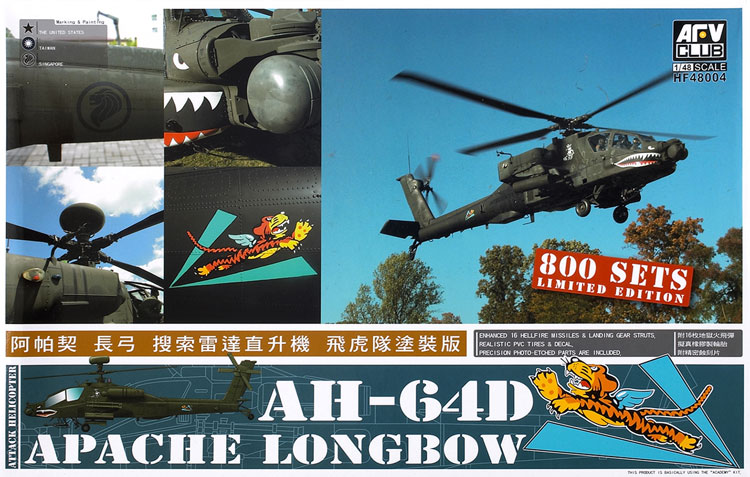
The primary attack helicopter for the United States Army for the past several years has been the Hughes (now Boeing) AH-64 Apache. In the late ’90s Boeing upgraded the Apache with a mast-mounted radar, giving the aircraft superior target acquisition abilities in poor weather and at night. The AH-64D was designated as the Longbow, indicative of its longer “stand off” capabilities. Boeing has committed to delivering more than 1,000 Apaches over the next decade. The Apache has also been chosen by several foreign nations and will be built under license by Westland in Great Britain.
Hasegawa has just released a detailed kit of the Apache Longbow in the popular 1/48 scale. The kit is well molded in light gray plastic, with engraved panel lines and fine raised rivets. The cockpit canopy can be displayed open or closed. The rotors and underside machine gun are held in place by vinyl grommets, so they can be installed after painting. Two identical pilot figures are provided to fill the seats if you desire.
The large decal sheet features many of the aircraft’s stencils, as well as the markings for one aircraft. Additional individual numbers are provided so you can change the serial number to just about any specific aircraft. The main tires are pre-flattened and keyed to the landing gear struts for a perfect sit.
Construction of my Apache began with the cockpit interior. To allow for the differences in instruments from the A model (already announced as a future release by Hasegawa), the consoles are molded as separate pieces. The interior parts are well detailed. The only disappointment was the seats, which have lightly engraved upper seat harnesses, but no lap belts, and lack texture on the seat cushions.
Decals are provided for the instruments, but it didn’t make sense to me to apply these mainly black decals over the flat black base coat of the interior. Instead, I dry-brushed the cockpit with medium gray paint to pop out the detail.
Before gluing the fuselage halves together, open all of the holes indicated in the instructions. Take your time gluing the fuselage halves together. The seams are long, and it’s difficult to clean them without destroying nearby detail. Time spent getting a good fit will keep the amount of filling and sanding to a minimum. Don’t forget to put the vinyl grommet in the tail before sealing it.
The stubby wings fit well and have interlocking tabs to make sure they are aligned properly. Install the wings before the sponsons or they won’t fit. The fit of the sponsons and the lower plate is also good. Again, work on getting a good fit so you won’t need filler.
No interior is provided for the wheel wells, and if you look closely you can see the bottom of the cockpit tub through small holes in the gear wells. I left off the main landing gear until final assembly. To make it easier to paint the jet exhausts, I left off the main engine pods until painting and decaling were finished. I added as many of the small details as I dared before moving on to painting.
The main rotor assembly consists of many small parts. I spent a lot of time with my lighted magnifier and tweezers assembling it.
Normally I would use the canopies to mask off the interior for painting, but the Apache is designed to have the canopies displayed in the open position – although the instructions show small modifications can be made to close them. I masked the canopy windows with frisket film, and covered the interior with low-tack masking tape.
I airbrushed the model with Testor Acryl army helo drab (FS 34031). After the paint was dry, I sprayed on a coat of Future floor polish as a base coat for decaling. While the Hasegawa decals are a little thick, I had no problem getting them to snuggle down over the fine detail using Super Set under and Super Sol over the decals. When the decals were dry, I sprayed on a coat of Polly Scale clear flat, and the decal film virtually disappeared.
With painting and decaling done, I began final assembly. The canopy is a very good fit to the fuselage. Adding all of the clear light lenses was a challenge in trimming and handling small parts. I used Future as an adhesive to install them. Two styles of Hellfire missiles are provided, as well as a couple of rocket pods. Clear parts are provided for the Hellfire noses, producing a realistic-looking missile. Painting instructions and decals mark the Hellfires as inert training rounds.
When installing the main rotor, I found that it did not sit square. It is difficult to see exactly where the problem lies, but I suspect that I installed the rotor base (part No. G32) slightly out of alignment despite the positive fit of the parts.
The finished model looks just like the real a thing, a big ugly bug, bristling with antennas and other lumps and bumps. Hasegawa has done a good job producing this kit. I spent about 24 hours building my Apache, a little more than usual, probably due to the large number of small parts. The finished model matches almost exactly the dimensions I found on Boeing’s web site (www.boeing.com). Because of the large number of small parts, it is clearly aimed at the experienced builder. I’m looking forward to building an AH-64A when it comes out.