
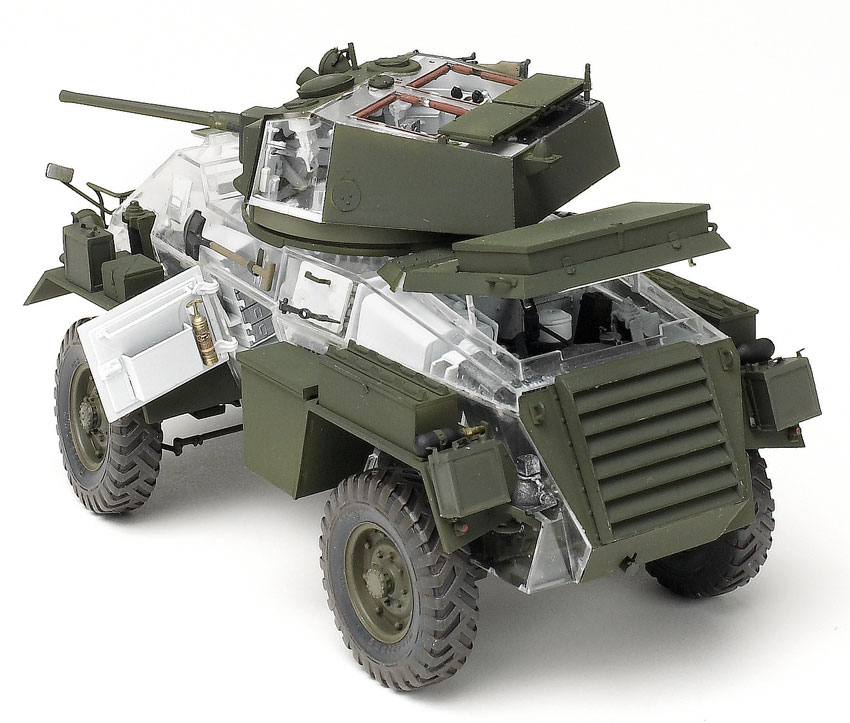
Bronco Models answers the call for more British armor with its release of the Humber Mk. IV, the last of this line of armored cars.
The model is molded in light gray plastic, with a sheet of photoetched metal, a vinyl belt of bullets for the turret machine gun, and clear parts for the lenses and vision blocks. It’s a “special edition” kit featuring clear parts to show off the interior and engine. (Opaque gray styrene parts are provided for the hull and turret, too.)
There is flash to remove from some parts, and the photoetched metal is so soft I ruined several parts just trying to remove them from the fret. You’ll need good tweezers and optical aids to see and assemble the many microscopic parts.
The instruction book is 39 pages with 50 steps and can be a little vague at times, especially when it comes to bending and placing the photoetched metal. Painting diagrams are in color, and colors are called out along the way. Decals provide markings for five vehicles.
Before you begin, you must decide if you are going to build the clear version; it plays a major role in how the vehicle is assembled. The box art will help you visualize the completed clear model.
I assembled the engine and transfer case and left them off until after I had painted the frame. I built the frame, leaving out the floor (Part D15) and interior parts, then added the engine, radiator, drive shafts, and mufflers to the frame. After that, I glued the floor and interior parts.
Decals are included for the gauges; I used a drop of Micro Kristal Klear for glass over the gauges. I painted the shells separately with SnJ brass and glued them to their racks after the rest of the interior was painted.
The tires comprise three parts, with the sidewalls and wheel rim as one piece and the tread as a separate piece. (Mind the direction of the tread.) A bit of filler was needed for a small gap in the sidewalls on each tire. The directions are vague about parts C58 and C59; they should be glued so the wider side is to the top of the suspension. If you are careful with the glue, the front wheels will be steerable.
Multiple panels make up the hull; the roof is glued to the floor. The floor is three separate pieces; if any section is misaligned, the separate hull panels will not line up properly. Otherwise, parts fit was good.
I used Testors clear parts cement for the clear plastic as well as any parts being glued to the outer walls of the clear hull, and super glue to join clear edges to painted sections. Several large parts were left off the walls to allow a better view of the interior. The directions call for opening holes in the hull and fenders, but many of these holes accept square pins; I cut off the pins and just glued the parts down. The clear parts are brittle, so use a sharp drill bit to avoid spider-web cracks around the holes. I left many of the smaller parts off the outer hull until it was completely assembled to prevent breakage.
No matter how hard I tried, I could not get the rear grille (Part D11) to mate properly with the rear hull plate (Part G3).
The color guide indicates Mr. Hobby, Hobby Color, Humbrol, and Tamiya paints. I chose Tamiya white (XF-2) for the interior, and Tamiya olive (XF-58) for the exterior. Smaller details are painted with Humbrol colors. The decals went down well with no silvering. Building the clear version, I did only minimal weathering and dry-brushing.
This model took 55 hours, due to the high parts count and strategic, in-progress painting — two reasons why I recommend it only for experienced modelers. Bronco’s kit captures the distinctive Humber, and the see-through option makes it an interesting model.


