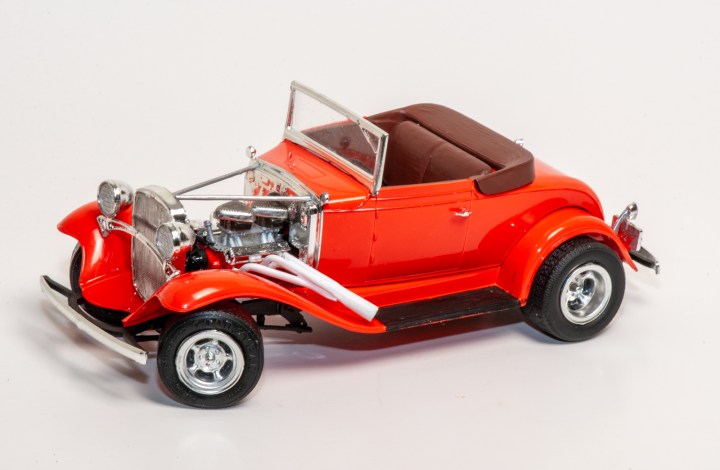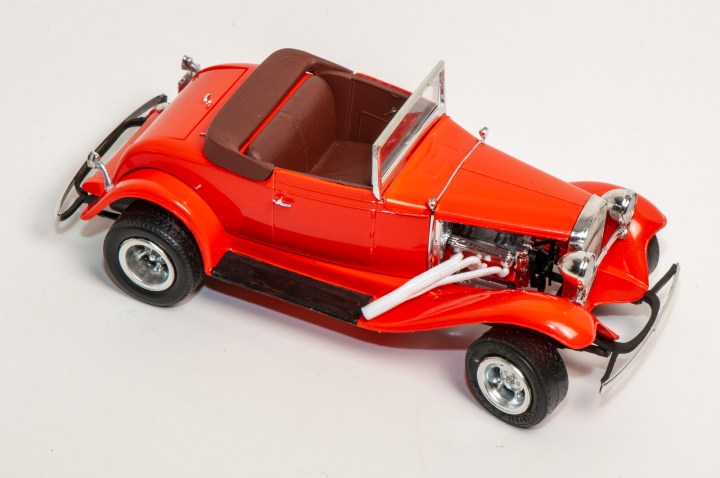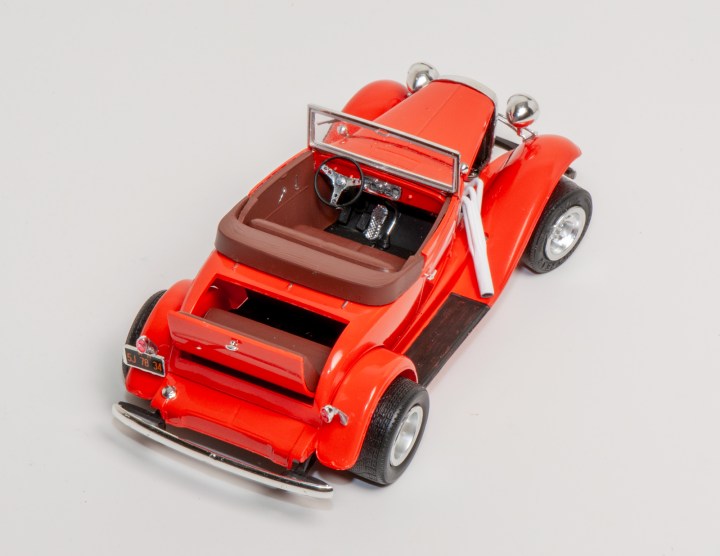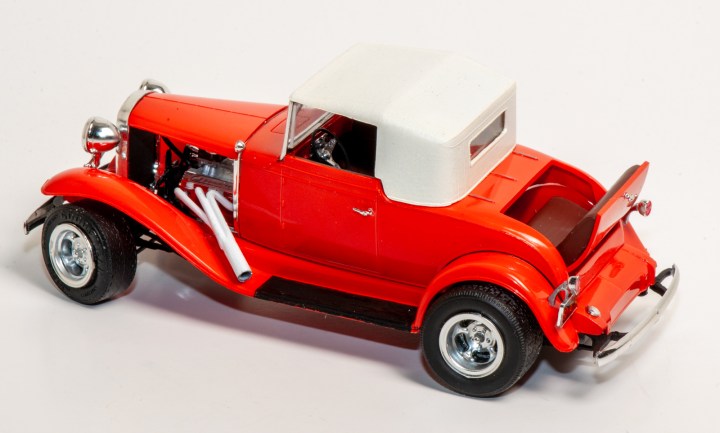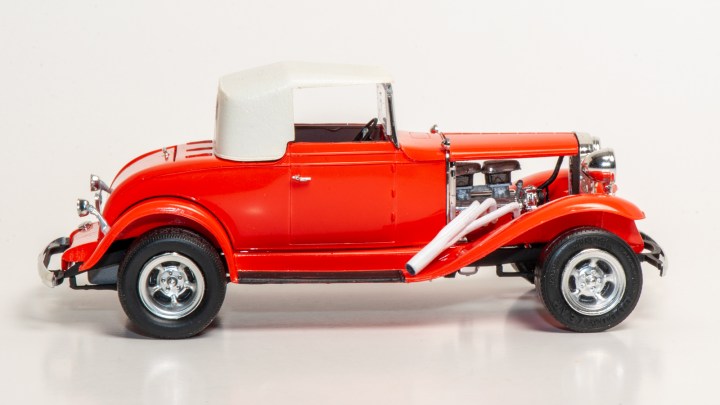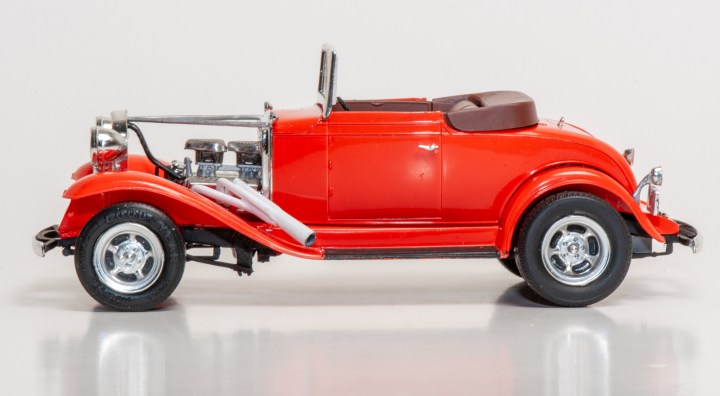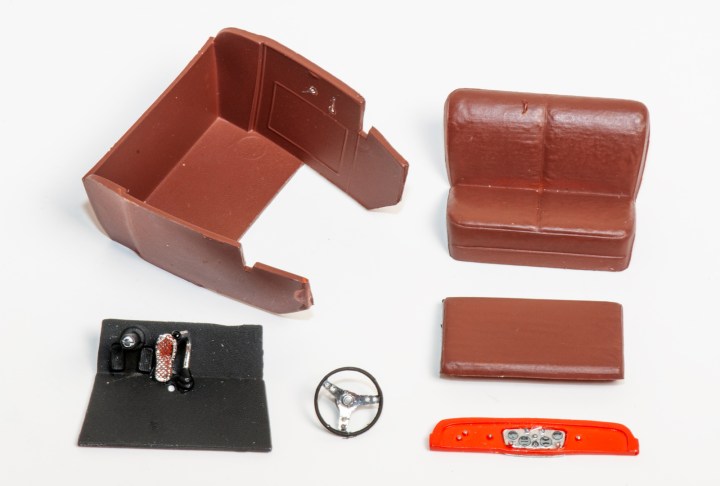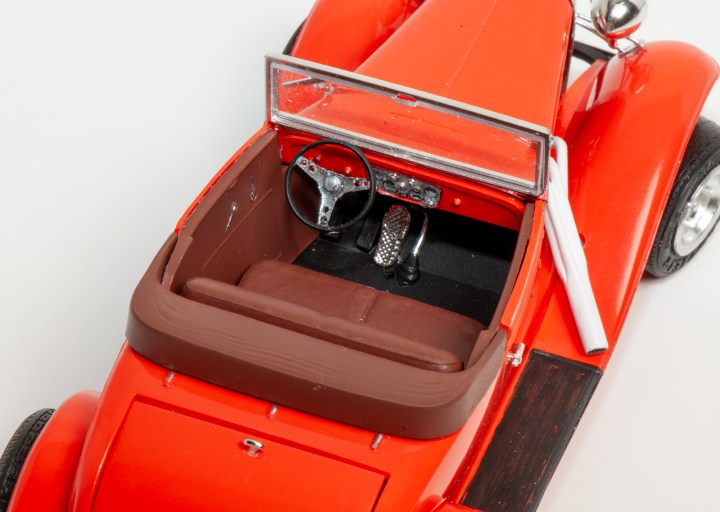
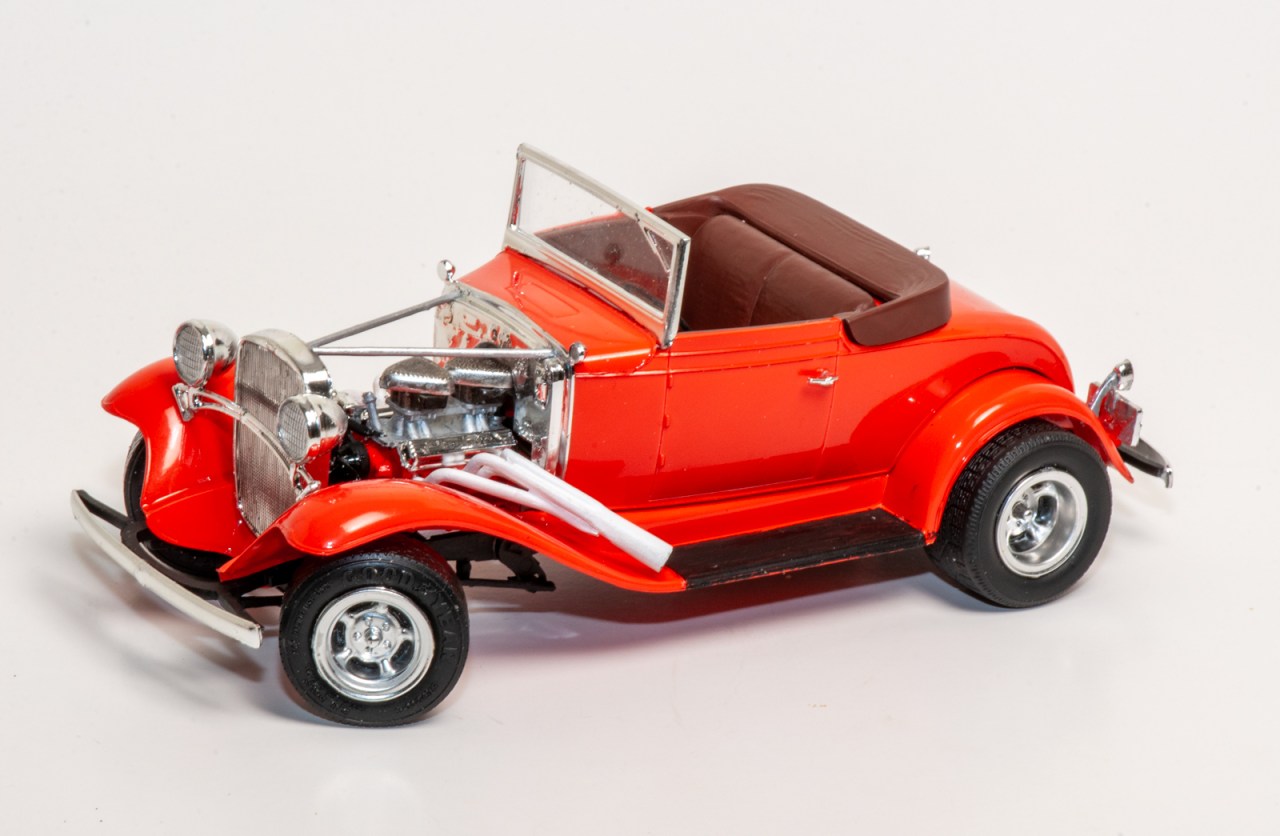
The new MPC 1/25 scale ‘32 Chevrolet Roadster Street Rod plastic model kit has a long history. One of the first kits produced by MPC, it debuted as a “Gangbuster” kit in 1965. It included both a cabriolet (convertible) and non-factory panel truck body. While called a roadster, the kit actually replicated the cabriolet body with its fixed windshield frame, higher belt line, and doors with roll-up windows.
The kit has been reissued over the years with MPC and, later, AMT/Ertl adding or subtracting parts for gasser, Connoisseur Classics, and Blue Ribbon Rod boxings. The last time it saw daylight was 1986.
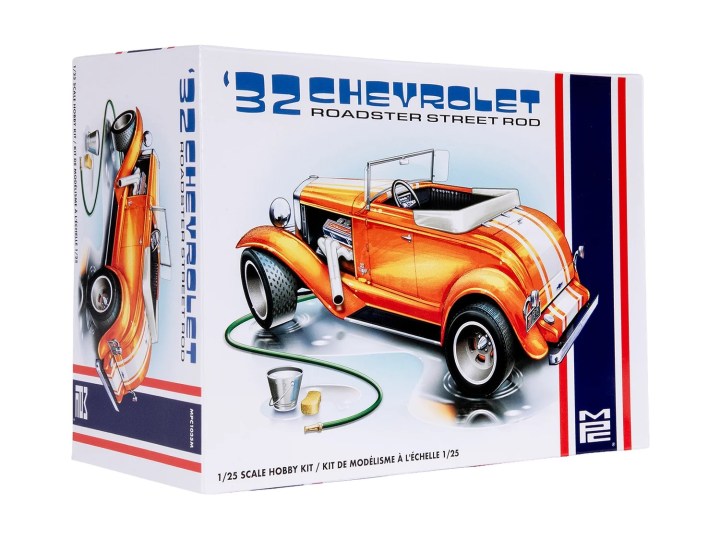
Six decades after its first appearance, Round 2 has reissued a kit that closely repeats the 1977 Blue Ribbon Rod (other than the omission of that button tufted seating) 49 years later. To return this kit to the market was a major undertaking by Round 2, including efforts to eliminate flash typical in decades-old tooling (I found none on my sample), and new tooling for some of the chrome-plated and clear parts. A decal sheet includes large racing stripes and instrument panel gauge decals. To top it off, Round 2 commissioned artist Jeff Allison to create appealing new box packaging.
The original 1965 kit was not an easy build, and since this kit is based on it, many of the same issues remain. When assembling this kit, you must to check the mating surface fits of each part before gluing it in place. Many of the locator holes will need to be enlarged to fit the locating tabs on the mating surfaces. You’ll also find plenty of ejector-pin marks to address. You’ll find drills and files are your friends while building this kit. My review sample’s chrome parts had excessively thick plating that further complicated assembly challenges, but after examining another kit, I saw the issue had been resolved.
Like with prior reissues of this kit, the part numbers on the instruction sheet often do not match the numbers on the parts trees. You will have to visually match each part to the illustration on the instructions. I found no mold lines on the body parts, but my sample showed irregularities on the surfaces of the passenger-side front fender near the running boards and on the cover for the rumble seat. A few quick swipes of a file and sandpaper will mostly address these flaws, but a contest-grade model will need additional work.
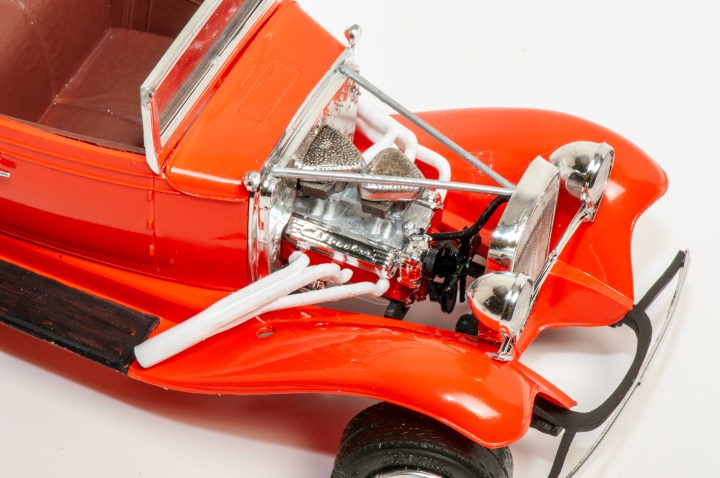
The most challenging parts of the kit include fitting the wheel, inner rim, and retainer fit; aligning and affixing the grille and radiator assembly; and completing the front suspension. The front suspension offers the capability for posable steering, including a working drag link and pitman arm. Plan to set aside the time to remove mold lines and finesse the fits of the over-the-fender headers as these parts are front and center on the finished model. I omitted the muffler pipes as they did not meet the headers in a realistic place (make sure to fill the fender holes if you do the same). Also, omit the stock exhaust pipe shown in the instructions; it is intended for the factory-stock version, not a hot rod.
If you plan to use the racing stripes, I recommend you remove the hinge engraved on the hood top along with the three engraved trim pieces on the tulip panel (ahead of the rumble seat) so the decals lay flat. Cut off the outside mounting pins on the headlight cross bar and glue on the fenders by sight, otherwise your headlight assembly will end up crooked. Save the windshield frame installation until last; do not glue it to the dashboard first as shown in the instructions.
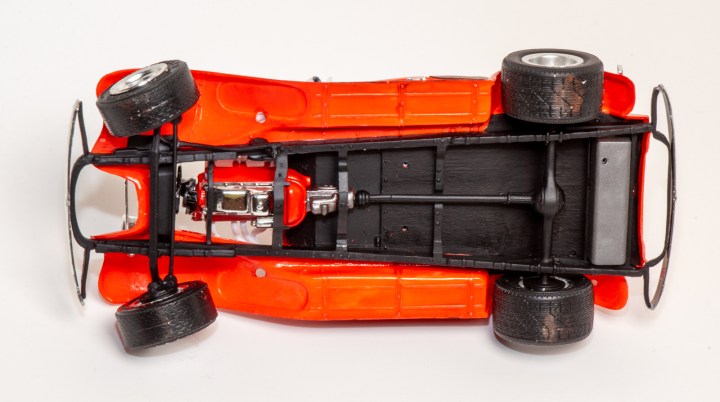
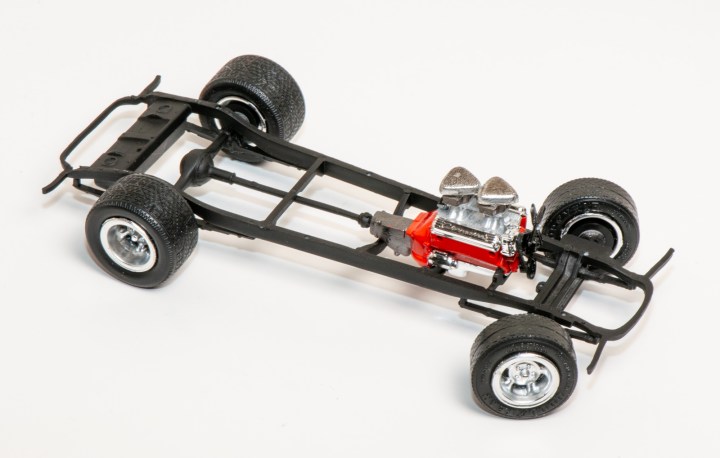
Unfortunately, the chassis does not include street rod style updates for the original factory-stock Chevy design. The 1932 differential and torque tube in the kit would never handle the torque of that Chevy V8. The unrealistically high ride height in front and the too-wide tires were already out of date even when the Blue-Ribbon Rod version was first introduced, saying nothing of today.
On the plus side, the body itself is exquisitely rendered, with separate, tiny, plated parts for door handles, lighting, and other body accessories. The overall body proportions are excellent. The thick chrome on the plated parts in my sample did obscure some of the fine engraving.
This kit offers potential for kitbashers. Round 2 opened virtually all the sprue gates for this release, resulting in nearly all of the factory-stock parts returning (even the side mount spares), as well as three other engine options and miscellaneous features like a roll bar and the bucket seats and floorboard from the original panel delivery body. These parts might be useful in your other projects. As for updating the appearance of the Chevy cabriolet to modern hot-rod tastes, I suspect that the front and rear suspensions, engines, wheels, and tires from Revell’s most recent 1929 Model A and 1932 Ford hot rod roadster kits might be swapped into place without much effort.
Although you’ll find fit issues and a lack of updates for the 1932-era chassis, the overall detail for the MPC 1/25 scale ’32 Chevrolet Roadster Street Rod plastic model kit far exceeds many of the competing 1960s kits, and it remains one of the few pre-World War II Chevy kits offered in 1/25 scale. The completed version, while not correct for a street rod, possesses a certain visual charm. While the highly appealing new box art will attract many hobbyists, the skills required to assemble it take it to a level meant for advanced builders. Round 2 went to considerable effort to restore vintage tooling for a kit that hasn’t been seen for decades. If you like the subject and are up for the challenges, I say give it a go.