
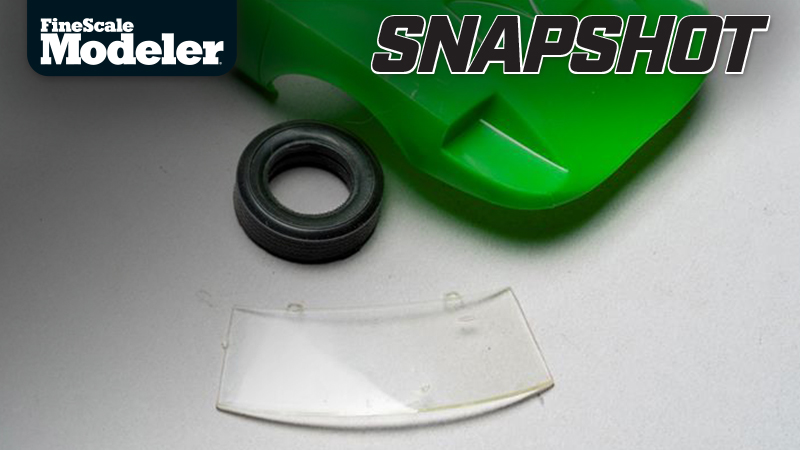
Don’t you just hate it when you open a kit and find that the tires have been eating away at your clear parts? Luckily, most of the time, you can salvage the part. A piece of clear sheet plastic is a viable option in some cases, but in others, there’s a better choice.
Trying to replace the windshield of a rare IMC Avenger GT-12 with plastic sheet would not yield the best fit. The thin part fits flush and has two mounting tabs molded into it. Rather than replacing it or using similar parts, you can fix it instead.

You’ll need wet or dry sandpaper in 400, 600, 1000, 1500, and 2000 grits; a set of polishing cloths or pads from 3200, 3600, 4000, 6000, 8000, and 12000 sheets; and polishing compound and a soft cloth to apply it. For the polishing compound, any brand will work; Meguiar’s, Tamiya, and Novus are excellent polishes that I regularly use.

Start with the deepest and sand the defect smooth with 400-grit sandpaper. Only sand the area around the repair, not the whole part. It might be tempting to use a coarser grit to get to the bottom of the depression quicker, but anything more than 400 will create scratches that will take longer to remove in subsequent steps.

Move on to 600-grit sandpaper, sanding the area you’ve previously worked. Notice the sanded area has been expanded somewhat. Since the grits used are so mild, don’t be afraid of over-sanding, especially as the grits become finer. Use each grit until it removes all the scratches from the previous one.

Progress through the rest of your sandpaper, up to 2000 grit, and the damage should be gone. The plastic is uniformly hazy but not yet clear. If there are moderate or large scratches visible, go back to a coarser grit and eliminate them with another round of sanding. You could go directly to polishing compounds at this point, but I recommend continuing with polishing cloths first.

After working through the polishing cloths up to 12000 grit, it’s time to apply a polishing compound, as directed, with a soft cloth. The imperfections that can be seen now are on the other side. In addition to the tire damage, there are some scratches up by the mounting tabs on the top edge. Now, it’s time to flip it over and perform the same process to fix the marks on the other side.

This is the inside of the windshield after wet-sanding the tire imprint with 400 grit (bottom arrow), I switched to 600-grit sandpaper to erase it entirely. Then, I switched to 1000-grit sandpaper to refine the 600-grit work and also began correcting the fine scratches near the tabs (top arrows). No need to go after those fine marks with a larger grit and cause more work or potentially more damage.

I treated the entire inside face of the windshield with 1500-grit sandpaper until it had an even sheen. I made sure there were no shiny depressions and no significant, deep scratches that stood out. Once satisfied, it was time to move on to 2000-grit sandpaper and then the finer polishing cloths.

At this point, the part has been sanded thoroughly and treated with polishing compound. There is a black speck I suspect was introduced during molding that I’m willing to live with — a stone kicked up from a truck that nicked the windshield, let’s say.

Here, I’ve taped the windshield in place using the mounting tabs to test-fit it inside the car body. You can use this process on any clear part, whether it’s for a scale model car, airplane, helicopter, or starfighter. Just take your time and make sure to thoroughly eliminate the scratches caused by the previous sanding before moving on to the next higher grit.
