
Now we’re talking! I sprayed the modified custom part Tamiya Metallic Gray (No. LP-61) and brush-painted the ribbed sections flat black. The Camaro grille received a coat of flat black before I hand-painted the egg-crate insert metallic gray. Finally, the surrounds on both parts were brushed Sparkling Silver (No. LP-48). The headlights were painted with the same three colors.
For rollers and rubber, I again went to my spares box and dug out BMW wheels and a set of Tamiya tires that fit them well. The kit’s wheel backs fit snugly inside the rims, and I was able to press them onto the metal axles. I thought they looked cool under Tamiya Gloss White (No. LP-2).
After sanding the Camaro grille, I removed the center of the custom grille with a knife and a PE saw. I separated the Camaro grille from the headlights and sanded the outer edges to match the shape of the custom grille opening. Lastly, the bumper was cut off the stock grille.
The kit interior has two rows of bench seats with the front one molded in. I made a new rear floor from styrene sheet to represent the rear seat folded down. I removed material to smooth the sides along rear windows and a couple of bosses that interfered with the new floor.
Wanting more than the stock (top) or generic and somewhat dated custom (middle) grilles in the kit, I found a leftover Revell ‘69 Camaro RS grille (bottom) insert in my spares. It looked like it could be combined with the custom part to make a more brand-specific full bumper.
After clear coating with Valspar AC2100 urethane, I masked and airbrushed the window trim Tamiya Metallic Gray. The rockers were also painted the same color to continue the theme and create the illusion of a longer body.
Final Thoughts
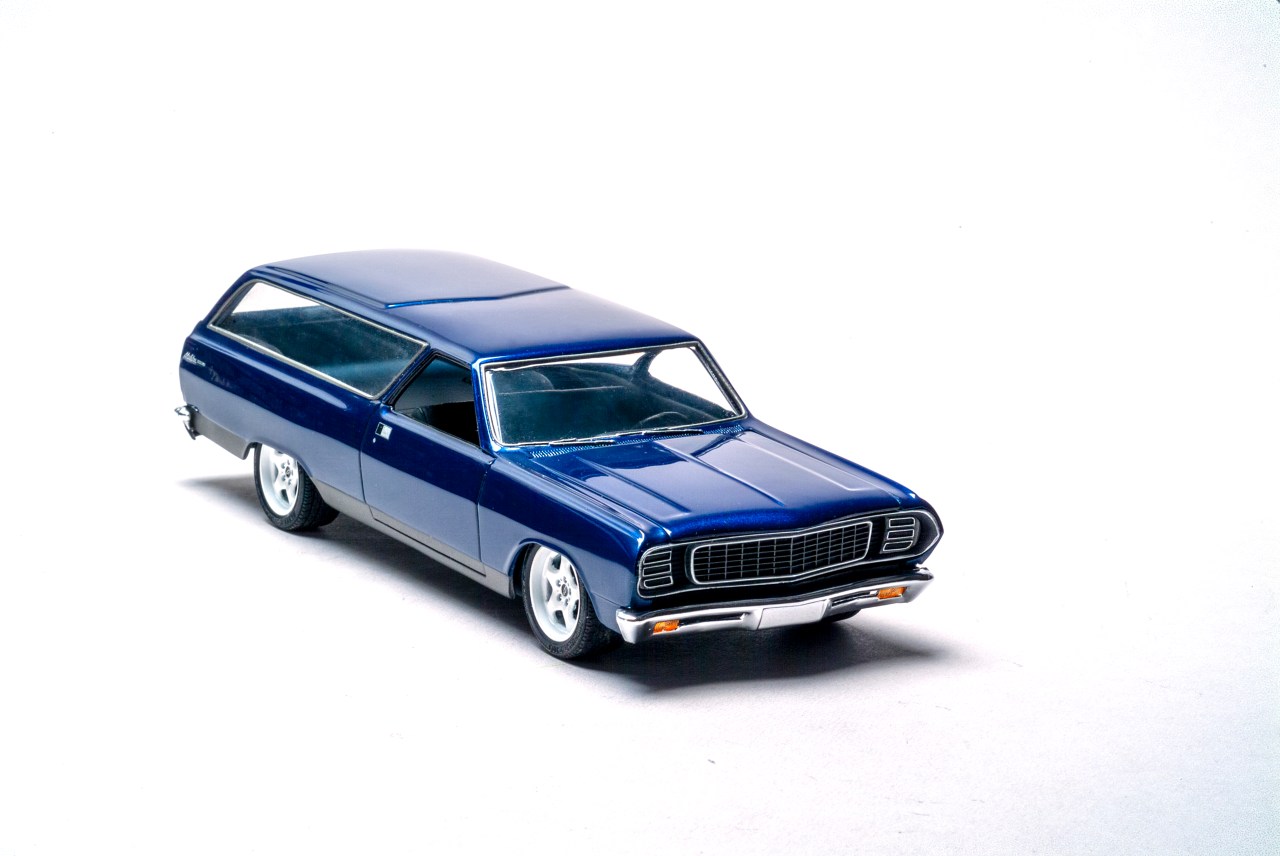
I’m happy with the way this long-roof conversion turned out. The AMT 1/25 scale ’65 Chevelle surf wagon’s pedigree is an older kit with some issues that I chose not to fix. But that wasn’t the point. Rather than perfection, I was looking for proof of concept. With this successful dry run out of the way, I (and you) can use the same processes on a more-recent ‘66 Chevelle wagon kit.
After I was happy with the fit of the side window, I cut a second one using the first as the template. The rear window and windshield were cut from the kit part with a PE saw, and I removed the wind wings from the windshield because I’d removed the frames earlier.
The interior came together using the kit parts, including the rear inner tailgate panel that is not shown in the instructions. Had I noticed that part earlier, I would not have removed the mounting bosses inside the body. The colors on the dash are the same as those used on the grille.
I primed and painted the body Tamiya Racing Blue (No. TS-51). I placed masking tape over the window opening, traced the trim with a fine Sharpie, and then transferred the tape to thin, clear plastic. I cut the template and window out with scissors.
I re-scribed the panel lines around the new widow frames once more after the solvent glue had cured for 24 hours. Then I primed the body.
Using the same tools, I notched the roof and door areas where the old C-pillar would become the new B-pillar and removed the drip rail that formerly ran between the two.
I glued the former C-pillar in it’s new position. Cut styrene strips filled the gaps after the glue dried. The section removed from the front door sill filled the bottom C-pillar notch while styrene sheet did the job on the roof. Micro chisels cut the rabbet into the B-pillar’s leading edge.
I cut the B and C pillars out of the driver’s side with a photo-etched metal (PE) saw and the back of a hobby blade for horizontal slices. Goodbye wind wing. The pencil marks show where the longer door will end and where to install the former C-pillar as the new B-pillar.
Long roofs? I’m a fan. Like many things in life, my appreciation for wagons probably started with the cars I grew up around. I drove a wagon for my first driver’s license test, and even my first car was a wagon. In fact, I’ve owned three real wagons, and I’m especially partial to two-door styles.
Chevrolet produced a two-door 1965 Chevelle wagon, and there’s nothing wrong with the design. Far from it, with nice form and balance, good lines — everything a car should have. Here’s the thing: I thought it would be cool to have really long, single-piece side windows to accentuate the look. And the idea wouldn’t leave me alone.
Without knowing if it would look as good as it did in my imagination, I picked up an AMT 1/25 scale ’65 Chevelle surf wagon (No. AMT1131/12) as a place to start and got busy turning my idea into a model. Would I love it or hate it? The only way to know was building a proof of concept. With that in mind, I kept it simple regarding the interior, engine, and chassis detailing.
Here’s the body of the 1965 Chevelle Malibu surf wagon. The C-pillar will have to go, and the B-pillar, well, it’ll never be the same. The the higher contour beneath the main rear side window will need to be relocated behind the front side window.
While I cut the upper section to fit prior to installation, I found it easier to install a long piece and trim to fit after most of it was cemented in place. The tape helped hold the strip while the cement around bottom curve dried for about 20 minutes before I tacked down the last section.
After the window frames were replaced, I applied a bead of superglue along the inside for added strength. You can see I’ve eliminated one of the mounting posts inside the tailgate with a rotary tool. I’ll eliminate the other, too.
I built up the drip rails for the front side windows with .020- x .035-inch styrene strip and Tamiya Extra Thin Cement and reinforced them with superglue. In back, .018- x .045-inch styrene strip replaced the removed side window trim. I let the strip stand proud of the body for a nice edge.
Pre-cut .018- x .045-inch styrene strip connected the bottom of the side window from the B-pillar to what used to be the new C-pillar. A second strip inside the body filled the missing thickness. Styrene sheet filled gaps where the old C-pillar used to be. Superglue filled old door lines.
While working on the passenger side, I realized the rear window opening and trim height were not symmetrical with the driver side. To fix this, I removed the rear window frames from both sides of the car by scribing around them with the back of a hobby knife.