
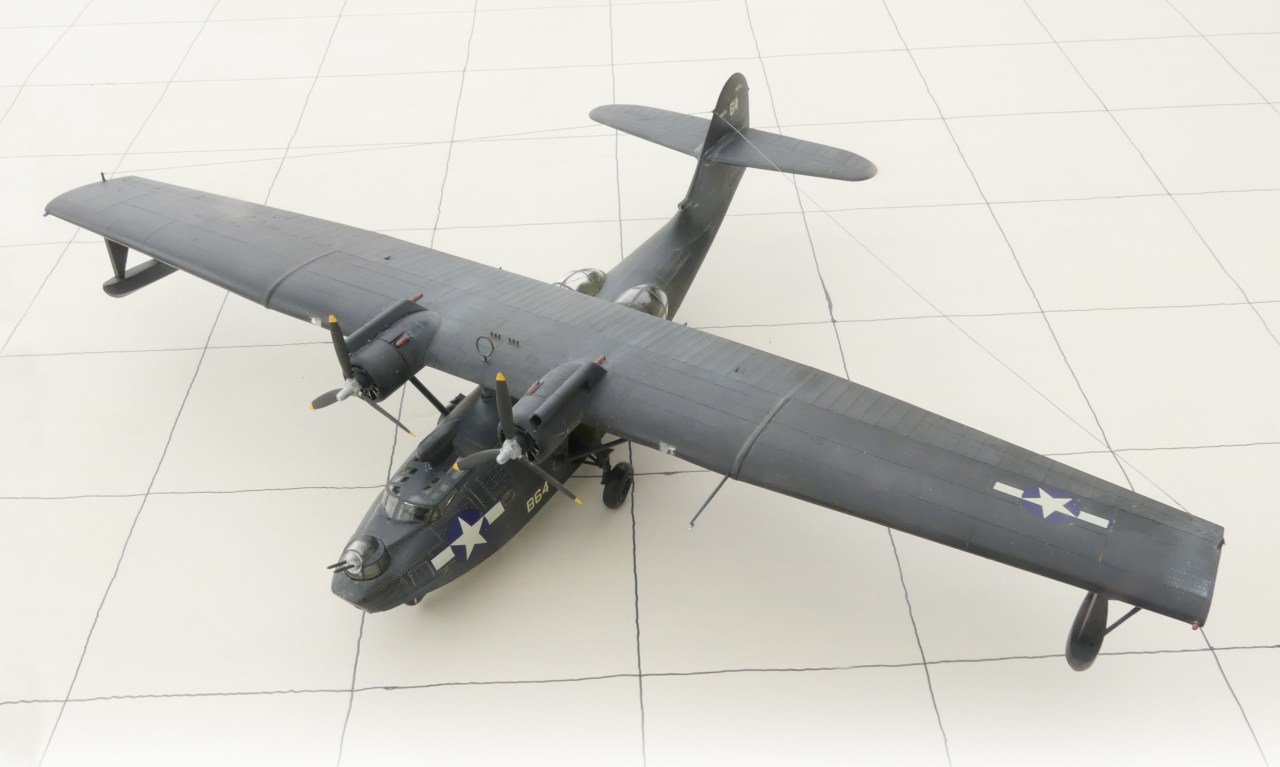
After sealing the decals with a light coat of PFG thinned 1:1 with distilled water, I airbrushed an overall coat of Model Master Flat Clear acrylic (No. 4636). Worried it looked too flat, I polished with toothpaste again, then applied dots of titanium white, Indian yellow, and cadmium red light artist oils a section at a time.
The kit decals went down without difficulty, except for the large national insignia on the nose where compound curves caused wrinkles. When repeated applications of Microscale Micro Sol didn’t cure the problems, I sliced the wrinkles with the tip of a hobby knife blade and applied Micro Sol. A touch of insignia blue paint covered the scars.
Next, I airbrushed the model with Pledge Floor Gloss (PFG) to provide a smooth, receptive surface for decaling.
Final Thoughts
I installed the landing gear, wingtip floats, bombs, and cockpit canopy, and added the clear plastic stand at the rear. I rigged the antenna wire using .003-inch dark gray sewing thread rubbed across beeswax to keep down fuzzies and anchored with superglue. Now my not-quite black Catalina was ready for a night interdiction mission.
The final weathering step was applying exhaust stains aft of the engines with medium dark gray soft artist’s pastel. I smoothed the stains with my fingertip and an artist’s paper stub. Any excess can be removed from unwanted locations with a cotton tipped swab dampened with a little water. Finally, I sealed everything with a light coat of flat clear.
I drew these dots down the fuselage and along the wings and tail surfaces with mineral spirits on a small flat brush, leaving thin streaks of color on the painted surface. They also settle into panel lines and recessed rivets. The overall effect is to make the upper surfaces look eroded, weathered, and stained by salt air and sand.
To prepare for decal application, I polished the painted surfaces with a damp, soft, cotton cloth and toothpaste. This also really brought out the molded rivets.
After filling and smoothing seams — despite its age this kit didn’t need much work — I masked the turret, windows, landing lights, and blisters in preparation for painting. I also masked the cockpit canopy but left that part off until final assembly. I airbrushed the exposed framing with Model Master Interior Green (No. 1715).
The parts are molded in smooth, black plastic, but the fabric-covered aft portions of the wings and all the control surfaces are molded with a fine woven-cloth like texture.
The Consolidated PBY Catalina flew low and slow, but it proved to be one of the most important aircraft in the Allied arsenal in World War II. With a range of more than 2,500 miles and endurance of more than 21 hours, the aircraft proved itself in reconnaissance and search-and-rescue work. Add a payload capacity of 4,000 pounds of bombs, depth charges, or torpedoes, and, with the -5A amphibian version, the ability to operate from both land and water, it was supremely versatile.
Black Cat PBY squadrons were created to interdict Japanese shipping used to reinforce and resupply their troops in the Pacific theater. Flying from island bases, the Black Cats ranged far over the sea, operating at night to intercept Japanese ships and barges transporting men and materiel among the islands. They were successful, sinking or seriously damaging more than 30,000 tons of Japanese merchant shipping.
I built the 1955-vintage Monogram kit when I was a boy. When I saw Academy’s 1/72 scale of the Black Cat PBY-5A (No. 2137), I grabbed it. The kit is fairly accurate and a straightforward build that produces a nice replica. I accurized the simplified framing on the waist gun blisters.
The instructions show the kit being built in a series of subassemblies, including all the fine details. I thought this was a recipe for disaster because little exterior parts tend to get damaged or snapped off during assembly and painting. So, I built the subassemblies pretty much in the order shown in the instructions but left off fine details until after overall painting of the airframe.
Note: This model needs a lot of weight to stand on its nose wheel. Because of the space taken up by the cockpit and nose landing gear bay assemblies, there’s almost no room for adding weights to the nose. Instead, I enclosed a space immediately aft of the cockpit with styrene sheet and poured in 30 grams of lead birdshot secured with white glue. That turned out to be too little — you’ve been warned — so in the end I made a tail prop from clear sprue.
A large, all flat black model may be impressive but not too interesting, so I planned to weather it for added drama. Upper surfaces on the real airplanes were faded by the intense, South Pacific sunlight more so than the undersides. Salty sea air eroded the finishes even more, and dust from the sandy soil of the islands got into everything.
With the tape removed, the contrast between the “faded” metal upper surfaces and the fabric sections is apparent. The difference is even more obvious underneath where the metal surfaces are full-strength black.
I masked the control surfaces and the aft sections of the wings and airbrushed the undersides with straight flat black. Without removing the masks, I sprayed the upper surfaces with a mix of 7 parts flat black and 1 part flat white.
To differentiate the fabric-covered portions of the plane, I mixed 4 parts Rust-Oleum Flat Black enamel (No. 7776) and 1 part Flat White (No. 7790). I applied this dark gray with an airbrush and sprayed all the seams to check them.


