
Kit: No. 1694
Scale: 1/32
Manufacturer: Hobbycraft Canada, 905-738-6556, www.hobbycraft.com
Price: $19.98
Comments: Injection-molded, 50 parts, decals
Pros: All new, well-molded, good detail, nifty interior-surface treatment, good decals
Cons: Modeler must modify fuselage to align lower wing, undersize instruments, inadequate engine mount
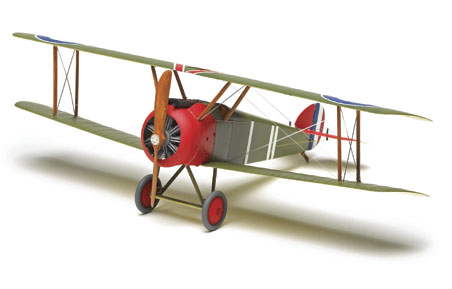
The Sopwith Camel is one of the most famous Allied fighters of World War I and brought down more enemy aircraft than any other aircraft type.
The good news is Hobbycraft Canada’s kit is all new, not a reissue of its previous 1/32 scale Camel with its oversized struts. The bad news is the new kit has a crucial fit problem with the lower wing to the fuselage. The good news is Hobbycraft tells you about it ahead of time in the instructions. The bad news is you have to fix it yourself.
The kit’s 50 parts are well-molded in light gray plastic with good detail. Control surfaces are nearly separated, and thus, easily positionable. The six-page instruction manual contains rigging diagrams, but some of the parts placements are vague. Well-printed decals provide markings for Capt. Roy Brown’s famous Camel and four variations of Maj. W.G. Barker’s aircraft. A separate decal sheet has woodgrained decals for the fuselage interior sides and instrument panel (with undersized instruments), and wicker decals for the seat. These worked satisfactorily.
In step 2, you’re directed to shave .045″ (1.16mm) from the edge of the cutout in the bottom of the fuselage where the onepiece lower wing goes. Good luck measuring. That doesn’t seem like much, but if it isn’t corrected, the problem cascades, and the struts and upper wing will not come close to proper alignment.
A byproduct of the fuselage correction is that the forward bottom piece (part No. B11) won’t sit flush with the fuselage portion of the lower wing. This can be solved by adding B11 to the firewall (A1) after the wing is glued to the fuselage.
The four-part Clerget engine is impressive, but its anchor to the firewall is flimsy. The Vickers guns are also nicely done. Hobbycraft did not include the clear inspection panels for the wing leading edges or the strut-mounted generator.
With a little effort the detailed cockpit interior was made to fit within the fuselage halves. The one-piece wings and stabilizers have good rib detail and are acceptably thin for the scale.
I painted the model with Polly Scale acrylic brown drab on the upper surfaces and French beige for the lower surfaces. The decals went down fine with a touch of Solvaset.
I made a jig to hold the assemblies together when adding struts and rigging. With the lower-wing/fuselage correction done, I added the interplane struts first, then brought in the cabane struts with the upper wing in place. I used monofilament and wire for the rigging and control wires. Hobbycraft’s rigging diagrams are helpful.
The model is basically accurate in dimension and contour when properly assembled. I spent about 45 hours on it because of fit problems and all the rigging. After building Hobbycraft’s excellent SPAD XIII, this kit was a disappointment. It should be attempted by experienced modelers.
– Dr. Bill Funcke