
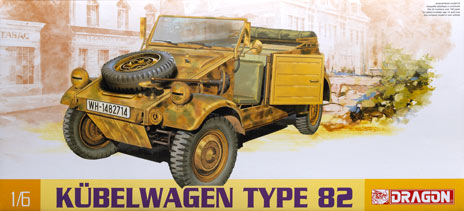
Kit: No. MV03
Scale: 1/24
Manufacturer: Hasegawa, imported by Dragon Models USA, 626-968- 0322, www.dragonmodelsusa.com
Price: $29.98
Comments: Injection-molded, 186 parts (9 vinyl), decals
Pros: 1/24 scale, personal equipment, choice of top position, driver figure, positionable doors and storage-trunk lid, complete engine
Cons: Soft detail, poor figure molding, ejector-pin marks in visible areas, some part locations vague

The Type 82 Volkswagen, better known as the Kübelwagen, was the German counterpart to America’s Jeep during World War II. It was a much-loved small transport used by all the military branches. Nimble and reliable, it was modified for a wide range of roles including radio car, ambulance, and mechanic’s service vehicle.
Hasegawa’s 1/24 scale Kübelwagen is molded in 186 parts. The molding of the tan plastic parts is crisp with little flash, although surface detail is a little soft for this scale. Taking a cue from its car-kit line, Hasegawa molded the tires in soft vinyl for a “real rubber” feel. Extras include personal equipment, jerry cans, small weapons, two tops (up and down), a driver figure, and a complete engine.
The two-page, 22-step instruction book is illustrated with part numbers and names. Also included are painting and marking diagrams for a standard army machine and for artillery and panzer units with multicolored camouflage patterns.
Decals for three units are supplied. These are thin, in-register, and their colors appear accurate.
In the instructions, part locations are vaguely illustrated in a couple of places. In step 12, the windshield clamps (parts No. K9) should be attached with the rounded side facing toward the front. Also, in step 17, the location of the windshield frame (A3) to the body is not clear. The frame should be mounted with its bottom edge flat against the body and its hinge arms straddling the vehicle.
The kit’s construction is straightforward. The parts are well-engineered so all the major assemblies fit together seamlessly, no need for filling and sanding. Unfortunately, a number of ejector-pin marks are visible.
To make painting easier, I deviated from the instructions slightly by building subassemblies. Beginning in step 9, I joined all the body-related parts, choosing to leave the body separate from the chassis and interior parts until after painting was completed. I painted the model with Vallejo and Tamiya acrylics.
I decaled the kit using the standard army markings. The decals went down nicely and needed just a light application of Microscale Micro Sol solution to help them conform to the surface details. Before weathering the model with oils and powdered pigments, I sealed the surface with a 50/50 mixture of Polly Scale clear flat and clear gloss.
I placed several of the small weapons on the seats and left out the driver figure. I spent 22 hours building and painting my “Kübel,” and it scales well against the data in Schiffer Publishing’s VW At War.
It was a fun, easy build that both beginners and the experienced enthusiasts will enjoy.
– Phil Kirchmeier