
Kit: No. 045
Scale: 1/72
Manufacturer: Planet Models, available from Squadron Mail Order, 1115 Crowley Dr., Carrollton, TX 75011-5010, phone 972-242-8663
Price: $36.96
Comments: Cast resin, 30 parts (1 vacuum-formed canopy), decals.

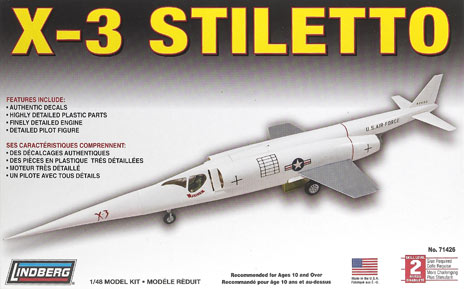
If ever an aircraft looked as though it was going a mile a minute while standing still, it was the X-3 Stiletto. Designed to explore double-sonic speeds, the X-3 fizzled when it turned out that its puny engines could push the craft past Mach 1 only in a dive. But that shape – tiny stainless-steel wings on a preposterously pointy white fuselage – ooh baby!
This is the first in Planet Models’ line to divert from the incredible World War II German “paper projects” – aircraft that never got past the design stage. Molded in ochre-colored resin, the X-3 kit features recessed detail on the outside, with a good cockpit. The instructions provide two basic exploded-view drawings, a color and markings diagram, and a brief history. Propagteam decals provide most of the markings, but oddly give only black borders to what should be a yellow NACA (National Advisory Committee for Aeronautics) badge on the fin.
Air bubbles marred the landing-gear struts, wheels, and afterburners. The fuselage halves are well cast but have a hint of a twist in the nose. Thick resin tabs are molded to the tip of the nose and tail and must be removed carefully. I cut away much of the material with a razor saw, then sanded the remainder flush. You must drill a hole in the nose to mount the test-instrument probe (not provided).
My sample had rough edges on the main gear well openings; I cleaned them with files and sanding sticks. Planet’s representation of the main gear doors is incorrect. They provide single large doors that mount to the tops of the bay openings. Photos in Aerophile Vol. 1, No. 1, and Famous Aircraft of the World, X-Planes, show the doors mounted at the bottoms of the openings with another small door at the top front of each bay.
Another problem was the afterburners. The instructions direct you to fasten them to the rear of the engine fairings, but photos show that the ‘burners were inside the fairings. I thought, “No problem, just drill a series of holes, punch through the back of the fairings, and squeeze the ‘burners in there, right?” Well, no – the back end of the fuselage is solid resin. I decided to leave off the burners and paint black circles to represent the exhausts.
Only one vacuum-formed canopy is provided, so you must be careful cutting the excess plastic from the part. Instead of trying to fit the two flat panels, I cut away the resin bridge separating the window openings. Then I shaped the bottom edges of the canopy and used its top to replace the bridge.
Assembly is typical of resin kits. I used super glue to join the parts. Some shaping with sanding sticks was necessary to improve the fit of the major components. I painted the wings with SnJ Spray Metal and used Model Master gloss white for everything else. Bare-Metal Foil makes up the natural-metal areas around the jet pipes.
My sample’s Propagteam decals resisted positioning even though I plopped them into puddles of water on the model. They sank to the surface and wouldn’t budge. I applied one of the “U.S. Air Force” legends cockeyed, and it tore apart when I tried to straighten it out. I replaced both legends with SuperScale items. I left off the incomplete NACA band, and the serial number for the fin was not provided.
After about 18 hours, my X-3 was complete; that’s longer than usual for a kit with so few parts, but refining the fit and modifying the gear doors accounted for most of the extra effort. I’ll fish through my spare decal barrel and come up with appropriate NACA logos and serials later. The finished model looks OK, but the shallow intakes and misrepresented exhausts dull the edges of this Stiletto.
– Paul Boyer