
Last year, Wingnut Wings burst onto the scene with four excellent, lavishly packaged 1/32 scale World War I aircraft kits. Anticipation of more products has been tinged with speculation as to whether Wingnut could continue to meet the same high standards – and it has. With its four new kits – two Pups and a pair of Albatros – Wingnut has proved itself the master of large-scale WWI model airplanes.
As in Wingnut’s previous releases, the Albatros D.V kit contains a 20-page glossy full-color modeling guide, including many color and archival photos to help with your build. Decals are included for five schemes; given the longevity and popularity of the D.V, additional aftermarket markings can’t be far behind. Optional parts include different engines, radiators, and propellers. The sprues even have molded-in identifiers for the engine and propeller versions. Perhaps as a response to the only consistent criticism leveled at Wingnut, photetched metal was used for the cooling jackets on the twin Spandau machine guns.
The molding is as impressive as ever, even including numerous drain holes in the lower fuselage. Cockpit detail relies almost exclusively on plastic parts (with the exception of photoetched-metal seat belts) and looks complicated, but it assembles easily. Do make sure all mating parts are free of paint buildup; molding tolerances are so tight that excess paint will impede fit. (I pre-painted all parts and assembled them after trial fitting and scraping.) Wingnut suggests assembling the entire engine bay and inserting it as a unit, but I just added the formers and engine mounts before closing up the fuselage, thus avoiding the difficulty of masking an installed engine.
Construction was quick once the fuselage interior was assembled. Optional Daimler-Mercedes engines are provided – models in their own right, with more than enough detail to look complete out of the box – with clear instructions for which one is appropriate for the marking options. I left off the stabilizer and rudder to avoid damaging them during finishing. The fit of the engine cowl panels was perfect, but I decided to leave both off to display the engine.
Before I knew it, I was assembling the wings. The attachment points for the cabane struts appear weak and indistinct, but work well once the wing is attached. Main strut attachment points are very sturdy. Both the lower and upper wings appear to have incorrect dihedral angles, but when assembly is complete they closely resemble the original, although the top wing may have slightly too much dihedral.
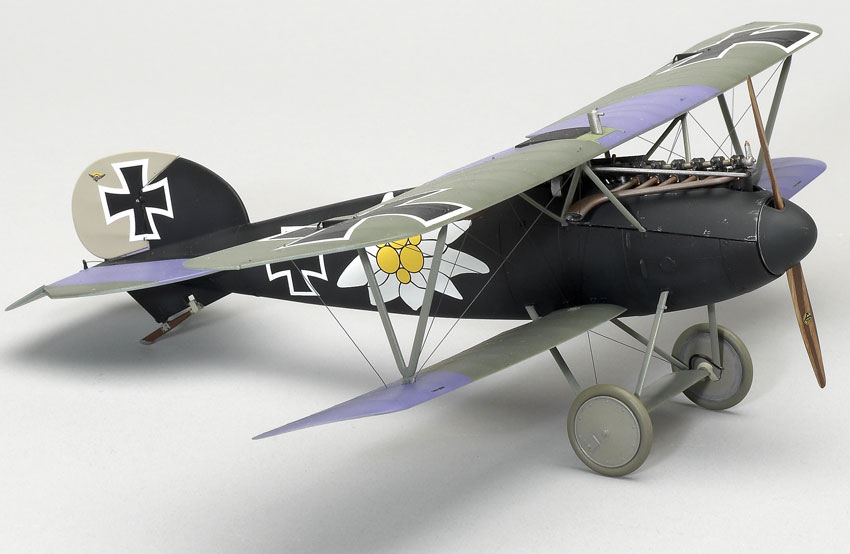
Rigging your Albatros is considerably aided by the kit’s pre-molded rigging holes. They are even included in the landing gear – make sure you study which holes are for rigging and which are for attachment of the axle. After painting the “camouflage” scheme with mixes of Tamiya acrylic, I applied the excellent Cartograph decals. They went on without fuss and were not at all translucent, even on the huge, white edelweiss marking. Finally, I rigged my “Albi” with nylon monofilament and it was finished.
The kit works out to be near-perfect dimensionally, and it sure looks the part. I spent a thoroughly enjoyable 34 hours on mine.
I think I’m getting addicted to these kits. I would recommend this one to anyone who has built a few models. Even if you have avoided rigged biplanes in the past, the detail, finesse, and fit of these kits will have you hooked. An Albatros is fairly easy to rig, and, given patience and some practice, a fine result can be achieved.


