
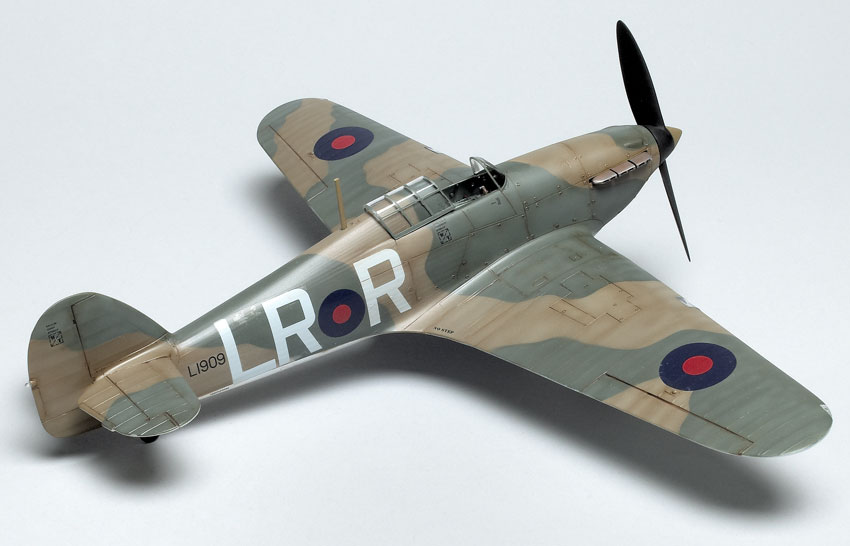
Thanks to Pacific Coast Models, we now have a newly tooled, fabric-winged early Hurricane Mk.I in the increasingly popular 1/32 scale, with options for building any rag-wing version by making the lower fuselage fairing a separate piece, along with all three propeller possibilities. Two exhaust options also are featured among the 19 resin pieces. The 28 photoetched-metal parts include a prepainted instrument panel. Two different windscreens are provided, although a molding flaw is present in the middle of the armored glass option. (PCM is aware of the defect and has been very forthright in addressing the issue – details of how to obtain a newly-molded replacement are listed on its Web site.)
Be aware that the instructions show the first of six markings options with no rear fuselage fairing, a two-blade prop, and kidney-shaped exhausts, while the paint diagram shows the later ejector-style exhausts with a two-blade prop. As a last bit of confusion, the box art shows a three-blade prop on this aircraft. Check your references.
The cockpit builds easily, but you should leave the gunsight off until late in the build. Also, there is no firm attachment point for the seat – it just rests on the tubular framework. The seat belts are nearly a model by themselves, with five parts for each lap belt alone. I don’t think photoetched metal works well for these 1/32 scale belts.
The instructions direct you to attach resin side wall details to the built-up tubular cockpit frame, but I added them to the side of the fuselage to make sure they aligned properly.
I did not glue the upper wing halves to the lower as instructed; instead, I added strong tabs on the fuselage at the wing root and left the lower fuselage part off until later, adding a brace to improve the fit. Dry runs confirmed this would result in a good wing-root join. After sanding it thinner to clear the bottom of the cockpit, I glued and clamped the resin gear bay to the wing. Then I attached the lower wing, followed by the upper wing halves.
All my dry-fitting was in vain – by sanding the gear bay flat and clamping it to the lower wing to improve the fit, I removed the small amount of dihedral at the outer portion of the gear bay. Thus, my upper wing halves pulled down to meet the lower, opening a substantial gap at the wing roots that I had to fill.
The rest of the build was trouble-free, with no filler being needed anywhere else (except just a bit where the wing joins the nose). A good deal of trimming was required to fit the landing and navigation lights, though, along with the photoetched-metal radiator parts.
I could not fit the windscreen, gunsight, and instrument shroud all together for some reason, so I chose the windscreen and gunsight. The gunsight mount was just a little short, so I tried forcing the windscreen in front of it. My gunsight now lies somewhere in the bottom of the fuselage.
I painted the Hurricane using Testors and Tamiya paints. The decals worked flawlessly.
This kit took 30 hours, mainly due to the adjustments needed for the wings and masking the complex color scheme. Pacific Coast has released a fine fighter. With the care and skill usually expected for a short-run kit, you will end up with a model that looks every inch the early Hurricane.


