
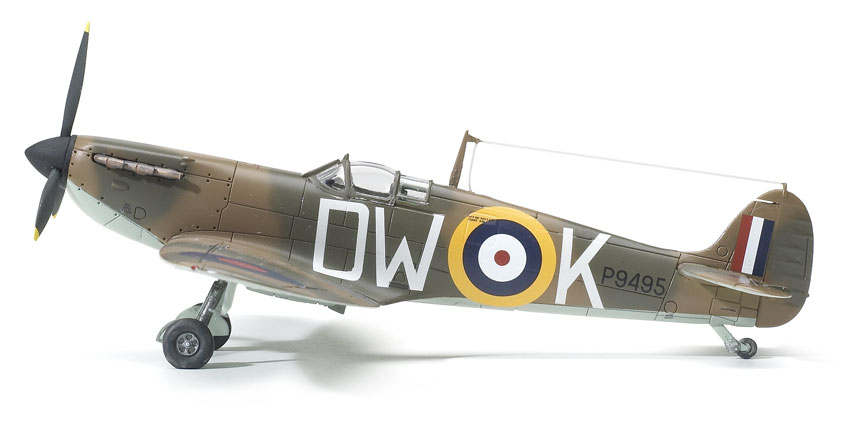
Just in time for the 70th anniversary of the Battle of Britain, Airfix releases a new Spitfire Mk.IA in 1/72 scale. In keeping with its current trend, Airfix presents a new-tool upgrade of its classic kit.
Gone are the raised panel lines and bench seat for the cockpit. This rendition features blue-gray plastic with crisply molded panel lines — perhaps a bit deep for some — fine surface detail, and a nicely detailed cockpit. Still, like the original, a pilot figure is included. Airfix provides markings for one aircraft from No. 610 Squadron, circa July 1940.
With only seven steps in the exploded-view instruction sheet, this is a straightforward build. Construction proceeded quickly, but after sanding the edges of the instrument panel and the aft bulkhead for a better fit, and gluing the cockpit assembly into the fuselage, I gave the canopy a test-fit and discovered my sample was a bit too long for the cockpit. I shaved some plastic from the front of the cockpit opening, but this was difficult because of the location of the instrument panel; it would have been easier without the cockpit assembly in the way. Although I didn’t notice it until after I glued everything together, I think you could slip the completed cockpit up through the bottom of the fuselage.
Contrary to the instructions, I left the propeller off until later. However, I did make a hole next to the prop-shaft opening to insert a stick to hold the model during painting. (If you use the original opening, you run the risk of splitting open the fuselage.)
The second thing to check carefully is the fit of the upper wings to the fuselage. Mine were so snug that they flattened the wing’s dihedral. A little sanding on the inboard edge of the upper wings alleviates the problem.
Overall, the fit was very good and I used minimal filler. I appreciated the positive attachment of the gear struts in the wheel wells. Square ends on the struts make getting their distinctive angle easy.
A full-color painting and decaling guide is on the back of the box. Though there is only one marking option on the decal sheet, there is a complete complement of stencils. My first decal was the serial number, and I noticed some silvering on it. To make sure this didn’t happen to the large squadron letters, I separated each of them from the roundel and trimmed them as closely as I could. To my eye, these letters are a little too large and the color too light. But, except for the red gun covers, the decals went on easily and settled without decal solution.
The kit is an excellent value I can recommend wholeheartedly to all modelers. My 14-hour build turned out an attractive Mk.1a. Airfix has given us another great kit at a very reasonable price.


