
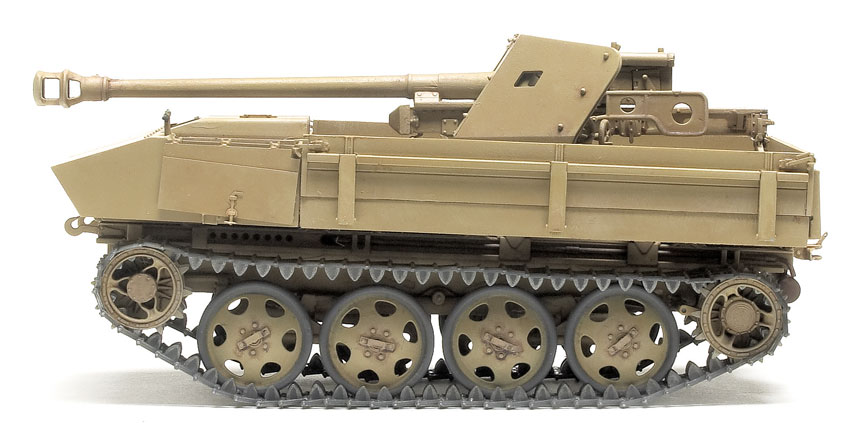
Dragon surprised many modelers with its new 1/35 scale 7.5cm PaK 40 auf RSO. Molded in gray plastic, the kit features individual-link “Magic Tracks,” two small sheets of photoetched metal (one for the gun and one for the vehicle), and full drivetrain detail, including a complete engine. A small decal sheet contains markings for three of the seven vehicles shown in the paint guide; the others don’t require markings. Unlike Dragon’s previously released PaK 40 gun, no turned-metal barrel is provided.
I began with the motor and chassis. Fit was excellent, but the instructions do not show installing the exhaust headers (parts F20 and F21). When assembling the idlers and drive sprockets in Step 2, make sure you use the correct middle part of the sprockets; both options are listed as B18, but they are slightly different. The part closest to the edge of the sprue should be used with the driver assembly (shown in Diagram C). The road-wheel arms (B1, B2) are not numbered on the diagrams; make sure the longer side of both arms is toward the center of the vehicle. The mud-clearing arms for the drive sprockets, parts A5 and A6, suddenly appear in Step 6.
Rather than wait until Step 20, I installed the tracks before attaching the body and bed to the chassis. I glued an upper and lower run of track links for each side, using individual links to fill the gaps on the idler and drive sprocket. Once the glue set, I removed the tracks and painted them off the vehicle.
Assembly of the cab and bed was straightforward with no problems. You can use either photoetched metal or molded plastic parts for the folding doors on the cab. Careful: Tiny pre-bent handles for the doors (parts MB1) are hiding in the bag with the decals and are easily lost or missed.
There is some controversy over the seats provided with the kit; one source claims they are patterned after a restored vehicle that used M113 seats. I attached my seats with white glue so I can change them later if definitive information becomes available.
The bed went together quickly. One of the ammunition storage bins can be posed open if you desire. The only problem was figuring out how the photoetched-metal side latches are folded, especially the ones for the rear gate.
Be wary of the gun. The main trunnions (B26, B27) are shown reversed in the instructions. When assembled correctly, the flat side of the pivot should point to the rear of the gun — not the front, as shown.
My finished model closely matched the dimensions in Chamberlain and Doyle’s Encyclopedia of German Tanks of World War Two (Sterling, ISBN 978-1-85409-518-3), except for being about 1/3″ too tall. How-ever, the height in my reference matched a height posted on Wikipedia for a regular cargo RSO, a somewhat taller vehicle.
The model really looks good, and the level of detail is astounding. Only struggling through the errors in the instructions moved this model into the experienced modeler range — otherwise, it’s a relatively easy build. Let’s hope Dragon issues that standard cargo RSO soon!


