
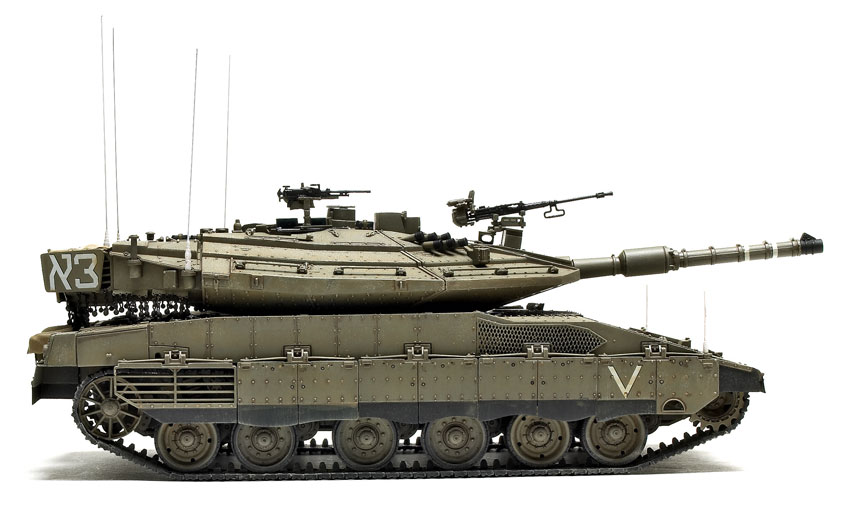
HobbyBoss has added an Israeli Merkava Mk.IV to its line of modern main battle tanks. The kit is molded in dark yellow styrene, with the headlight lenses and vision blocks molded in clear styrene. Two frets totaling 96 photoetched-metal parts, plus vinyl tires and poly caps for the road wheels, are included, along with a length of chain and brass beads for the chain armor Merkavas carry on their bustles. The upper hull and turret halves also have very convincing anti-slip coating molded on the upper surfaces.
There is a little flash on some parts, and a few ejection-pin marks need to be sanded to allow the parts to be glued together, but most fits are fine. A color sheet with the instructions shows two marking options. The .50-caliber machine gun and antennas already have holes in their ends to ease drilling them out.
I like to assemble the hull halves first, so I glued the exhaust vents to the upper hull. After the rear door frame (Part D55) is glued to the lower hull, the two halves can be joined. The rear doors can be open or closed, but with no interior I glued them shut. The rear storage baskets provide a choice of plastic or photoetched-metal parts for the bottom and front of the basket. Included in the basket is a molding of stowage wrapped in a tarp. I used the plastic bottom (Part C30)but chose the photoetched-metal front (Part PE A12) because it is more detailed than the plastic. Then I glued in the stowage. The top and rear frame goes over the stowage, but I left it and the basket front loose for easier painting. A tarp to cover the basket is also included, but I left that off until later, too. Same for the side skirts and dust flaps (parts D45 and D47), which I left off until the tracks were assembled.
The offset suspension is wrong because this tank does not use a torsion-bar suspension; each pair of road wheels should be directly opposite of each other.
The rear idlers come as a single molding. A choice of photoetched-metal or plastic parts is offered to detail the front drive housing (Part D35). I thought the plastic would be easier. The halves of the drive sprocket were a poor fit and needed a little filler.
Vinyl tires are included for the road wheels. Three of the road wheels use a half vinyl tire, leaving a mold seam in the center. The other three road wheels receive a whole vinyl tire, leaving a large protruding rim.
The tracks are individual links that do not lock together; I built them in three-link segments that I joined to make longer runs. I didn’t assemble the upper run, which is hidden behind the side skirts.
I joined the turret halves (needing a bit of filler) but left the gun off until the turret was painted and weathered. Leaving the commander’s hatch operable eased access for painting.
The chain armor for the bustle has a small brass ball with a pin that is bent through a length of chain. (I ran out of chain and had to find more in my spares box.) The ball and chain are then supposed to be clipped into notches in the photoetched-metal frames. But the frames are so fragile I glued them to the turret, then attached the balls to them when I painted the rest of the turret. Rather than paint the chain and balls, I darkened them with Blacken-It. Photoetched-metal tie-down buckles are provided if you want to show the rear basket covered.
The kit’s color guide calls for mixing Sinai gray with Mr. Hobby colors. However, that looked a little too green to me. So, I mixed my own colors. The base coat was a 1:1 mix of Tamiya khaki drab (XF51) and medium gray (XF20). Then I “clouded” a 1:1 mixture of khaki (XF49) and medium gray on the centers of panels, applied a gloss coat, then put on the decals. They adhered well with no silvering, but I needed Solvaset to make the chevrons lay down over the rivets on the side skirts.
The stripes on the barrel are included as a decal; the stripe that runs the length of the barrel on top is a single piece that required repeated coats of Solvaset to settle it over the irregular surface. I followed several sealant coats of clear flat with Mig Productions’ filter for gray sand, then a brown wash and dry-brushing of Humbrol pale stone, and, finally, a light overall coat of CMK’s light dust. K&S brass wire served for the antennas.
I spent 53 hours building the HobbyBoss kit. Based on my references, it represents the Merkava Mk.IV well except for the suspension (which isn’t really noticeable). But it will take an experienced modeler to get through the photoetched metal and chain armor.


