
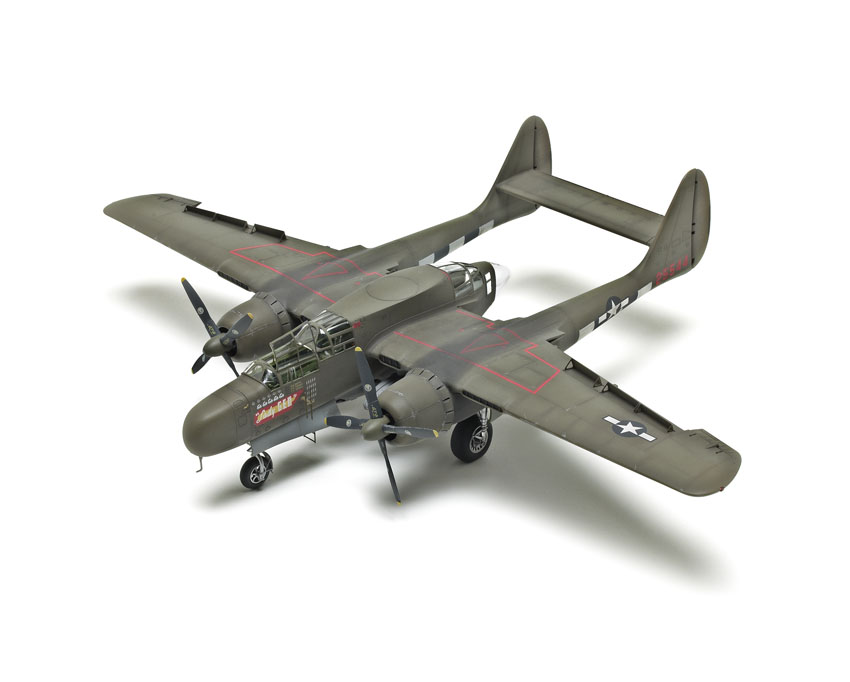
Many modelers know Monogram’s 1/48 scale Northrop P-61 Black Widow — a kit with wide appeal that has been equally as famous for its difficulty. It’s been a long wait, but now Great Wall Hobby has released the first P-61 in this scale since Monogram first kitted the late-war night fighter in 1974.
The plastic didn’t seem receptive to liquid cement, though, and I had to clamp the fuselage all the way around and let it dry overnight.
If you want the model to balance, you will have to load the nose with 2 ounces of weight.
I masked all the clear parts and glued before painting. I tacked the upper, opening piece of the forward cockpit, Part J3, because I wanted to pose it open. You will have to file a flat on the edge of Part J3 to provide a gluing surface for the left side.
Next, the wings and booms: The wings, ailerons, and flap assembly goes together nicely. But I don’t understand the recessed area for the speed brakes. The photoetched-metal brakes can be posed opened or closed. If you choose closed, you need to trim the extension arms off and glue the remaining portions in the provided recess — or, at least, that’s what the instructions say. In reality, the speed brakes retracted down and back into the wings, not down and forward onto the wing as depicted.
The booms go together without a hitch. Again, you’re supposed to trap the landing gear. And, again, it can be left off and snapped into place, then glued, after painting and decaling.
The engines are nice, but there are a few problems. First, there are no magnetos provided. Second, the photoetched-metal ignition harness is delicate. You’ve got about one chance to bend and locate the leads to the proper cylinders or they may snap off. I lost a few.
On the cowling parts (I29), the front openings are too small. They need to be opened up a little. The props and spinners are molded as one piece, which leaves an open notch behind the prop blades. It would have been better to have a back plate for the spinners to close the gaps.
The booms go on nicely, just a little filler on top where the wing meets. The boom/wing assemblies mate up with the fuselage with no gaps. Don’t forget the horizontal stabilizer between the booms; don’t glue it right away, just trap it between the booms. After the wing-to-fuselage assemblies dry, pull everything tight and glue the stabilizer and booms. No filler is needed.
You get two fuel tanks, but there are four slots, two on each wing: one inside and one outside of the booms to mount the fuel tanks. Check your references to see where the tanks should go. I mounted mine in the inner slots.
The rear hatch/boarding ladder is a nice little unit with photoetched-metal framing and .015″ styrene-rod strips.
Decals went down OK but were a little thick. They had a flat finish, which always makes me leery, but were not a problem.
It took me about 33 hours to complete my P-61. No special tricks; just follow the instructions carefully. Aside from the few engineering issues, it’s a big improvement over the Monogram kit. A few years of modeling experience also helps.
Note: A version of this review appeared in the January 2012 issue of FineScale Modeler magazine.


