
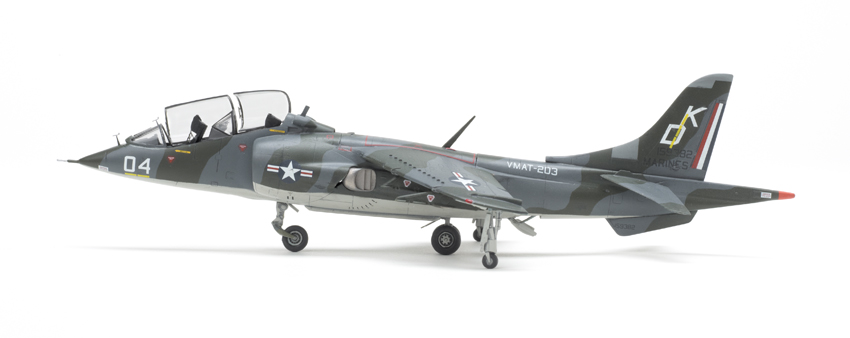
The two-seat trainer of the early version of the familiar Harrier has been the subject of only one other kit in this scale — an almost-snap-together “Bob Kit” from Heller from the 1980s. Sword’s kit is most welcome to fill that weak spot in 1/72 scale collections.
The fuselage (except for alternate two-piece nose cones) is molded in halves. Optional short and tall vertical fins are also provided, as are a pair of Aden gun pods for the aircraft’s belly. The sectioned canopy includes the back-seater’s secondary windscreen. The decals are beautifully printed and provide markings for RAF No. 3 squadron, No. 233 Operational Conversion
Unit, and the U.S. Marines VMAT-203 outfit.
The highlights of the kit parts are the prepainted photoetched-metal parts, including instrument panels, consoles, and seat harnesses. A single resin piece provides structure to the speed-brake well.
Everything looks good in the box. Then assembly begins. The chief problem here is the instructions. Although well-drawn, things go awry with the photoetched-metal part numbers compared with those etched on the fret. Put on your OptiVisor, grab a red pen, and study the instructions carefully. Look for the photoetched-metal part on the fret that looks like the one in the diagram and change the number on the sheet to that of the real part. If you don’t do this, you’ll end up putting little antennas on top of the ejection seats (for example).
The seats look good with all of those tiny prepainted straps, and are typical of the RAF service aircraft — not so much like the Stencel SEU-3 seat for the Marines.
Although not numbered on the sprues, the plastic parts are numbered in a parts map in the instructions. There’s trouble here, too, with the right and left intake parts swapped in the assembly diagrams. The outrigger strut doors are shown upside down, and the back-seater’s windscreen is upside down, too. To experienced builders, these problems will be obvious and easily corrected. But for a beginner studiously following the instructions …
Most of the components fit well, but the canopy has problems. First, the kit provides an oversize front instrument panel coaming that will in no way fit inside the windscreen. I fashioned a new one from thin sheet styrene. Next, it is not clear how the back-seater’s coaming and windscreen (once fitted upright) fit into the cockpit opening. In photos I found of the real aircraft, it appears that the raised lip of the back-seater’s windscreen forms a seal between both canopies when closed. The kit parts don’t seem to fit that way, and, although the canopy is sectioned, there are no hinge mechanisms to pose the canopies open, either. I ended up just gluing them open. Still, the forward windscreen sits too far forward and produces a noticeable overhang.
I painted the model with Testors Model Master enamels, added a coat of Pledge Future floor polish before decaling, and used Testors Acryl clear flat for the final finish. The decals are a little finicky — thin and difficult to handle — but they really squish down to the surface.
The finished model looks good if you don’t dwell on the canopy. I left off some of the photoetched-metal blade antennas — too tiny to install, even with sharp tweezers.
I spent 31 hours on the kit, much of it working with the photoetched-metal details and masking the camouflage.
This kit is not for beginners, and experienced builders are cautioned to take extra time to sort out and dry-fit the parts.
Note: A version of this review appeared in the January 2013 FineScale Modeler.


