
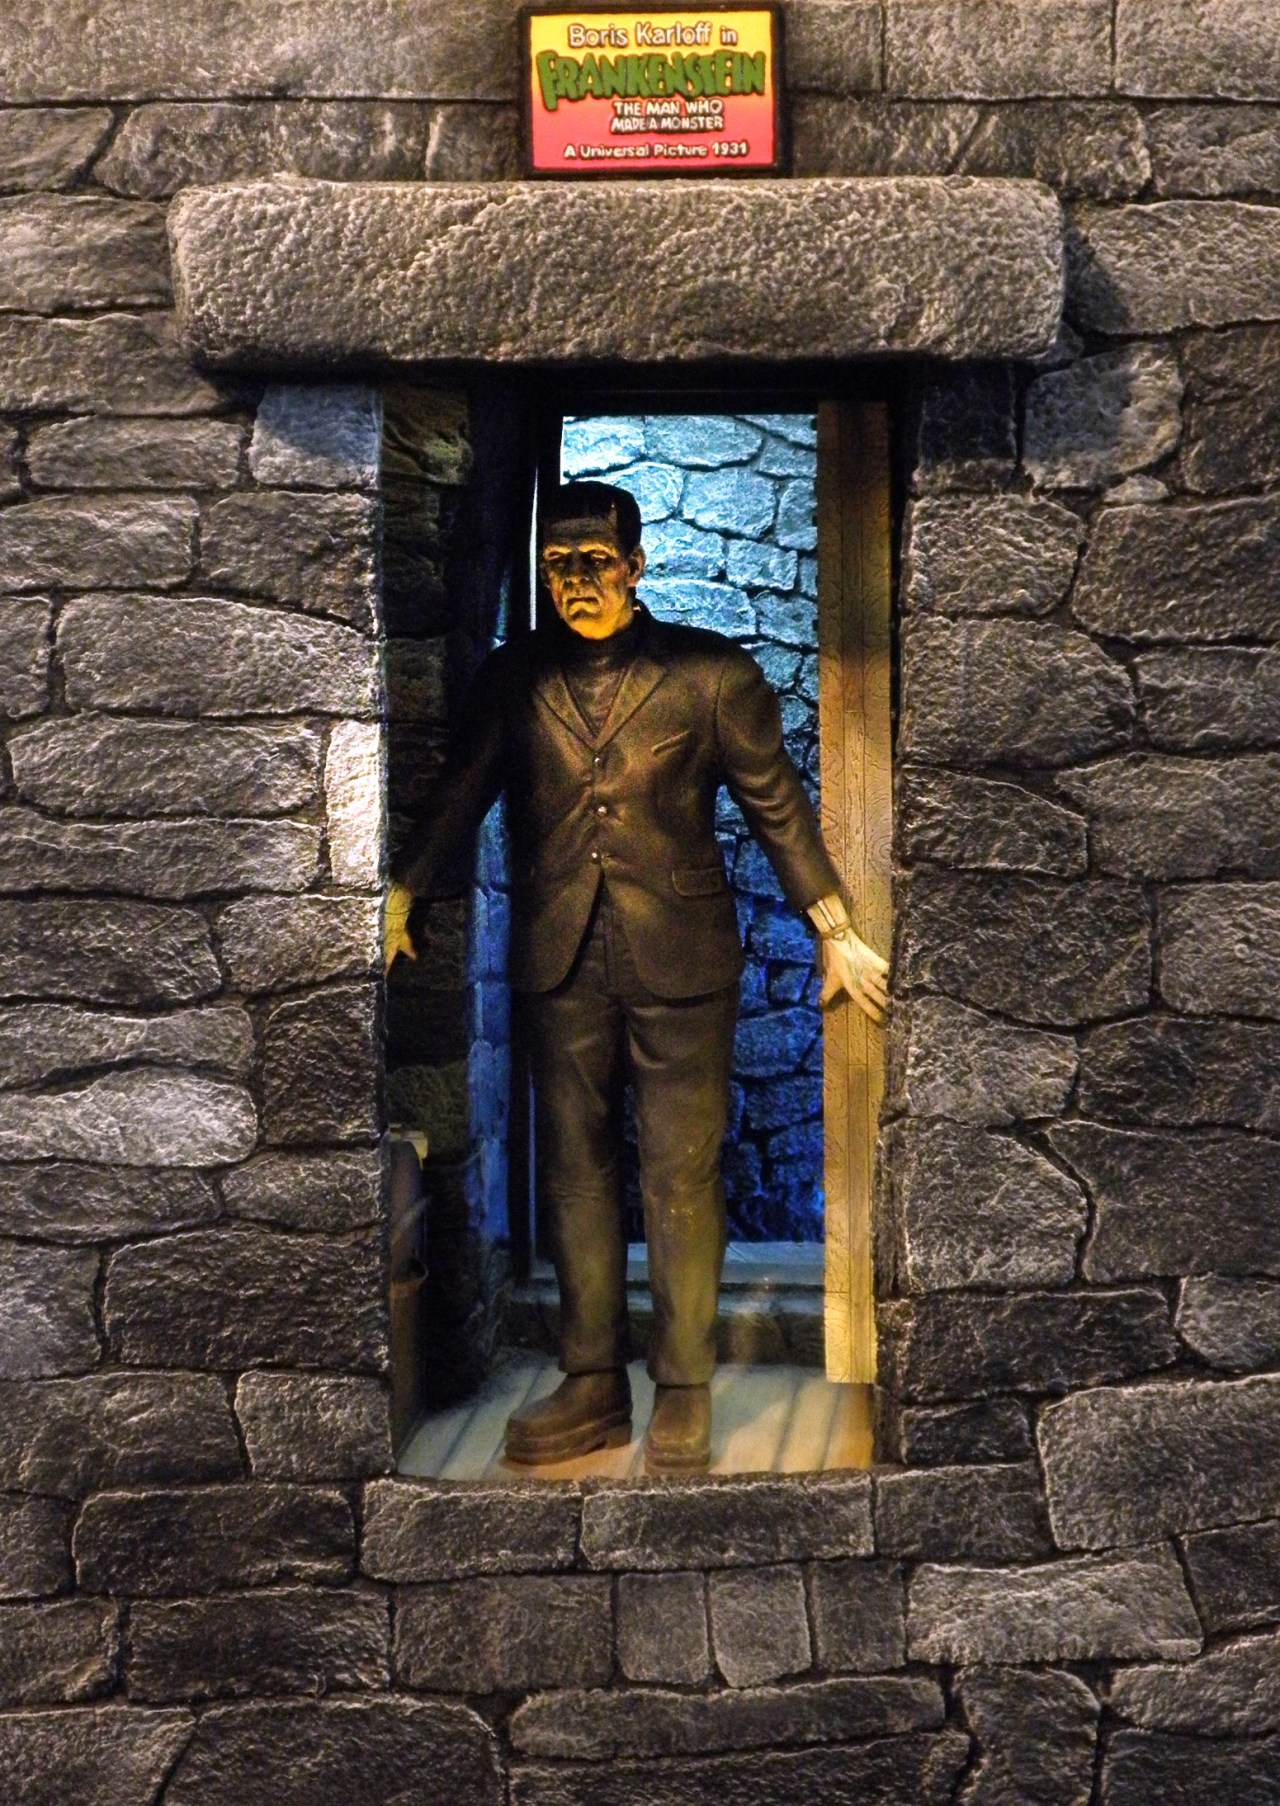
I textured the cardboard with Celluclay papier-mâché and, for fun, I added “memory stones,” sculpted from Apoxie Sculpt around the exterior. Each shows the birth and death dates of cast and crew that worked on the film.
White LED Christmas lights, some tinted with Tamiya Clear Orange (No. X-26) and Clear Blue (No. X-23) acrylic paint, light up the interior of the shadow box.
That’s when I found Starlighting Projects’ Storm in a Box unit, a electronic set that simulates lightning and thunder. It was too cool not to add, but test-fitting showed installing it would require drastic changes.
The big realization was that the model would need to be a shadow box. I build up the exterior of the box with sections of corrugated cardboard.
… but it truly comes alive with the shadow box cover fitted. At more than 13 inches square and 18 inches tall, my simple project had truly become a monster.
Final Thoughts
It seems that the longer one builds models, the easier it is to become entranced with all the extra details and aftermarket parts that can be added to a project. Those extras can bring much more time and effort to the build than was originally intended. That happened with this project, but I am pleased with the result.
The ever larger scene required a more substantial base than the wooden craft plaque I started with. Instead, I mounted it on a solid plank of wood supported by sturdy furniture legs I found at a hardware store.
The finished scene without the shadow box looks pretty good …
To increase the appearance of depth, smaller stones were sculpted over the inside of the back wall. This forced perspective makes it appear as if the wall through it is farther back than the diorama’s back wall.
The monster looked a tad spindly, so I bulked up his shoulders using Aves Apoxie Sculpt, seen in gray in this photo. While I was at it, I corrected clothing details, including the lapels, lower sections, and cuffs, and repositioned his boots to make his pants less high-water.
After some test-fitting, I repositioned the Monster’s hands for a better grip on the wall and door. Then I painted the clothes in various shades of black and dark gray and his flesh a pale yellowish gray for an authentic “dead” color.
In any situation, when a project becomes so big it takes on a life of its own, it is often described as becoming a bit of a Frankenstein. Sometimes that happens with a modeling project when what was supposed to be a straightforward build becomes something entirely different. That’s exactly what happened to me — I created my own Frankenstein, figuratively and literally.
It started with a Moebius 1/8 scale Frankenstein kit, designed after an iconic publicity still from the 1931 film version of Frankenstein with Boris Karloff as The Monster. There are issues with the figure and the kit base is a poor representation of the laboratory set seen in the film. Looking at it, I thought I could accurize the model with a little work — boy, was I wrong!
The kit head (left) simply doesn’t look much like Karloff. So, I replaced it with an out-of-production resin head from Cult of Personality that looked much better. You can find similar products from Escape Hatch Hobbies (escapehatchhobbies.com).
I sculpted an accurate lintel with foam and Apoxie Sculpt, but scrapping the kit lintel, which was designed to lock together with the wall and floor sections, made it necessary to make a new floor from basswood. I also made a trunk from styrene sheet and lead foil.
To block the view through the door and maintain the scene’s atmosphere, I built a wall for the corridor with foam carved to look like rock and covered with Durham’s Rock Hard Water Putty for texture. With each addition, the base was becoming unwieldy.
In the movie, the laboratory door opens into a short passageway, but in the kit, it opens into the lab. I built extensions for kit walls with styrene foam and foamboard and sculpted rock texture with Durham’s Rock Hard Water Putty and Apoxie Sculpt.
The kit lacks a doorframe, so I built one from basswood strips. To mount the door on the frame, I added small ornate hinges salvaged from a wooden craft box. Mounting the frame on a base helps hide the fact that the door is a little too short compared to the figure.


