
Next, I added rivets or, in this case, titanium screws. I started by indicating each line with a magic marker on the foil.
Then I gently ran a pounce wheel — here it’s a Rivet-R Tool from R.B. Productions — along each line guided by a flexible straight edge.
It is important that the lines of screws be equally spaced and perfectly straight. Foiling and adding screws or rivets to a model is a marathon, not a sprint. Patience is a virtue in this situation.
You can rotate swatches of BMF 90 degrees to provide visual interest and contrast between panels as seen on this B-24 I built. Most of the foil is Matte Aluminum (No. 011) with a few panels finished with Chrome (No. 001) for added contrast.
Smooth or burnish the foil with an artist blending stump. The paper stump will not tear the delicate foil no matter how hard you rub.
Once the foil is in place, trim along panel lines with a hobby knife guided by a flexible straight edge. (See John’s story about applying BMF in the September 2021 FSM for more tips and tricks.)
Next, I use 0000 steel wool to enhance the foil’s natural grain. A single, light swipe is all that is required — do not swipe more than once.
When I went to join the fuselage and wing, I discovered the curve of the former didn’t match the latter. Filling this gap with putty and cleaning it up would have been tedious and difficult.
To support the weight of the engine pods, I inserted metal rods into the pylons that fit into matching holes I drilled in the wings. I attached the pylons and engines with superglue.
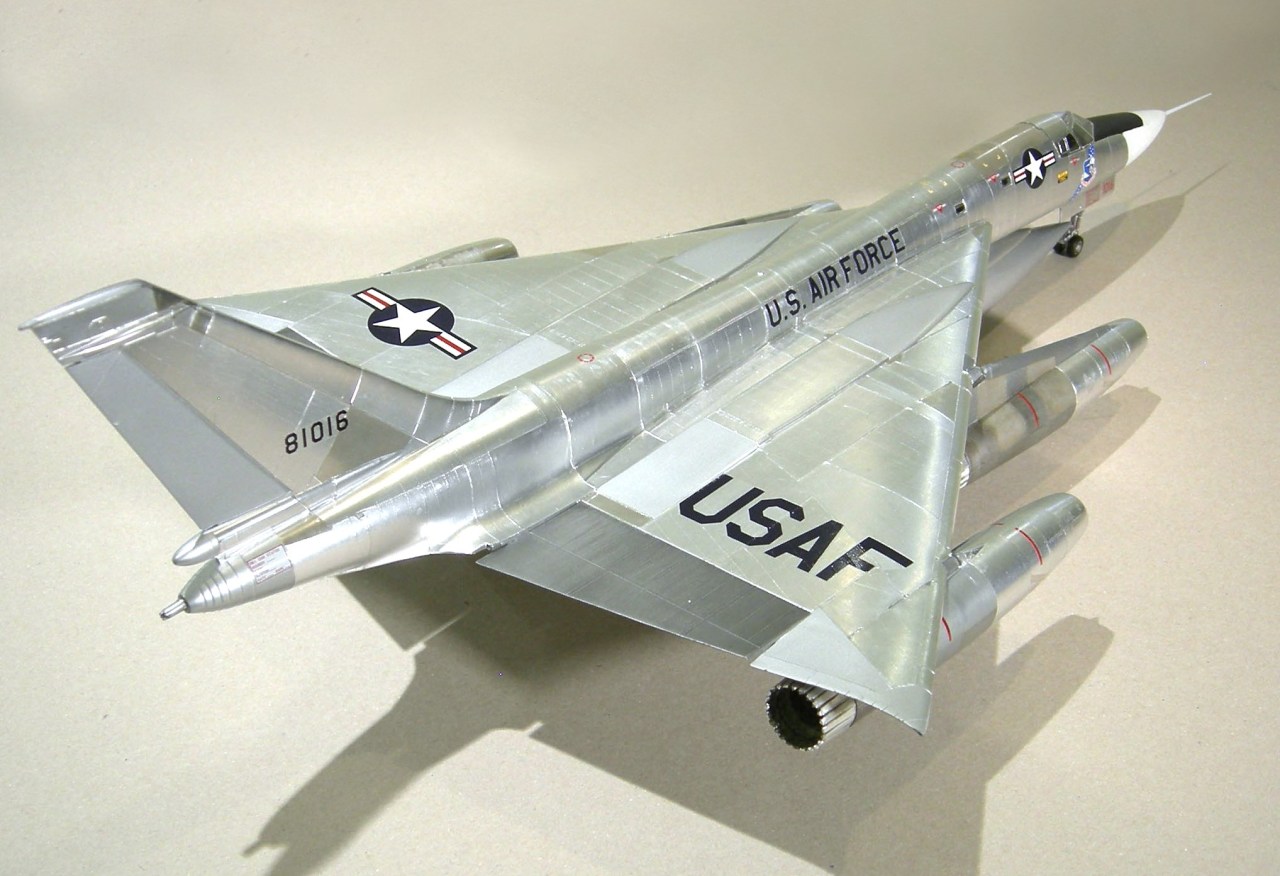
The final touch was ordnance: The B-58 could carry one 4-megaton nuclear weapon in a combined fuel tank and weapon pod on the centerline and four 1-megaton bombs under the wing roots.
Final Thoughts
Monogram’s Hustler was a challenging and frustrating model to build. However, taking the time to clad it in Bare-Metal Foil highlights the elegant lines of the fast-mover.
I painted the elevons to match the actual airplane using the same technique previously described for the engine pods: layers of Metalizer Aluminum and Titanium with some of the latter removed with enamel thinner.
The solution? I used a big bar clamp to press and hold the wing and fuselage together to reduce the gap.
The gap was virtually invisible after the glue dried and the clamp was removed.
Unfortunately, there was no easy fix for the seam between the tail section and fuselage; it required many rounds of filler and sanding to eliminate. Note that I did not foil the panels adjacent to the joins until they were glued together to avoid damaging the metal finish.
The kit’s engine detail is poor, so I replaced the intake and exhaust sections with out-of-production resin parts from Fisher Model and Pattern. A similar set is offered by Lone Star Models.
After detail painting, I applied a black wash to the interior of each exhaust. I airbrushed the exterior of each nozzle black and then covered each individual petal with Bare-Metal Foil (BMF).
The Hustler is extraordinarily tail heavy. To keep the nose grounded, I started by taping automotive wheel weights forward of the cockpit with aluminum duct tape.
Each of the main gear legs is equipped with eight small wheels. I applied a rust wash to simulate dirt and pop details on the struts and wheels.
Everyone has a soft spot for a particular kind of model. Mine is Monogram and Revell 1/48 scale bombers. Included in my builds are multiple versions of B-17s, B-24s B-25s, and a B-29. A number of those builds wear natural-metal finishes provided by Bare-Metal Foil.
I built a B-58 many years ago as a kid, and I am sure that it was a true glue bomb. Knowing I would be able to improve upon that previous build, I picked up a 34-year-old Monogram B-58 kit. The Monogram Hustler has a well-earned reputation for being a difficult build. Warped wings, poorly fitting parts, and lack of detail eventually relegated it to my Shelf of Doom for a year. Finally, it was time to get back to it.
The interior wasn’t my focus, but I went ahead and dressed the cockpit with aftermarket photo-etched (PE) metal and careful painting.
Using thin wire , I added brake lines to the nose-gear leg. I painted the gear aluminum and highlighted detail with a black wash.
Next, I taped the entire plane together and poured fishing sinkers into a small plastic bag resting on the fuselage behind the cockpit until the nose dropped down. I sealed the baggie and taped it into the fuselage aft of the cockpit.
Surprise! (Not really.) The wings were warped in my kit, so out came the bar-clamps and my trusty architect’s scale to hold the parts straight as the glue dried. Clamping the triangular metal scale along the leading edge helped flatten everything.
I applied BMF to the wings, tail, and fuselage prior to joining the three subassemblies. It was easier to foil the components separately.
When applying BMF, the first step is to cut a piece of foil slightly larger than the panel to be covered. Don’t worry about the wrinkles yet.
I proceeded to wipe each panel individually, which made them different from each other and added variation and visual appeal. The front section of each pod was finished with BMF, and I attached the resin nozzles with superglue.
Encountering the first of many fit issues, both halves of all four engine pods was warped. Clamps, clamps, and more clamps held the parts together while the glue set.
I airbrushed the rear section of each engine pod and the adjoining pylon with Testors Model Master Metalizer Non-Buffing Aluminum (No. 1418) topped with Metalizer Titanium (No. 1404).
The titanium lacquer was partially removed as I wiped the surface with enamel thinner. The results closely resemble the color of the a real Hustler’s engine pod.


