
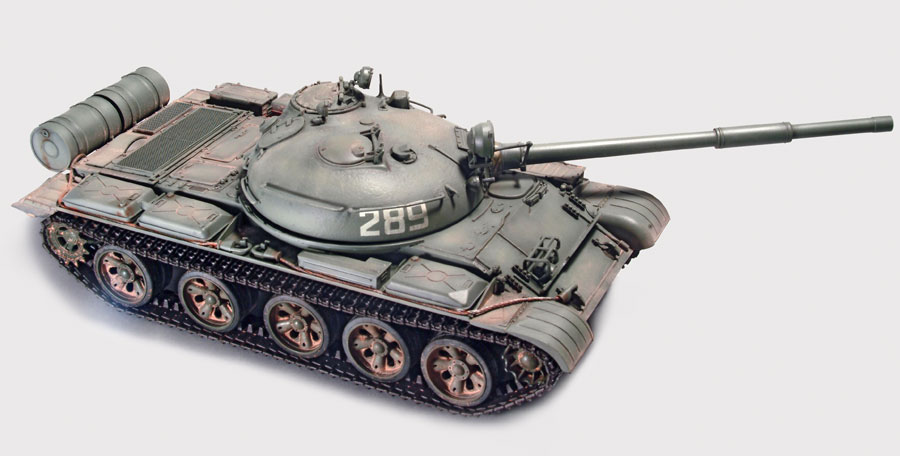
T-62s served alongside T-55s in the Soviet Army. Now, with the release of Trumpeter’s first T-62 kit, modelers can park one next to Tamiya’s T-55 on their shelves.
Molded in Trumpeter’s typical light gray plastic, the parts exhibit good detail with crisp panel lines and nicely rendered casting texture on the turret.
The lower hull includes a detailed underside with access panels molded in place. The upper hull is molded as two parts with the engine deck separate from the forward half. The overhang for the turret is particularly nice. The fenders are separate, with detail top and bottom, but several large ejector-pin marks mar the underside.
The tracks are plastic, individual links. Road-wheel tires are molded separately in black plastic (not vinyl). This makes painting easier, but it complicates assembly slightly.
A small photoetched-metal fret provides engine grilles and a few other little items. There is also a turned-metal barrel, although a multi-part plastic barrel is included.
The fit of the parts is generally good, but I found I needed super glue filler in a few spots to make sure gaps disappeared.
I skipped the road wheels in the first step (I prefer to paint them before assembly), starting instead with the lower hull and suspension arms – the arms are keyed so lining them up correctly was easy.
The major hull components fit well. Be careful not to fill the rectangular openings around the turret overhang. They need to be open to fit the parts later.
When adding the fuel-tank brackets on the rear hull, be careful that they go on straight. I used one of the tank halves to brace them as they dry.
In Step 7, the headlight is incorrectly labeled as part B12; it should be B11. These parts are very similar, but B11 has a mounting tab to fit the hole in the glacis plate. I attached the lights, but left the clear lenses off until after painting. Also, instructions indicate attaching Part A4 on the glacis plate’s starboard side only. There are matching locating holes for another A4 on the port, so I attached a second. Photos show some T-62s with one, some with two, and some with none, so check what is right for the vehicle you’re modeling. There is a weld seam at the front that is too short and will need to be extended after you attach the A4 parts.
The photoetched-metal grilles fit perfectly in the engine intakes and look terrific.
After filling ejector-pin marks under the fenders with several applications of Mr. Surfacer 500, sanded smooth, I attached the fenders, several stowage boxes, and other items. The copper wire for the tow cables is malleable enough to hold shapes when bent around fixtures, but stiff enough not to kink easily.
The unditching log is a little disappointing; it’s a one-piece molding, but it’s hollow. Most if it is hidden on the finished model, but I’ll replace it with a wooden dowel on my next T-62.
There are a couple of things to watch for on the turret. Parts B1 and B2 are shown reversed in their directions. You’ll have to drill out locator holes for the grab handles that circle the turret. Unfortunately, the instruction are a little vague about which of the marked holes need to be opened. I bored out the coaxial machine gun barrel.
I used the superb metal barrel, which fit the mantlet perfectly. I had to file the inside of the small metal ring so it would fit over the muzzle and attach to the front of the gun’s fume extractor.
Trumpeter has not provided a bayonet mount for the turret, but the fit is snug enough to hold the part in place without glue.
After priming with Polly Scale acrylic roof brown, I airbrushed the hull and turret Polly Scale Pullman green, and the tires Model Master Acryl schwarzgrau. I applied kit decals for a generic Red Army tank.
I assembled the road wheels with super glue and attached the tires. The drive sprockets are keyed but go together misaligned. I trimmed off the tab and lined up the teeth up by hand.
The track links – an early style appropriate for T-55s and early T-62s – have four attachment points that needed a couple passes with a sanding stick to remove. I assembled top and bottom runs for each side with Testors liquid cement. Using 95 links on each side created the right sag on the upper run.
After a clear flat coat and some weathering powder, the tank was ready.
It looks like a T-62, but there are a couple of minor shape issues. There has been discussion online about the angle of the loader’s hatch. Most sources indicate that the hinges should be a right angles to the turret’s center line, rather than a few degrees off as molded. FSM author Cookie Sewell notes that some sources show early T-62s had an offset loader’s hatch. So, it can be argued that the kit is right.
The rear plate should meet the engine deck at 90 degrees; instead it is perpendicular to the ground. With fuel tanks and unditching log attached, the incorrect angle is hard to see.
Trumpeter’s kit is light years ahead of Tamiya’s old kit, and, with a little work, a very accurate model can be made. The fit is good overall, and the finished model looks right.
I recommend it to builders with a little experience, and to all fans of Soviet Bloc armor.


