I didn’t know a lot about the DTM racing series (Deutsche Tourenwagen Masters, or German Touring Car Masters) other than it ran only German makes that looked like their street versions on steroids. So, when I saw one of these Revell Germany kits, I had to give it a try — and I’m glad I did!
I was impressed as soon as I opened the box. The multipiece body exhibits excellent detail and proportions. The only drawback is there are several sink marks throughout the main bonnet and driver’s greenhouse. I contemplated some serious bodywork here, but as I studied the decal placement sheets I realized most of them would be covered. However, I did have to do some seam sanding with 600-grit filing sticks.
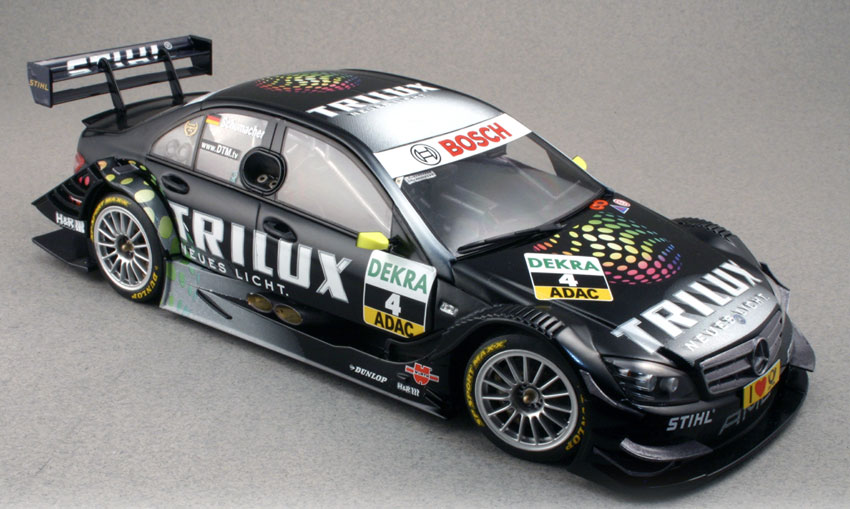
I prepped the body pieces for paint, but before applying the color coat I wanted to find a couple of pictures of the real car to verify a few things. Good thing! The car is not the gloss black called for in the instructions. I needed a semigloss clear to duplicate the pictures I had found; I painted the body pieces black, decaled them, then sprayed semigloss clear over them for a uniform finish. The rest of the body details went together with no problems.
The decal sheet is very nice, but there are no white color swatches for the windshield pillars. I used my airbrush and some pure white to fog them in.
The engine assembly is a bit simplistic, but the engine cover and hood hide most of it. Decals depicting carbon fiber for the valve covers are a nice touch.
The front and rear suspensions are also simplified, and they’re easy to put together. The front wheels can move as if steered. The instructions have you melt both ends of the tie-rod assembly, but I found the pieces fit tightly enough that you can skip this and still turn the wheels.
The wheels and tires build up beautifully as well. The rims are chrome plated; strip those and paint them aluminum to be accurate. The tires have no mold seam in the center and can easily be sanded for a track-used appearance. Make sure you carefully mark each rim/tire after building it so the brake calipers are positioned correctly. (I forgot to do this and had to hunt for a few reference pictures!)
I had no problems assembling and painting the chassis pan and interior tub. I did take a few liberties with the color instructions, though. I painted some of the interior components gunmetal to simulate the carbon fiber of the real car, whereas the instructions tell you to paint everything with shades of black. The gunmetal components make the interior much more interesting.
Final assembly proved a bit tricky. If the engine cover is not completely down in the front, the hood will not close. I also suggest not gluing the rear section of the body in place; the hood needs to slide underneath the front edge.
I was wowed by this kit, and the finished model is excellent. I just may have to pick up the other touring cars to complete the set!


