
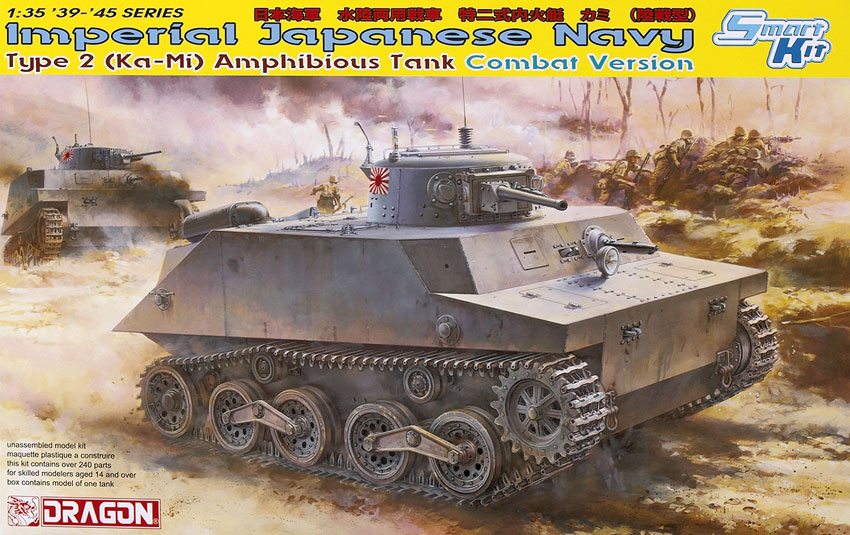
It’s a surprise that Dragon released a 1/35 scale Type 2 Ka-Mi amphibious tank. However, it’s presented as the combat version, so the pontoons and air stacks that make it amphibious are not included — and that’s surprising, too.
Parts are molded in light gray styrene; clear light lenses and armored glass are also provided, as is a small fret of photoetched metal. Fine weld beads and rivets are well represented.
Fit is good; little filler is needed. The turret includes a basic interior, and the lower hull interior includes fuel tanks, a hull machine gun, pontoon clamps, and the driver’s armored hatch.
The instructions do call out options, but many times the difference between parts is vague. The confusion is increased by several errors in labeling the part numbers. Careful study and test fitting are a must.
Step 3 has you choose an early- or late-production vehicle. The difference between the two is that the earlier has a pontoon clamp in the front armored plate, while the later variant eliminates the clamp and covers it with a steel plate. The directions don’t mention which marking option goes with which vehicle; I built and marked the early version according to the box art.
Before you join the hull halves, make sure all of the interior is in place. If you are going to use the spotlight, drill out the hole and remove the molded-on cover outside the hull. The lower half of the fuel tank is mislabelled as D1; it should be D11. All of the hull hatches are molded separately. There is a choice of louvered side hatches with a watertight hatch molded on or molded separately.
I annealed the mesh covering for the muffler, which made it easier to bend evenly around the muffler. I left the clamps for the pontoons off until the model was painted.
The tracks are one-piece DS track meant to be joined with liquid glue. They have detail on both sides and hollow guide horns, but if you prefer individual track links to better represent the sag in the top run, a set of Magic Track is available for this model from Cyber-hobby.
The rear idler wheels are numbered wrong: Part A17 should be glued to A19, and A16 to A18. In Step 2, all the numbers for the rear idler units are wrong. Instead of D, they should all be from the A sprue. If you’re careful gluing Part A7 to A25 and A26, A10 will be movable, allowing you to adjust track tension. I glued parts A23 and A24 to the hull instead of to parts A25 and A26 as shown in the directions. Leave the rear idler arms off the hull until after painting so the rear idler wheels can be adjusted to sit properly when the track is mounted.
If you are going to show off the turret interior, there are four knockout marks to fill; I punched out discs of Evergreen styrene and sanded them flat to fill these depressions. A little bit of filler closed gaps inside and outside of the turret around parts C16 and C17.
The connections for the collapsible auxiliary jib boom on the turret are molded on to the turret or can be replaced by photoetched metal. I chose the metal, though I did thin down the plastic part of the front clamp for the boom. This gave me something to glue the metal to. I also replaced Part C24 with its photoetched-metal equivalent, filling the holes in the turret with styrene rod where C24 was supposed to be glued.
The directions fail to show the placement of Part C46. It should be glued to Part C45 in Step 6 before C45 is glued to parts C14 or C15. The latch for the top hatch (Part C19) should be Part C25, not A35 as shown in the directions. The antenna is a little thick and should be replaced with stretched sprue or wire.
I painted my tank with Tamiya dark gray (XF-24). For contrast, I added Tamiya IJN gray (XF-12) to the original color and dusted the top surfaces. I painted the turret interior Tamiya white (XF-2) and detailed with Humbrol, Vallejo, and Testors Model Master paints. The directions do not call out the detail colors; rely on the box art and your best guesses. Mig and Vallejo washes and dry-brushing finished up a minimal weathering application.
Dragon has you paint the props brass, but photos show them painted the same color as the tank. I did, however, show the brass by chipping the dark gray.
There are not many decals to apply. I chose the rising-sun option. Pictures show that along with vehicle numbers, but nothing is mentioned in the directions. The decals went down smoothly with Micro Sol.
It took 23 hours to build this kit, making it a good weekend build or change of pace. It measures favorably with references. There are good interior photos in the forum at www.network54.com, along with a discussion of the tank’s colors. Also, see www.dragon-models.com for pictures of the vehicle the kit was modeled after, under the heading “Project Peleliu.”


