
First up, the crew: The kit doesn’t provide figures for either the nose or tail turrets. Taking bits from my spares box, I cobbled together the tail gunner. Motor-tool surgery on his arms, hips, and legs fit him to the turret.

I modified the kit bombardier — seen here in his original position — to man the nose turret. For dramatic effect, I cut and repositioned his arms across his face as if he’s bracing for the impending impact. Milliput blended the new joins.

Monogram’s 40-year-old kit is a bit plain by modern standards, with no photo-etch (PE) or resin. But there’s interior detail that provides a good foundation for additional work. Historical accuracy wasn’t my primary concern when I started this build; instead I wanted to have some good old modeling fun, like I had enjoyed as a boy with old Monogram, Lindberg, and AMT kits. That meant not worrying about every detail. But I wanted to add some realistic detail and a sense of drama.

Using wire and solder, I added hydraulic and brake lines to the wheels and bomb bay.


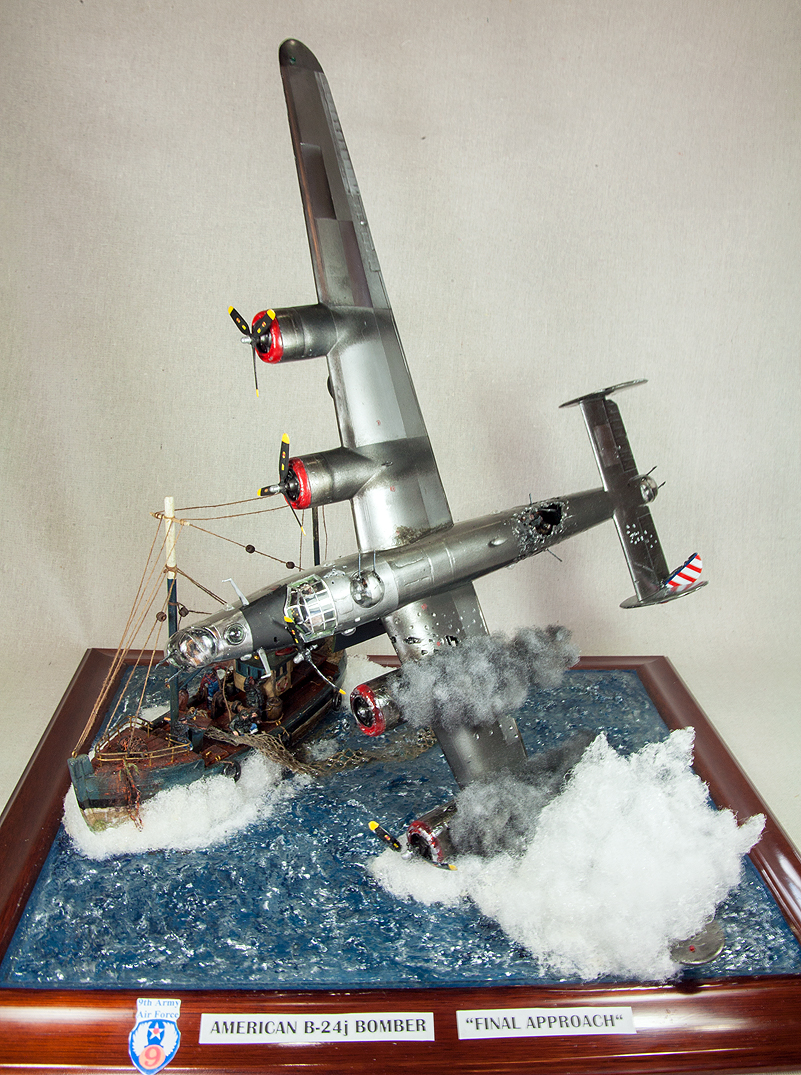
In the January 2017 FSM, I showed how LED tea lights and rayon fiberfill added fire and smoke to my diorama of a stricken B-24 plunging into the English Channel. I also put a lot of work into Monogram’s venerable Liberator and the base. Here’s the rest of the story.

I painted the medium with Vallejo Prussian blue and dark blue. Streaks of white and black hinted at depth. Several poured layers of EnviroTex Lite clear gloss followed.

Before finishing the sea, I carved a shallow trench in its surface with a No.11 blade and drilled two 1/4″ holes in the frame at the end of trench. I inserted two rectangular brass pieces bent into L shapes and epoxied them into the broken wing. More EnviroTex sealed the rods, permanently anchoring them to the base.


For the base, I used a mahogany-stained hardwood picture frame with white mat board stapled to the back. I applied Liquitex matte medium to seal the edges, then more in the middle with a little sea texture.

I painted the crew with shading and pinwashes. A drop of Pledge FloorCare Multi-Surface Finish (PFM) over Tamiya clear green acrylic provided realistic goggles.

I replaced the thick clear parts with a Squadron vacuum-formed canopy and side blisters to better reveal interior details. Eduard pre-cut masks made painting all that framing a breeze. I replaced the kit navigation and wingtip lights with clear plastic cut from plastic glue applicators painted with Tamiya clear red, green, or orange, and installed them with clear-part cement.


Verlinden .50-caliber resin machine guns and PE ammunition belts replaced the kit’s basic armament. I drilled out the resin barrels with a pin vise and installed PE sights.

It took multiple applications of Deluxe Materials Perfect Plastic Putty to fill the seam between the fuselage halves. I lost some panel lines in the process and failed miserably in my attempts to rescribe them.

After painting the floor and seats, I detailed the instrument panel dials with PFM for glass and added white-glue control knobs. Dry-brushed silver and flat black introduced wear, and a light enamel wash emphasized shadows.


The vessel still needed something, so I painted 1/48 scale resin fuel drums from Brengun and lashed them to the deck with more chain. Ammo oil and fuel stains and rust weathered the stowage.

For the upper layers of water, I applied two coats of Vallejo Water Texture with a 3″ brush. This stuff goes on white but dries clear.

Unable to find 1/48 scale fishermen, I settled on 1/50 scale truckers from Preiser. Milliput sculpted with dental tools created heavy coats, boots, and a hat or two, and soon I was looking at six hearty British sailors. The two-part epoxy putty also help reposition arms and shorten legs. (They appear too big next to the Liberator crew, so somebody’s math is off!)


The most intimidating part of the project was inflicting mortal damage to the airframe. I used a motor tool and tried to keep the havoc under control. My warning to myself was, “A few 20mm cannon holes and shrapnel damage go a long way, Bob.” That warning fell upon deaf ears, as you can tell. I admit that I may have overdone the fuselage damage a bit. Some readers are probably wincing and wondering how in the world the waist gunners survived that horrific fuselage damage and remained at their guns. I could say they were up front getting coffee and sandwiches when the plane got hit. Or maybe I’ll just chalk it up to artistic license.


Next, I stained the deck with a hand-brushed base coat of Tamiya clear orange. Ammo of Mig Jimenez brown enamel washes emphasized the planks as well as detail in the hull and bridge. I also used a wash of Vallejo desert yellow on the rigging for a hemp rope color. I hollowed out the smokestack with a motor tool and added a brass heat shield for the crew’s protection. Bracelet chain secures an anchor made from a triple fishhook to the bow. Dark brown earth Ammo pigment, painted with Tamiya clear green and rust shades from LifeColor, covered the anchor with rust and algae. Furthering the old, weather-beaten appearance, I added barnacles to the waterline with Ammo earth pigments and Tamiya clear green mixed with a touch of Tamiya olive drab and dark brown. I sealed everything with acrylic clear gloss.


Inspiration struck me one day at Hobby Lobby when I saw a prefinished fishing boat model, complete with nets, rigging, rubber inner tubes, and a fair paint job, all for under $25. It was close to the right scale for the B-24, and a little weathering would make it look less like a toy.

After trimming the boat at the waterline, I glued on balsa-strip decking and trimmed it even with the hull. The wooden cover with the rope attached is for the live well, which I filled with Woodland Scenics Realistic Water. Before the final pour, I added a couple of plastic charms painted with Vallejo acrylics to show the day’s catch.


For sea foam kicked up by the wing of the plane and the trawler, I used rayon fiber and clear gloss varnish as explained in Chris Flodberg’s terrific article, “Creating rough seas” (April 2016 FSM). The key is to take your time and thoroughly pat down and smooth out the fiber frizz or curls appearing in the water by adding several thick layers of clear gloss, either with a brush or spray can.

