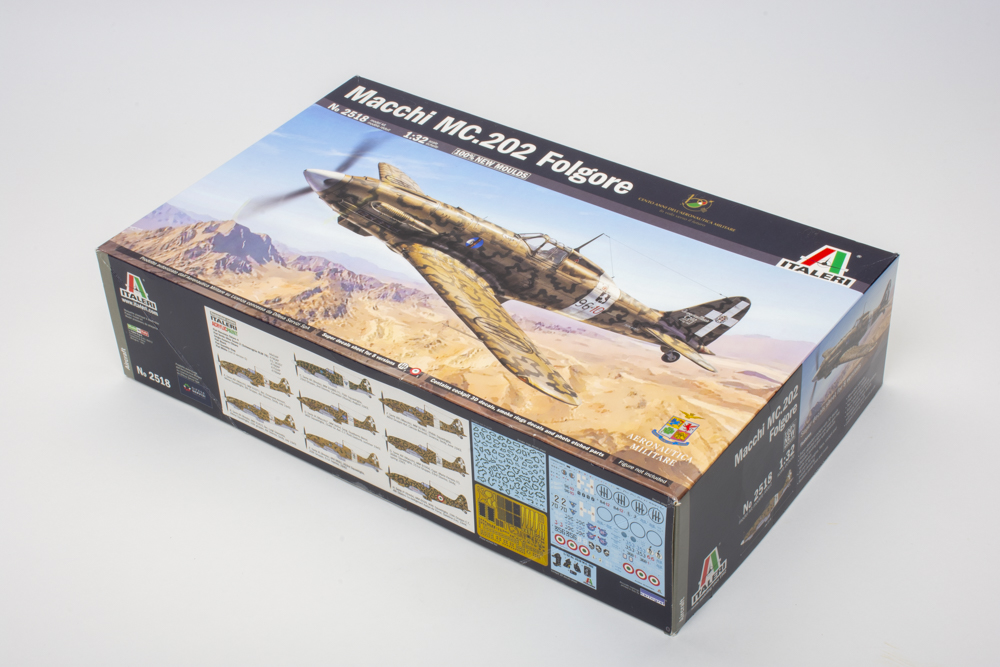
The Italians are known for designing good-looking machines and the Macchi MC.202 certainly qualifies. The all-new Italeri 1/32 scale Macchi MC.202 Folgore plastic model kit is loaded with extras and details and includes a fitting tribute from the Italian model manufacturer.
The kit’s design is straightforward, and the parts include the slightly longer port wing built into the full-size fighter to counteract the propeller’s torque. Some surface features, like the ribs on the control surfaces, are a bit exaggerated. The kit provides two sets of stabilizers and elevators, but interestingly, the “early” version is not used for any of the options. The instructions clearly point out optional parts, so you’ll need to decide on a scheme up front.
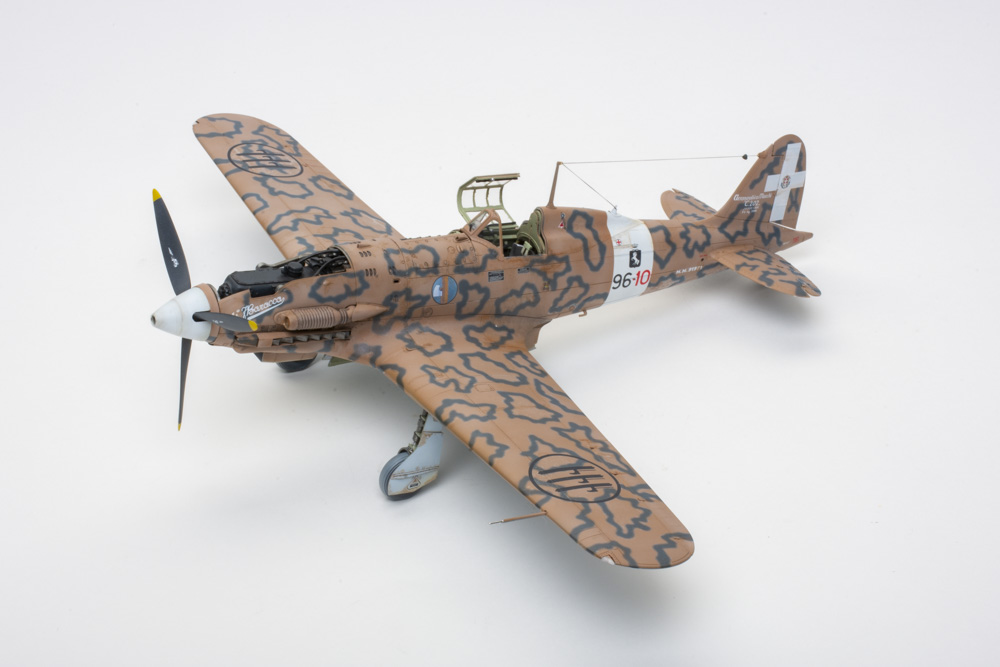
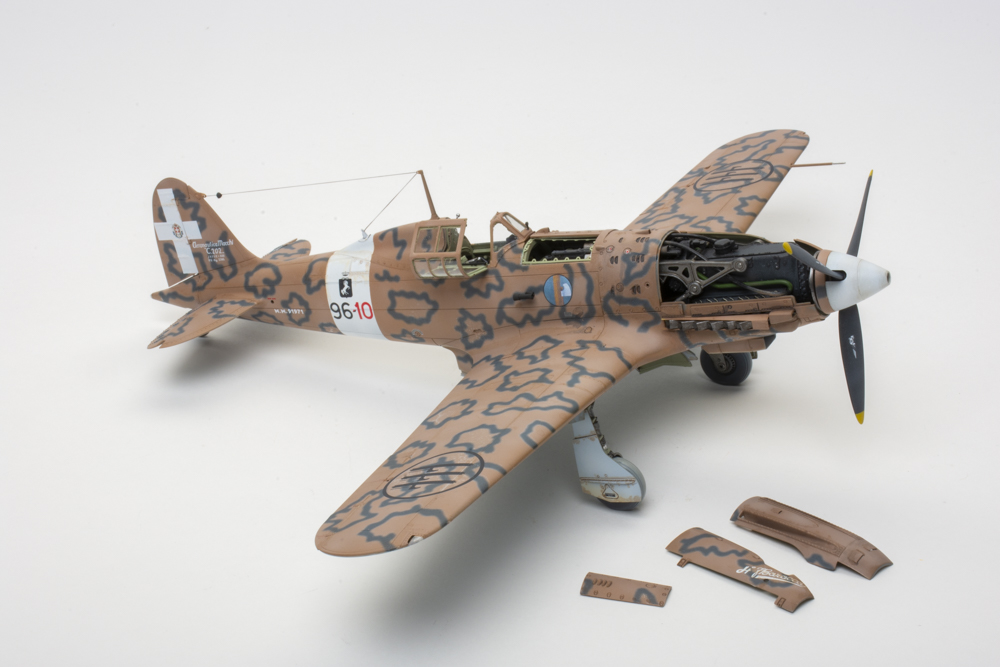
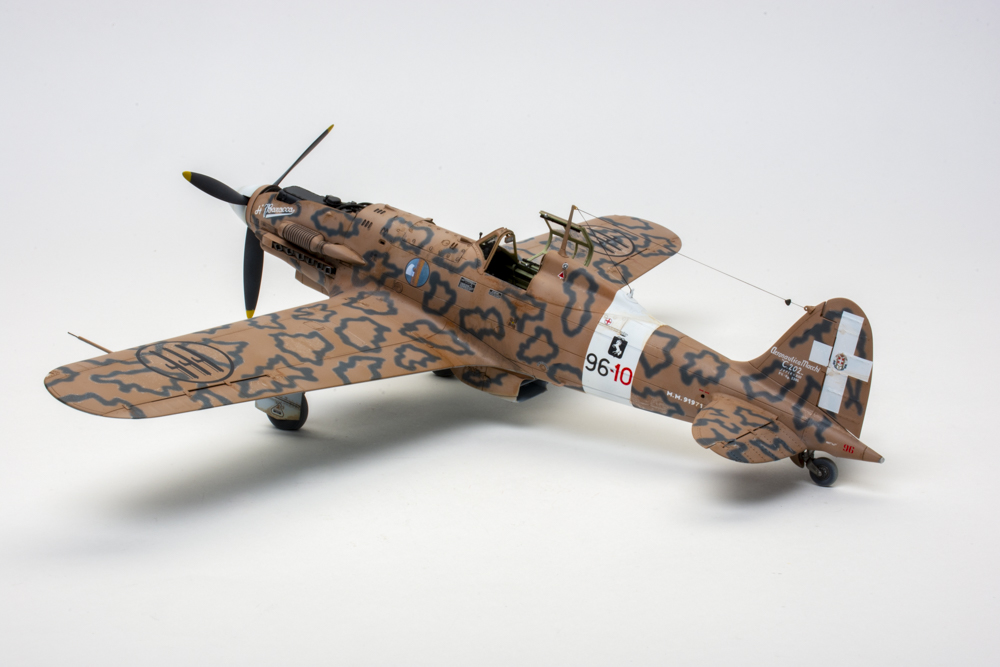
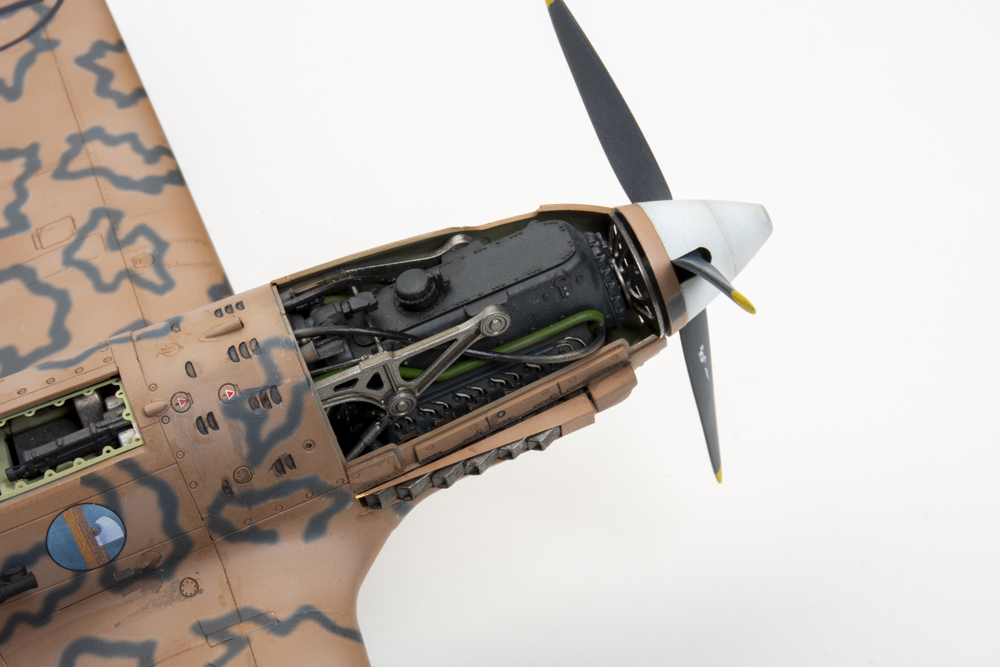
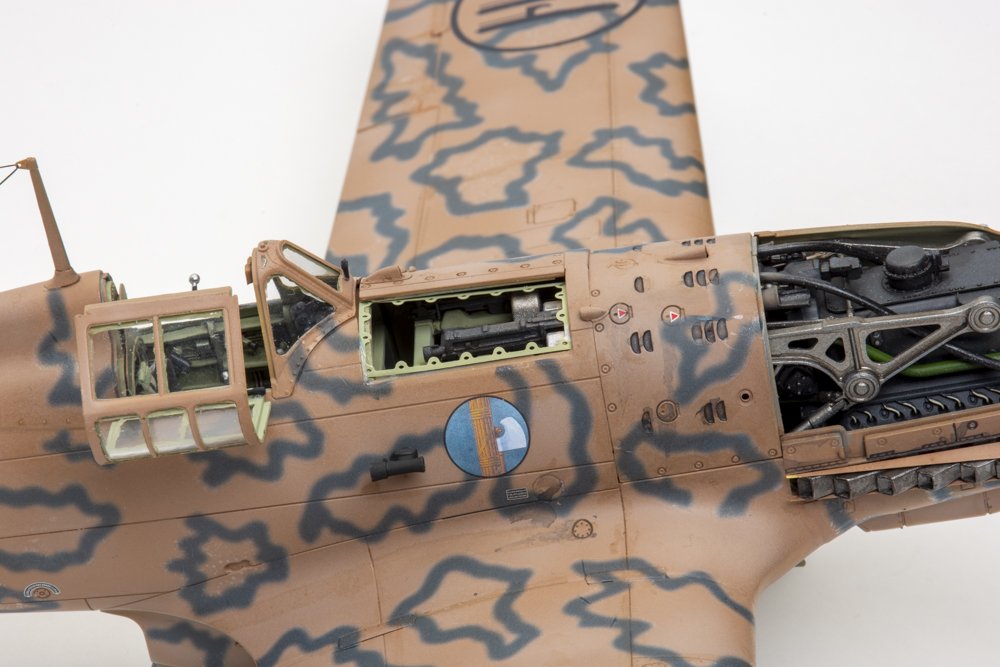
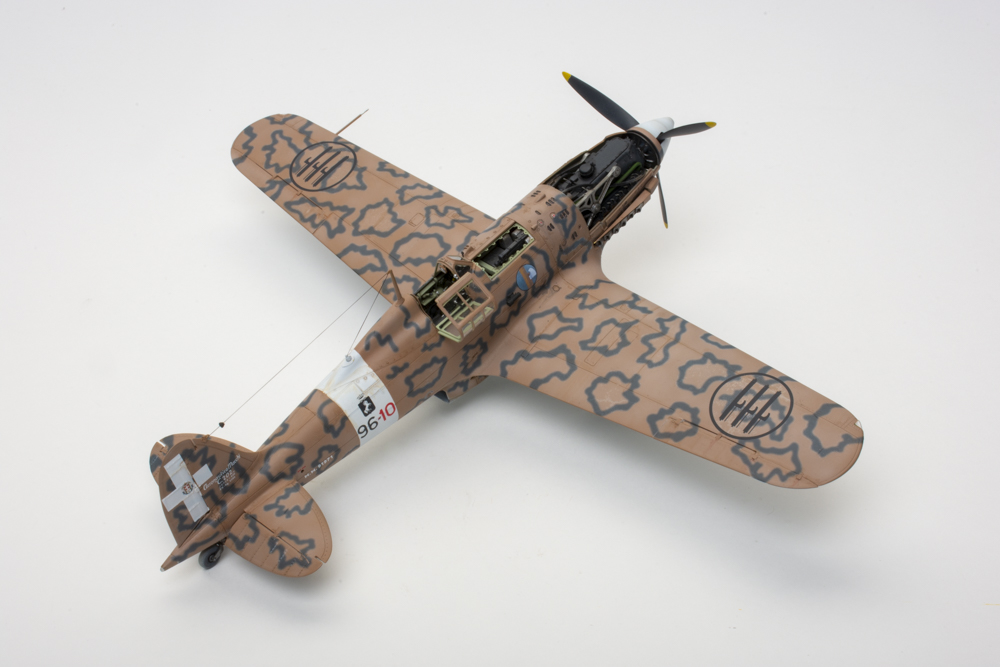
Italeri included a full R.A.1000 R.C.41-I Monsone, a licensed copy of the German DB601 V12 built in Italy by Alfa Romeo. The landing gear bay and cockpit brim with detail, and you’ll find no shortage of photo-etched metal (PE) items, some of which provide extremely petite fasteners for the many access covers — think teeny soda can tabs. Two sizes of vinyl hose and thin copper wire detail round out the parts, while the instrument panel comes as a series of 3D decals. Speaking of decals, there are eight marking options, along with a huge sheet of decals depicting the so-called Italian “smoke ring” camouflage.
Decide early in the build if you don’t want to display the engine, as this will save you significant work. The engine and the fully detailed firewall and wing spar assembly went together well, but the largest of the two vinyl tubes was too stiff to use. There isn’t enough of the smaller tubing to substitute fully, so I left off most of the lines.
Italeri has you build the main landing gear and install it next. Try as I might, I could not work around this early mounting, which complicates masking for paint. I was surprised by the imprecision of the gear bay liner fit (Part 17b). Ultimately, it was typical — the alignment aides employed by Italeri are a bit vague for some parts. Frequent test-fitting will solve this problem. Interestingly, Italeri has you install the “gun shelf” (Part 4b) hanging in mid-air off the back of the firewall, when they have molded perfectly acceptable guides into the fuselage halves. I added the assembly after installing the fuselage and firewall for a perfectly level fit.
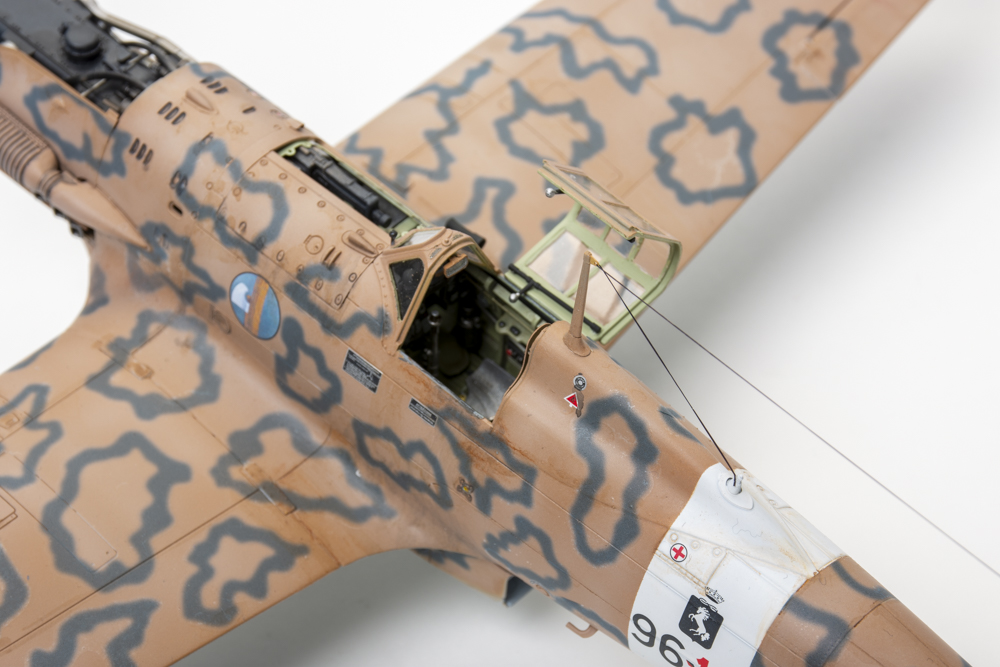
After much airframe work, assembling the cockpit begins with the instrument panel. I was excited to see 3D decals employed for added detail. Unfortunately, they all curled and ultimately fell off forcing me to glue them in place. Apart from that, the cockpit went together well. The fit inside the fuselage is perfect. Don’t forget to install the tailwheel fork before closing up the fuselage.
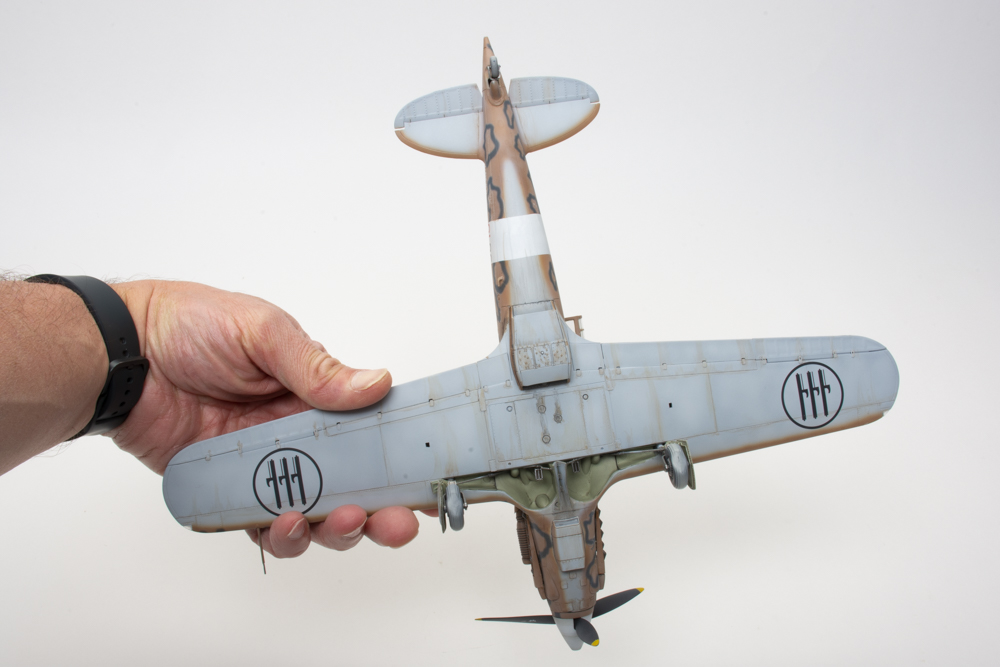
The wing-to-fuselage join is reasonable, leaving a gap to fill behind the wing root. The wings and tail surfaces have multiple PE fittings. Photo-etched parts also supply radiator and oil cooler detail. I left these off to ease painting.
The lower cowling molding is “soft” and, consequently, does not fit well. I had to trim the join between the cowling and fuselage to improve the fit. All the cowling panels have ejector-pin marks that need to be filled.
Pay close attention to the parts of the tail. The early version is on the main Sprue D and the latter is supposed to be on a small Sprue F, but that sprue has a molded “D” as well.
All of the gear doors were assembled and painted separately. Be careful because the second rib from the top of the main-gear door must be mounted as shown in the instructions or it will prevent the door from mounting to the gear leg. The separate exhaust stacks were problematic. I could not get them to slot in place without them dropping into the lower cowling, and I finally gave up, gluing them to each other with both resting on the slot in the fuselage.
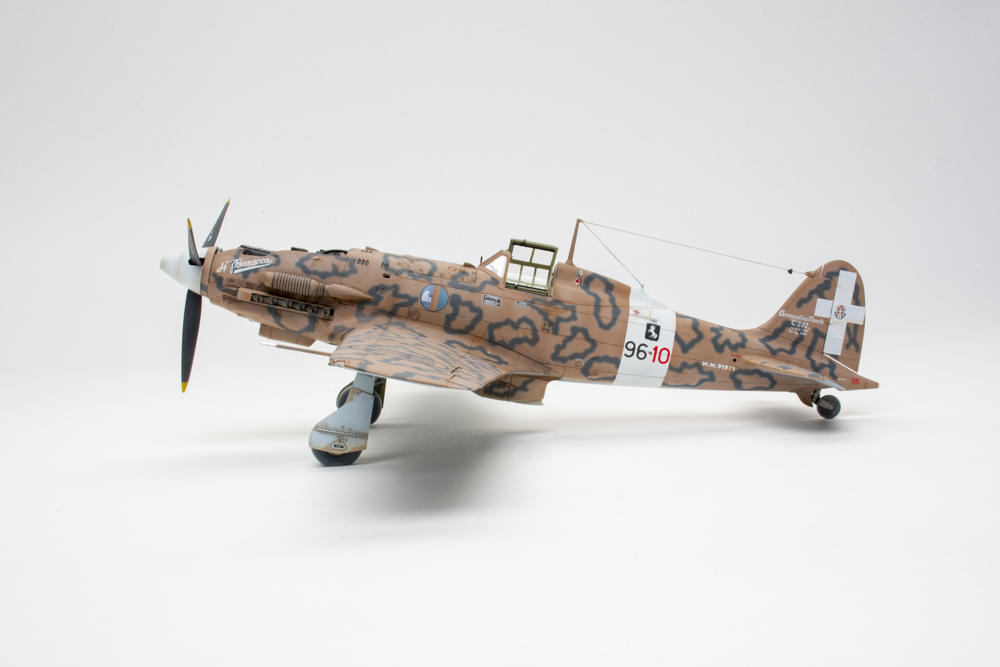
Painting the 202 is simplified by the included smoke ring decals for my chosen scheme. I carefully followed the excellent instructions provided by Italeri to apply the smoke rings over a gloss coat. Although they appear blue-grey on the sheet, applied over tan they turn the perfect shade of dark green. Well done, Italeri! The scheme I chose was for a Series XIII airframe, according to my references, not a Series IX. An easy swap of a decal from Version G solved the issue.
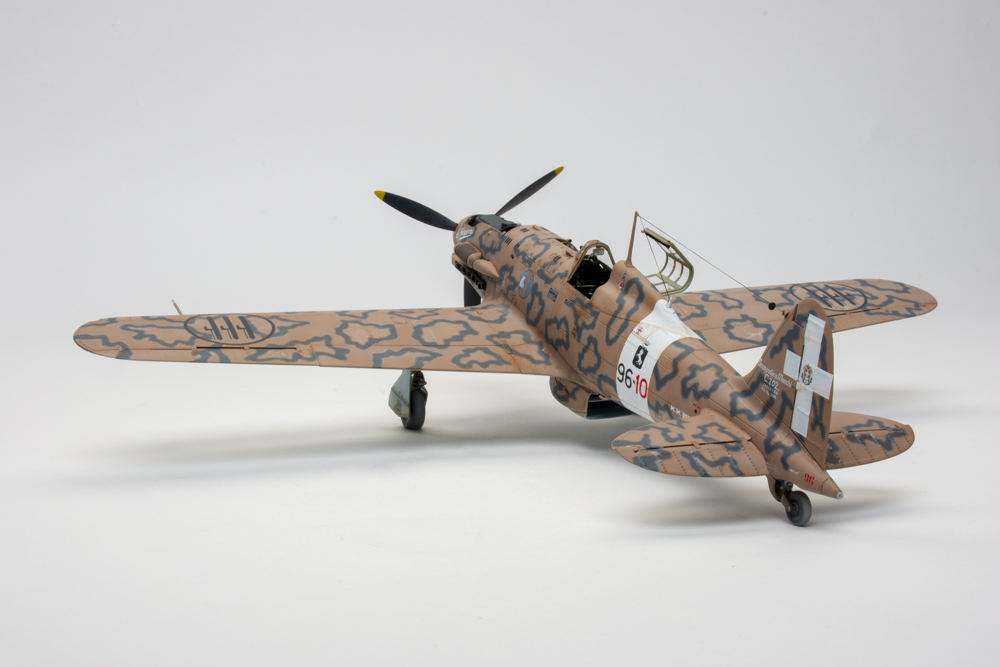
After painting and decaling, the final pieces were installed, and I made the antenna with EZ-Line instead of the included copper wire. I spent just under 44 hours on this kit, almost seven of which were placing decals. While it has some issues, the Italeri 1/32 scale Macchi MC.202 Folgore plastic model kit can be built into a sleek, stylish Italian thoroughbred.