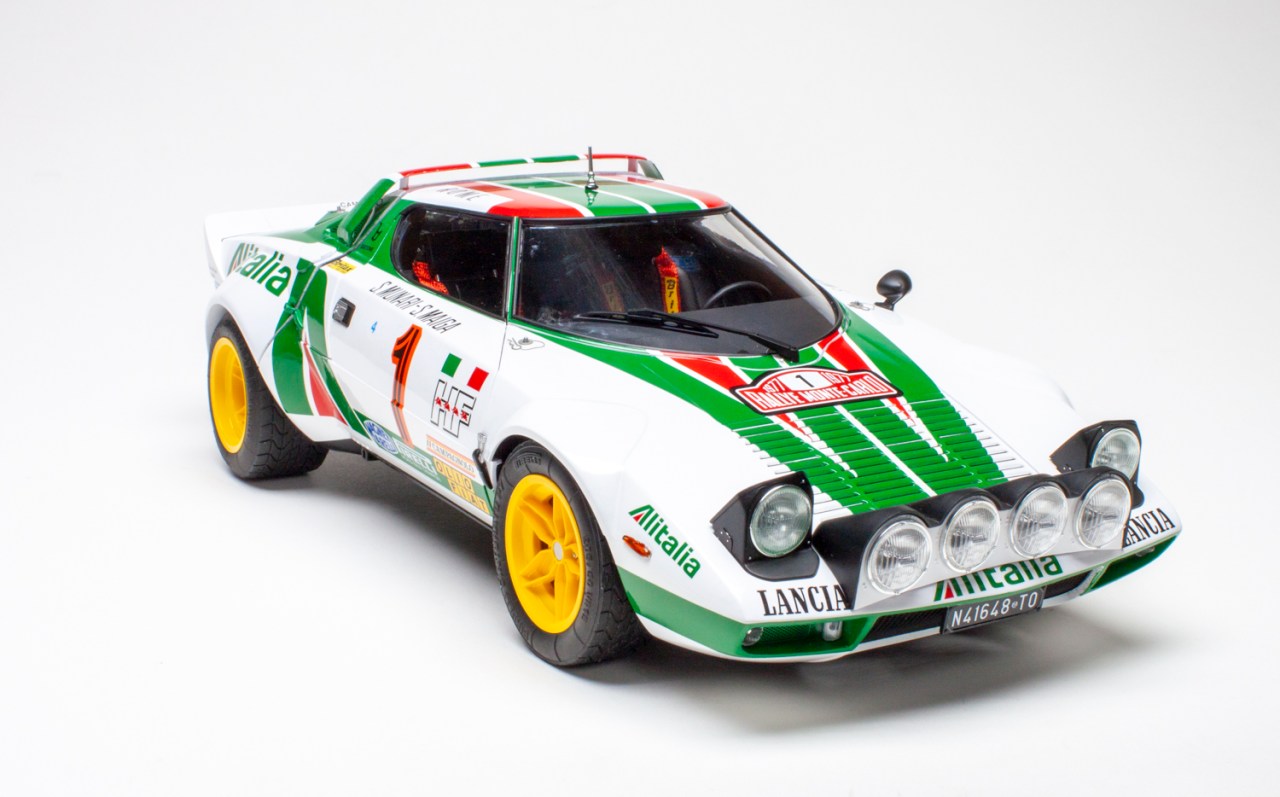
The Lancia Stratos is perhaps the genesis of the modern rally racing, purpose-built to dominate the sport with a 2.4-liter Ferrari V6 producing nearly 250 horsepower. Its lightweight chassis and sleek, Bertone-designed body won Monte Carlo, among many other races, in ’75, ’76, and ’77.
The newly tooled Lancia Stratos HF Gr.4 Monte Carlo 1977 becomes Italeri’s latest entry into its ever-increasing 1/12 scale lineup and is not a repop of the Doyusha kit. The plastic kit comes in a huge box packed with 11 sprues and a fret of photo-etched metal (PE), springs, vinyl tubing, ribbons for seat belts, and two large decal sheets. The instructions clearly cover assembly, but you’ll have to find good reference photos for painting — the callouts are sorely lacking on that front.
I started by thoroughly studying the instructions and gathering all of the components for the main chassis. Overall, I found the parts well-molded with crisp detail, although I had to fill a couple of sink marks on the bottom of the main chassis pan. After test-fitting pieces, satisfied I could build the complete chassis and still be able to fit all the other parts, I glued everything together and painted it with a Mr. Surfacer 1500 Black (No. SF288).
I deviated from the instructions slightly so I could build complete subassemblies, like the entire front suspension, instead of over the course of several disconnected steps. The suspension’s shocks proved difficult. The main shock body comes in two pieces, and the upper part with the shaft has a small barb on the end. Trying to hold the parts together while compressing the spring and hoping you don’t get any glue on the shaft so it still functions is tricky. The shocks on most 1/12 kits I’ve built assemble this way, but there just has to be a better solution.
Italeri provides ribbon material for the seat belts, along with PE buckles and adjusters. I found a heated knife blade works well to cut the ribbon cleanly and prevents fraying. Because the PE buckles are narrower than the ribbon, you will need to taper one end of each belt. Note there is only enough PE to make one four-point harness per seat, which I don’t believe is correct.. The dash looks good with decals for the gauge faces and toggle switches. Be careful, some of the toggle switches differ slightly in size. Clear gauge lenses are included and complete the look.
The kit’s Ferrari V6 engine is superb! I had no issues with the engine’s 72 parts, but you will want to test-fit before committing to glue because some of the parts have a bit of wiggle room. Again, you’ll want good reference photos for painting because there’s not much in the instructions. Find a flat surface for building the multi-piece block and heads to keep everything true and square. The kit supplies vinyl tubing for all the necessary plumbing and wiring. I replaced the kit’s thin spark-plug wire with some bead cord that looked more to scale to me. I also inserted bead cord into the larger vinyl tubing to prevent kinking on sharper bends. The instructions have you build the engine complete with exhaust headers before installing it into the chassis. You can do it, but you’ll face a really tight squeeze getting it in. I suggest leaving the rear header off until after you’ve installed the engine.
With the chassis complete, I moved to the body. It features several parts, including opening doors, rear deck, and a front clip make. The center section serves as the base for the rest of the build. Be careful when installing the windshield — there isn’t much surface for you to glue. I had an oops and couldn’t completely polish out the blemish.
While building the rear deck, I recommend leaving the louvers off until the deck is mounted to the chassis — this makes it easier to align the chassis pins (parts 17B and 19B) with the holes in the deck. The fender flares fit almost perfectly and needed no filler. From reference photos, the rear spoiler appears to be a separate piece and should not be blended into the body. Aligning the holes to attach the rear deck was tricky, the screw for the attachment is hard to reach, and keeping the screwdriver in the slot was frustrating. I have a fit issue that I’ve been unable to identify. Something prevents the deck from fitting tightly on the driver’s side.
If you use the optional front lights, be sure to drill the attachment holes first. When assembling the light pod, watch the part numbers — the reflectors and lenses look similar but differ slightly in size. To attach the front clip, I found it easiest to glue the upper hinge (Part 45D) to the radiator first and then snap the radiator into place. This captured the hinge pins without needing glue and eliminated the risk of seizing the hinge.
Decaling became a major task due to the way the body panels are split. I had to piece together decals (which are fabulous, by the way) so the markings looked correct because of how the panels met. Italeri includes extra green and red decal sections for touch-ups. I didn’t have the specified matching paints, but Testors Model Master Acryl Green (No. 4669) was close.
The Italeri 1/12 scale Lancia Stratos HF Gr.4 Monte Carlo 1977 plastic model kit isn’t a kit you’re going to finish off in a couple of weekends. It will take effort, but the end result will certainly make for a welcome addition to your rally car collection. It took me nearly four months to complete mine — a bit longer than normal. However, there’s a lot to work on. I recommend it for experienced modelers. Beginners and even some intermediate modelers will find it overwhelming. While working on it, follow your basic modeling practices, like test-fitting, and you will have a replica to be proud of.


