
There are many techniques for replicating damage in metal on scale models. But what if you want extreme damage, such as a tank hit with a rocket-propelled grenade? In this case, a good way to replicate metal damage is with actual metal.
Based on photos of a T-72 damaged by a rocket-propelled grenade, I removed a kit’s fender section and reworked the exhaust. The blast had ripped open the fender stowage bin and caused damage to the turret, too.

On the turret, I cut the mounting brackets off of the side stowage bin. A good portion of it will be missing from the blast, but based on reference photos, the mounting brackets remained. I removed the end of the rear turret bin.

I thinned the edges of the rear storage bin with a hobby knife to better represent scale-thin metal for the visible area.
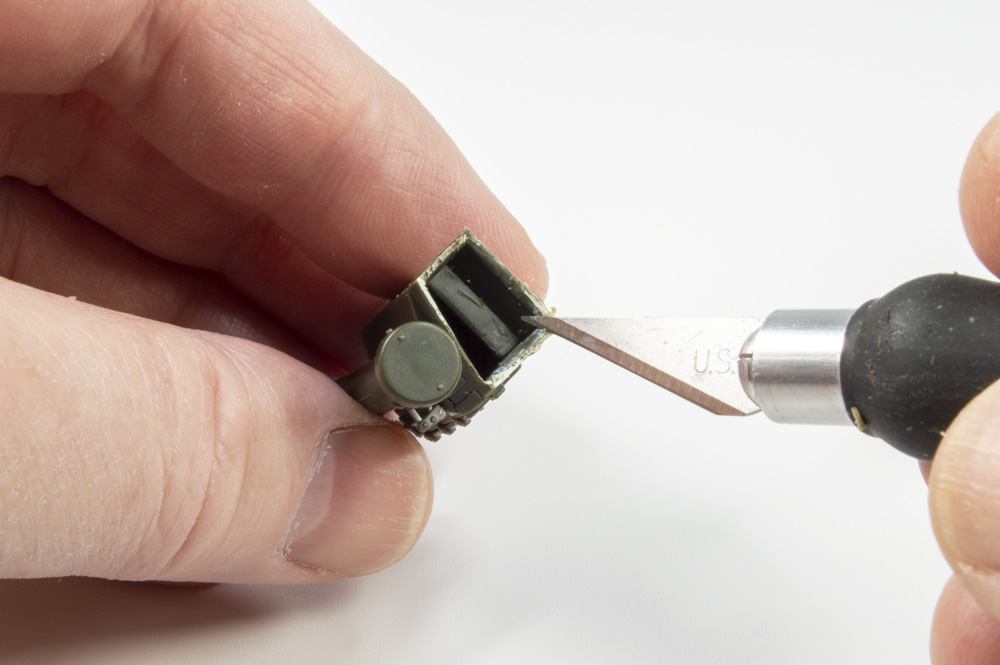
I also removed the mounting bracket from the panel of the rear turret stowage bin, which will be replaced with metal. I used this mounting bracket to attach to the metal piece and replace the plastic part.

Now, it’s time to start creating the metal pieces. I use tin/pewter metal foil from Green Stuff World. This is a thin, lead-free material that can be easily cut and shaped.

Using the fender section I removed earlier as a guide, I cut a piece from the metal foil with a straightedge and a hobby knife. The thin metal foil is easily cut with a sharp blade, but be warned that repeated cuts will dull the blade quickly.

For the remains of the turret’s side-stowage bin, I cut a section of metal foil and placed it over the plastic part. To replicate the strengthening ribs in the bin, I burnished the metal foil with a cotton swab, pressing the relief detail into it.

After bending the foil around the stowage bin and refining the shape to create what remained of the bin, I cut ragged edges with scissors to replicate burst and shredded metal.

To create the replacement panel for the turret’s rear stowage bin, I attached a piece of metal foil close to the shape and size I needed and trimmed the excess with a hobby knife.

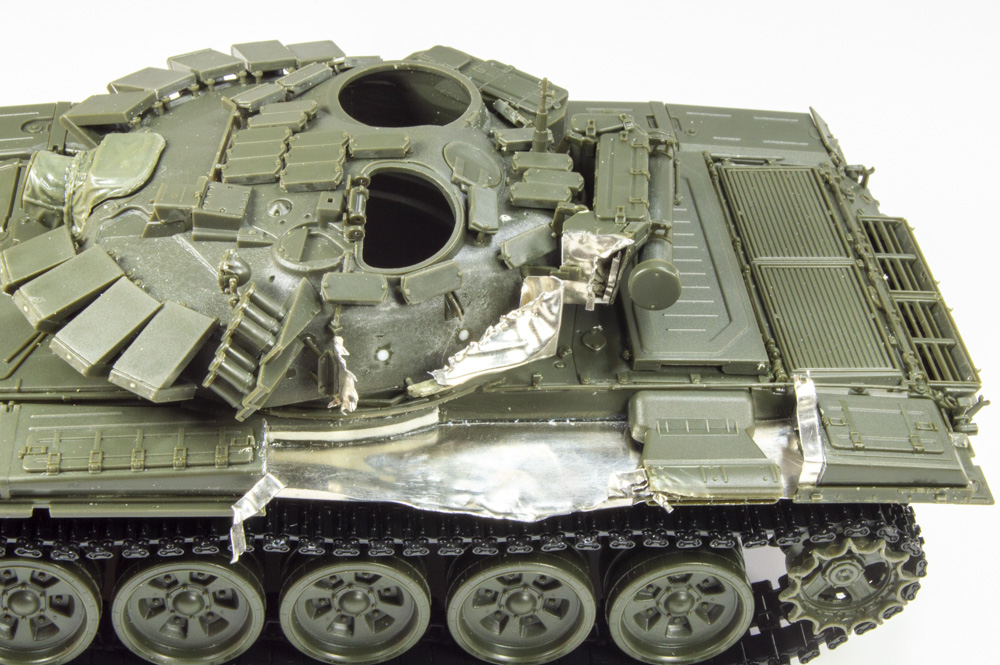
I attached the metal foil parts with superglue and did some final bending. I also created some brackets for the obliterated fender stowage bins, attached them, and bent them to replicate the damage I saw in reference photos. Here, you can see all the metal parts now in place.
Make sure to prime the metal parts before painting. I brushed on Tamiya Metal Primer (No. 87204) for this build.

After painting the model to match reference photos, the result provides a convincing depiction of damage caused by a blast that destroyed stowage bins but failed to penetrate the armor. In this case, I assume the crew had enough after this hit and abandoned the tank.
