Hero of the Doolittle Tokyo raid, the B-25 medium bomber was utilized through World War II and beyond.
HK Models has done a fine job reproducing this old warhorse for its first offering in 1/32 scale.
Injection-molded in medium gray plastic, this kit is loaded: The engines are kits by themselves, comprising 70 parts each with individual ignition wires, rocker covers, and exhaust pipes — lotsa parts! A detailed cockpit contains separately molded throttle levers, mixture controls, flap controls, etc.
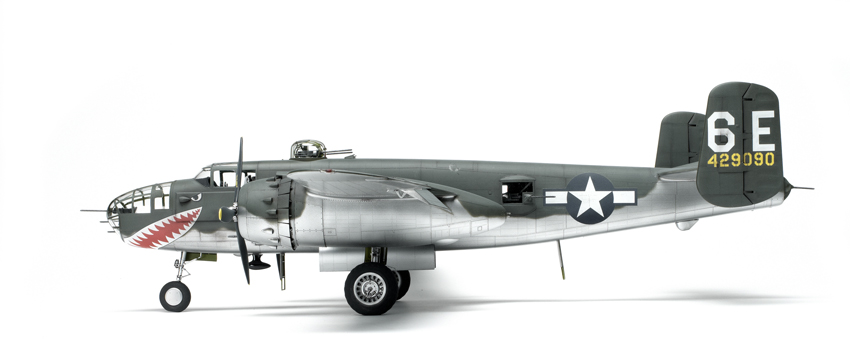
The bomb bay is complete with six 500-pound bombs. All the .50-caliber guns are provided, and the barrels are molded separately, so you can install them later without the worry of breaking them off during assembly. All the ammo cans and feed belts are included, too. There’s only one set of markings, but they’re sharp. The scheme is British dark green over natural aluminum with a big shark’s mouth.
Assembly starts with the top turret mount, which is fairly simple. Step 2 involves the tailgunner’s position. Follow the directions exactly. I tried assembling everything that is painted interior green and installing the guns later. It doesn’t work. The guns have to be painted and installed on part M42 in order to go together properly.
The cockpit is a complex affair because of the separate controls. The throttle levers could have been a little longer, but you can’t have everything. The instrument panel is molded with open dial faces to accommodate the decal instrument faces, which fit well on the backside of the panel. Photoetched-metal seat belts are provided. Though the instructions call for everything to be painted interior green, the seats should be aluminum, and the interior bronze green. All the clear parts had brilliant clarity and fit well.
Next, the bombs and bomb bay. Be careful with those bombs: Make sure the fins are at 90 degrees to the attachment holes on the bombs. I didn’t notice this, so my bombs are kind of cockeyed in the bay. Also, the bomb racks won’t mount properly on the bomb-bay sidewalls. The whole bomb bay should be painted aluminum.
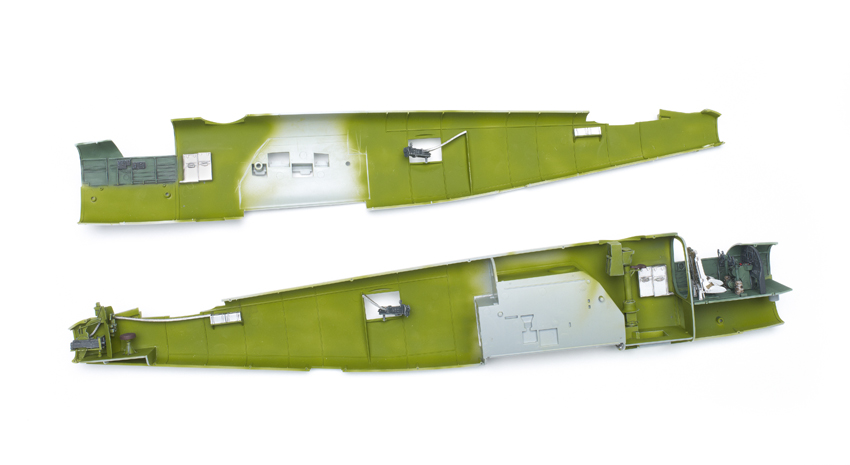
The rest of the interior assembly involves guns, ammo cans, and associated ammo belts. Again, the ammo cans should be aluminum, not interior green as directed. All the subassemblies fit nicely between the fuselage halves. A little filler will be needed in spots along the fuselage halves, but nothing drastic. The tail assembly goes together easily with no gaps.
The wings come with separate control surfaces. They provide retractable fairings when the flaps are down. Unfortunately, the flaps have a sloppy fit and need to be glued solidly or they won’t stay on. The inner flap, which is supposed to snap into place when the wing is installed, won’t stay in place at all. I had to glue it solid and shim the inner part of the flap with .040″ styrene strip in an hidden spot underneath to get the proper gap between the wing and the flaps. If I were to do it again, I’d just glue them up and locked.
Now for the engines: These things are little jewels. A bit of assembly is involved, but it’s fairly easy if you take your time.
Steps 19 and 20 include the reduction-gear housings, ignition-ring cylinder rows, push-rod guides, and intake manifold, all keyed so they slide together easily. It should be idiot-proof. But I managed to beat the system, because the reduction-gear housing and ignition ring ended up a half cylinder off. Ironically, everything else lined up properly — probably something I did. Just follow the directions carefully. The ignition wires fit perfectly, even with my boo-boo. Careful with the push-rod covers: They are sided, or directional.
After the engines are complete and installed in the cowling framework, the exhaust pipes and cowling panels go on. The instructions have you glue all the exhaust pipes, then the cowling panels. This may cause some misalignment if the glue on the pipes sets too quickly. I installed two pipes, then the corresponding cowl panel. That way, everything remains adjustable. Just work your way around the assembly and everything will line up properly. And the cowling panels all lined up with no gaps — great setup!
The propeller blades are a little like paddles; Relish Models has released a set of resin replacements (No. RR05).
The engine nacelles go together and attach to the wings without a hitch, just some blending on the top rear attachment point. The fire wall has molded flap actuators, but they are too short, aren’t at the right angle, and they tend to snap off with handling. But once they’re painted, they aren’t really that noticeable.
The bombardier/gunner’s position went together easily. All the guns’ ammo cans and belts lined up perfectly.
Here’s a shocker: The instructions call for 80 grams of nose weight. Hang on — try 195 grams. And that’s just to get the plane to balance without overloading the nose gear. I put weight in every conceivable nook and cranny — both sides of the nose-gear strut, under the bombardier’s floor — I even stuck some 1⁄16″ steel discs from an pair of ankle weights in the ammo cans’ cavities.
The wings, designed to be detachable, are very tight as provided. I couldn’t even get mine to snap into place. So, I filed down the locking studs on the fuselage to ease the fit. It takes some doing, because of the location, but it works.
The decals went down without a problem, completing an interesting scheme.
It took me 47 hours to build this bomber; 10 just for the engines. A few years of building experience will help the modeler, just because of the complexity of some of the assemblies.
Now I will wait for the 1/32 scale B-17. Yippee! I get to build four engines.
Note: A version of this review appeared in the November 2012 FineScale Modeler.