Ed.: Dan Jayne appeared in FineScale Modeler’s pages numerous times between 2004 and 2016. Famous for his cutaways of aircraft, Dan was an exceptional scale modeler who wasn’t bound to a single subject but built a range and was an early adopter of weathering that showed the effects of extreme conditions, for instance, sunken ships or destroyed armor.
Scouring the FSM archive, we discovered several Dan Jayne articles we weren’t able to publish before his death. To kick off our new Scale-Modeling Legends series, we’re going to show those articles in full, with minimal editing, to preserve as much of Dan’s tone and sense of humor as possible. (Warning: mention of suicide in this article.)
When committed to the front in April 1918, with the tide of aerial warfare running strongly against Germany, the Fokker D.VII revealed standards of controllability that were to become legendary in the hands of pilots like Bruno Loerzer, Rudolf Berthold, and Hermann Göring. Not the fastest or most maneuverable fighter, the D.VII was certainly the most effective. It was said the D.VII could make a mediocre pilot good and a good pilot an ace. Perhaps an exaggeration, the D.VII was certainly an outstandingly easy airplane to fly—very forgiving and responsive. It could hang on its propeller at 45-degree angles and remain a stable gun platform.
Fokker and Albatros produced 722 D.VIIs. It was powered by a Mercedes D3 six-cylinder, inline water-cooled engine that produced 160 horsepower with a max speed of 115 mph. Fully loaded, a D.VII weighed about 2,000 pounds, armed with two 7.92 Maxim light machine guns.
When building World War I cut-away projects, I prefer Revell 1/28 scale kits from the 1960s, like the Fokker Dr.I triplane (see FineScale Modeler November 2006). I searched the ends of the earth looking for the Revell Fokker D.VII (No. 85-4665) and couldn’t find it. After several years, I spotted a kit at my local Hobby Hut in the used-kit pile. The box was beat to hell—yellowed, faded, and only $15.
Yes! All of the parts were there; even the decals looked usable. The kit even had an engine. Life is good!
I dumped all the parts out on my workbench and behold! They formed the perfect images of the Virgin Mary! (But that’s another story — I still have nuns knocking at my door.)
Looking the parts over, I quickly found numerous inaccuracies in the kit, but all in all, it looked close enough to a D.VII to suit me. The fuselage was a little fat; the propeller was a tick long; and the top wing drooped a little. But I ignored these little bugaboos and dove into the main construction areas that I had to either replace with scratchbuilding or simply improve on.
Being a cutaway project, I cut off both port-wing panels and drew plans for spar and rib locations. I cut the ribs from .30-inch styrene sheet. The completed skeletal wing panels were mounted to the kit panels. Internal bracing wires, aileron cables, and pulleys were installed after painting.
The Fokker D.VII fuselage was a bit wide, but not wanting to open another can of worms—and with enough going on already—I let it slide. You gotta do that sometimes.
Or you’ll go crazy.
Using my rotary tool, I routed out the cutaway areas, choosing to expose the internal spaces of the aft fuselage, cockpit, and engine. Starting at the aft fuselage and referring to the illustrations in An Illustrated Anatomy of the World’s Fighters (by William Green and Gordon Swanborough, Zenith Press, ISBN 978-0-76031-124-0), I scratchbuilt the tail skid assembly. The tubular steel frame was replicated with .30-inch styrene rod detailed with silver thread for bracing wires. The many cockpit fittings, control panel, main fuel tank, and ammo can were all scratchbuilt.
I used the kit’s seat, floor, and aft bulkhead, but modified each of them to suit my purposes. The nose area was detailed inside, and the kit engine, as nice as it was, got the spark-plug treatment and further details. I found the engine sat too low, so I shimmed the cylinder bank with .40-inch styrene sheet and raised the cylinders and exhaust pipe up out of the cowling to the right height.
I cut out the front of the radiator and installed a mesh screen and scratchbuilt a radiator to be mounted behind that.
That’s called opening a can of worms.
All of these subassemblies were painted, installed to the starboard fuselage half, and the fuselage halves were glued together, trapping all that cool-looking stuff inside. At this time, all of the exposed internal areas were taped off for painting the fuselage exterior. The rudder and elevator cables were installed later, after painting.
I simply cut the port side of the elevator off, traced around it, and made a new one from .20-inch styrene rod to simulate the steel-tube construction. I sanded the left side of the rudder and fin smooth and glued .20-inch rod onto the parts.
I painted the propeller Testors British Gulf Stone, laid it flat on my work surface, and slid a fine-tipped pencil along the blades, leaving a nice line. Shim the pencil up and repeat five times for a layered laminated effect. I brushed these layers with Testors Rust. After two coats of Tamiya Clear, I applied the prop decals.
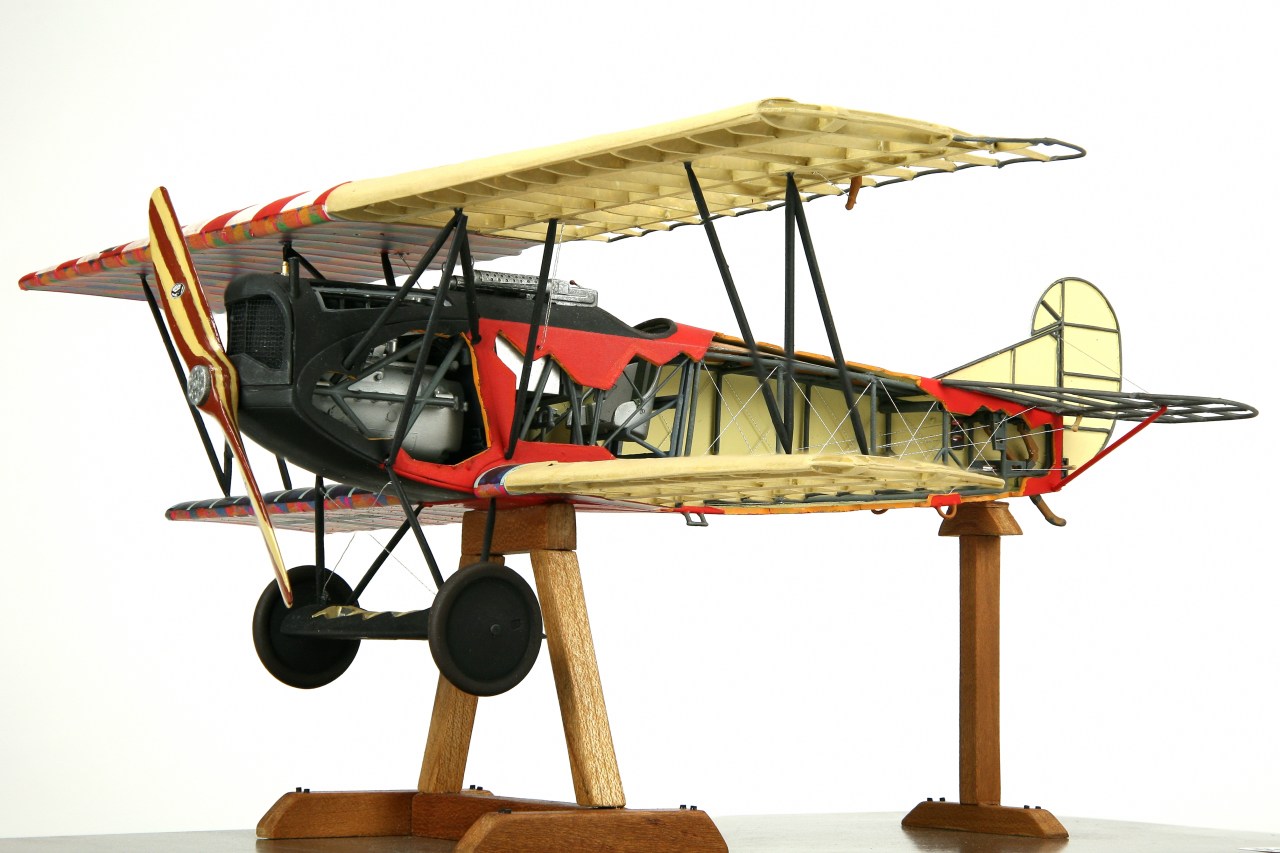
Color schemes for a Fokker D.VII are endless, and sometimes downright bizarre with fantastic colors and markings. They didn’t call it a Flying Circus for nothing. I chose to paint this Fokker D.VII biplane in the colors of Ernest Udet of Jasta 4, 1918. Udet was the second highest scoring German ace with 62 victories. He survived the war, got a job in Hitler’s Luftwaffe, and worked for Göring. When things got too much for him, he put a pistol to his head and committed suicide in 1941.
Looking at color drawings of his biplane, I painted the top starboard wing panel with red and white stripes. The bottoms of both starboard wings and the top of the upper starboard wing were covered with Battle Axe lozenge camouflage decals. Blue and red pinking tapes were applied over each rib by hand with airbrushed decal material.
The Fokker’s nose, landing gear, and struts were painted flat black and dry-brushed gunship gray. The aft fuselage was sprayed with Testors Flat Red. Udet’s biplane had the phrase “Du Doch Nicht!” in white letters on the elevator with a white stripe on the stabilizer.
Udet had his girlfriend’s initials on the fuselage sides below the cockpit in white letters. I applied these markings with white decal material. The German crosses were kit decals.
Pastels and chalks were used to weather the airframe. The tape was then removed, covering the internal areas, and any overspray was touched up with a brush. The cutaway edges were brushed flat orange. I sprayed the model with Testors Dullcote to level everything out and blend the colors.
This was fun!
As fun as building the Fokker Dr.I triplane was, it also looks great sitting in my display cabinet. It was a simple project—only five weeks. I now have the complete Revell 1/28 scale collection to finish, the Spad and the Sopwith Camel. Stay tuned. But first, there’s that Trumpeter MiG-21. I’d have to scratchbuild an engine for it. This hobby is a blast.
Have fun.
Build a model!
Photos by Chuck Stewart