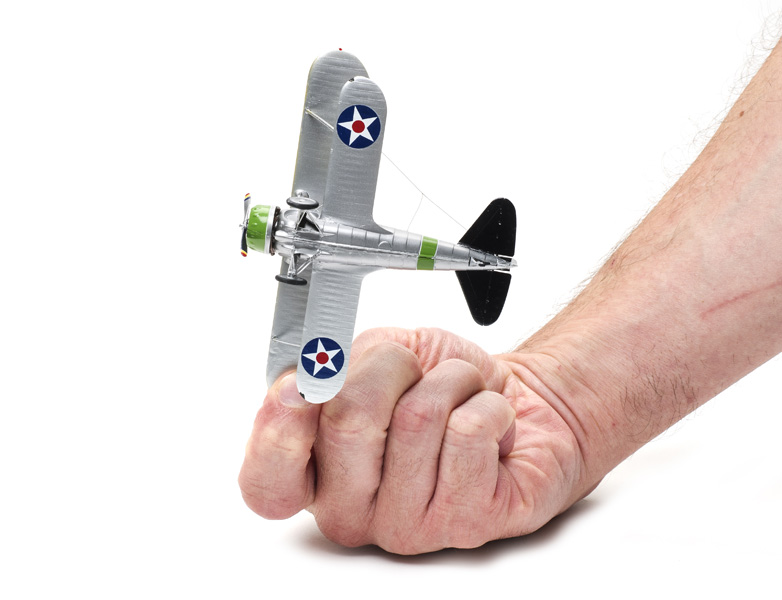
Grumman’s portly F2F biplane fighter was a follow-up to its initial two-place FF-1/SF-1 fighter/scout. As such, the F2F was the first U.S. Navy single-seat carrier fighter with an enclosed cockpit and retractable landing gear.
Attack Squadron’s release (it also makes the fighter in 1/48 scale) is a well-cast resin kit with photo-etched brass details and a one-piece vacuum-formed canopy. The part breakdown and assembly engineering is brilliant, taking cues from the classic Monogram biplane kits with cabane struts molded to the forward-fuselage upper deck.
Minimal cockpit side wall detail is molded into the fuselage halves. The cockpit tub includes fore and aft bulkheads and fits perfectly into the fuselage. The separate seat receives a pair of PE seat belts that are too short.
The instructions use a soft blue tint to indicate bonding surfaces between parts in each step, but in a couple of steps these tinted spots go awry or are hard to see.
The molding of the cabane struts with the fuselage and depressions molded into the separate lower wings and one-piece upper wing really make the assembly of this biplane quick and easy. After studying photos in Grumman Biplane Fighters In Action (Squadron/Signal), it seems that the kit’s locations of the interplane N struts are too far outboard. I moved them in 5mm, but it’s difficult to tell for sure what is right.
The most difficult part of the project was installing the landing gear. The main strut and wheel are resin parts, but the retracting mechanisms, small doors, and reinforcing plates are PE and must be folded, curled, and glued to the struts and fuselage. Although the assembly diagrams are adequate, it takes a lot of careful handling and fitting to get them positioned properly. Complicating matters, super glue or epoxy is required as typical plastic cements have no effect on resin and metal.
Another complication is the propeller, molded with a separate hub and blades.
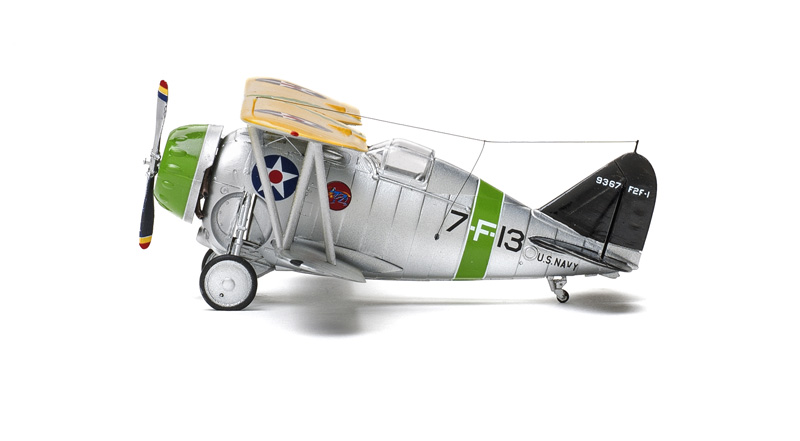
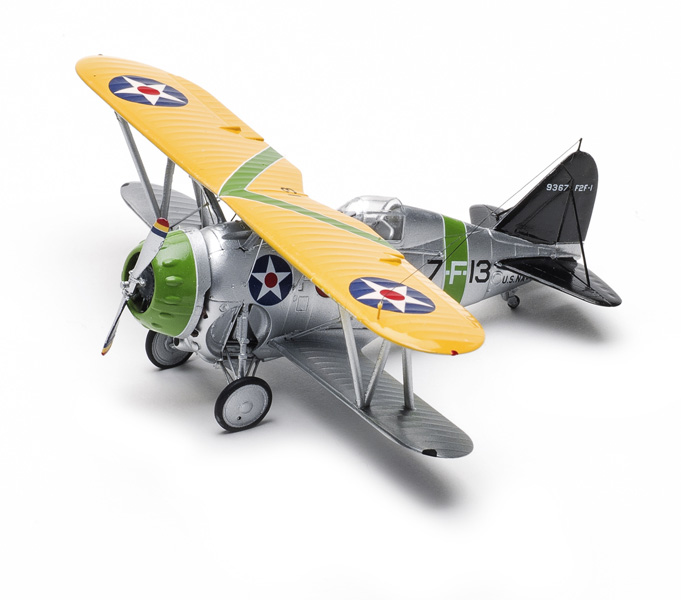
I predrilled holes and threaded monofilament fishing line (.2mm) for the rigging. I then painted the entire model with Alclad II aluminum (rigging and all). I used Testors Model Master chrome yellow for the top of the upper wing. The decals went on fine.
The vacuum-formed canopy seems a bit big when closed. I may try to open it later by separating the windscreen.
The finished model looks right. It took 34 hours to complete; a lot of that time went into fussing with the landing gear and rigging. If reading resin and biplane in one
Note: A version of this review appeared in the January 2017 issue.