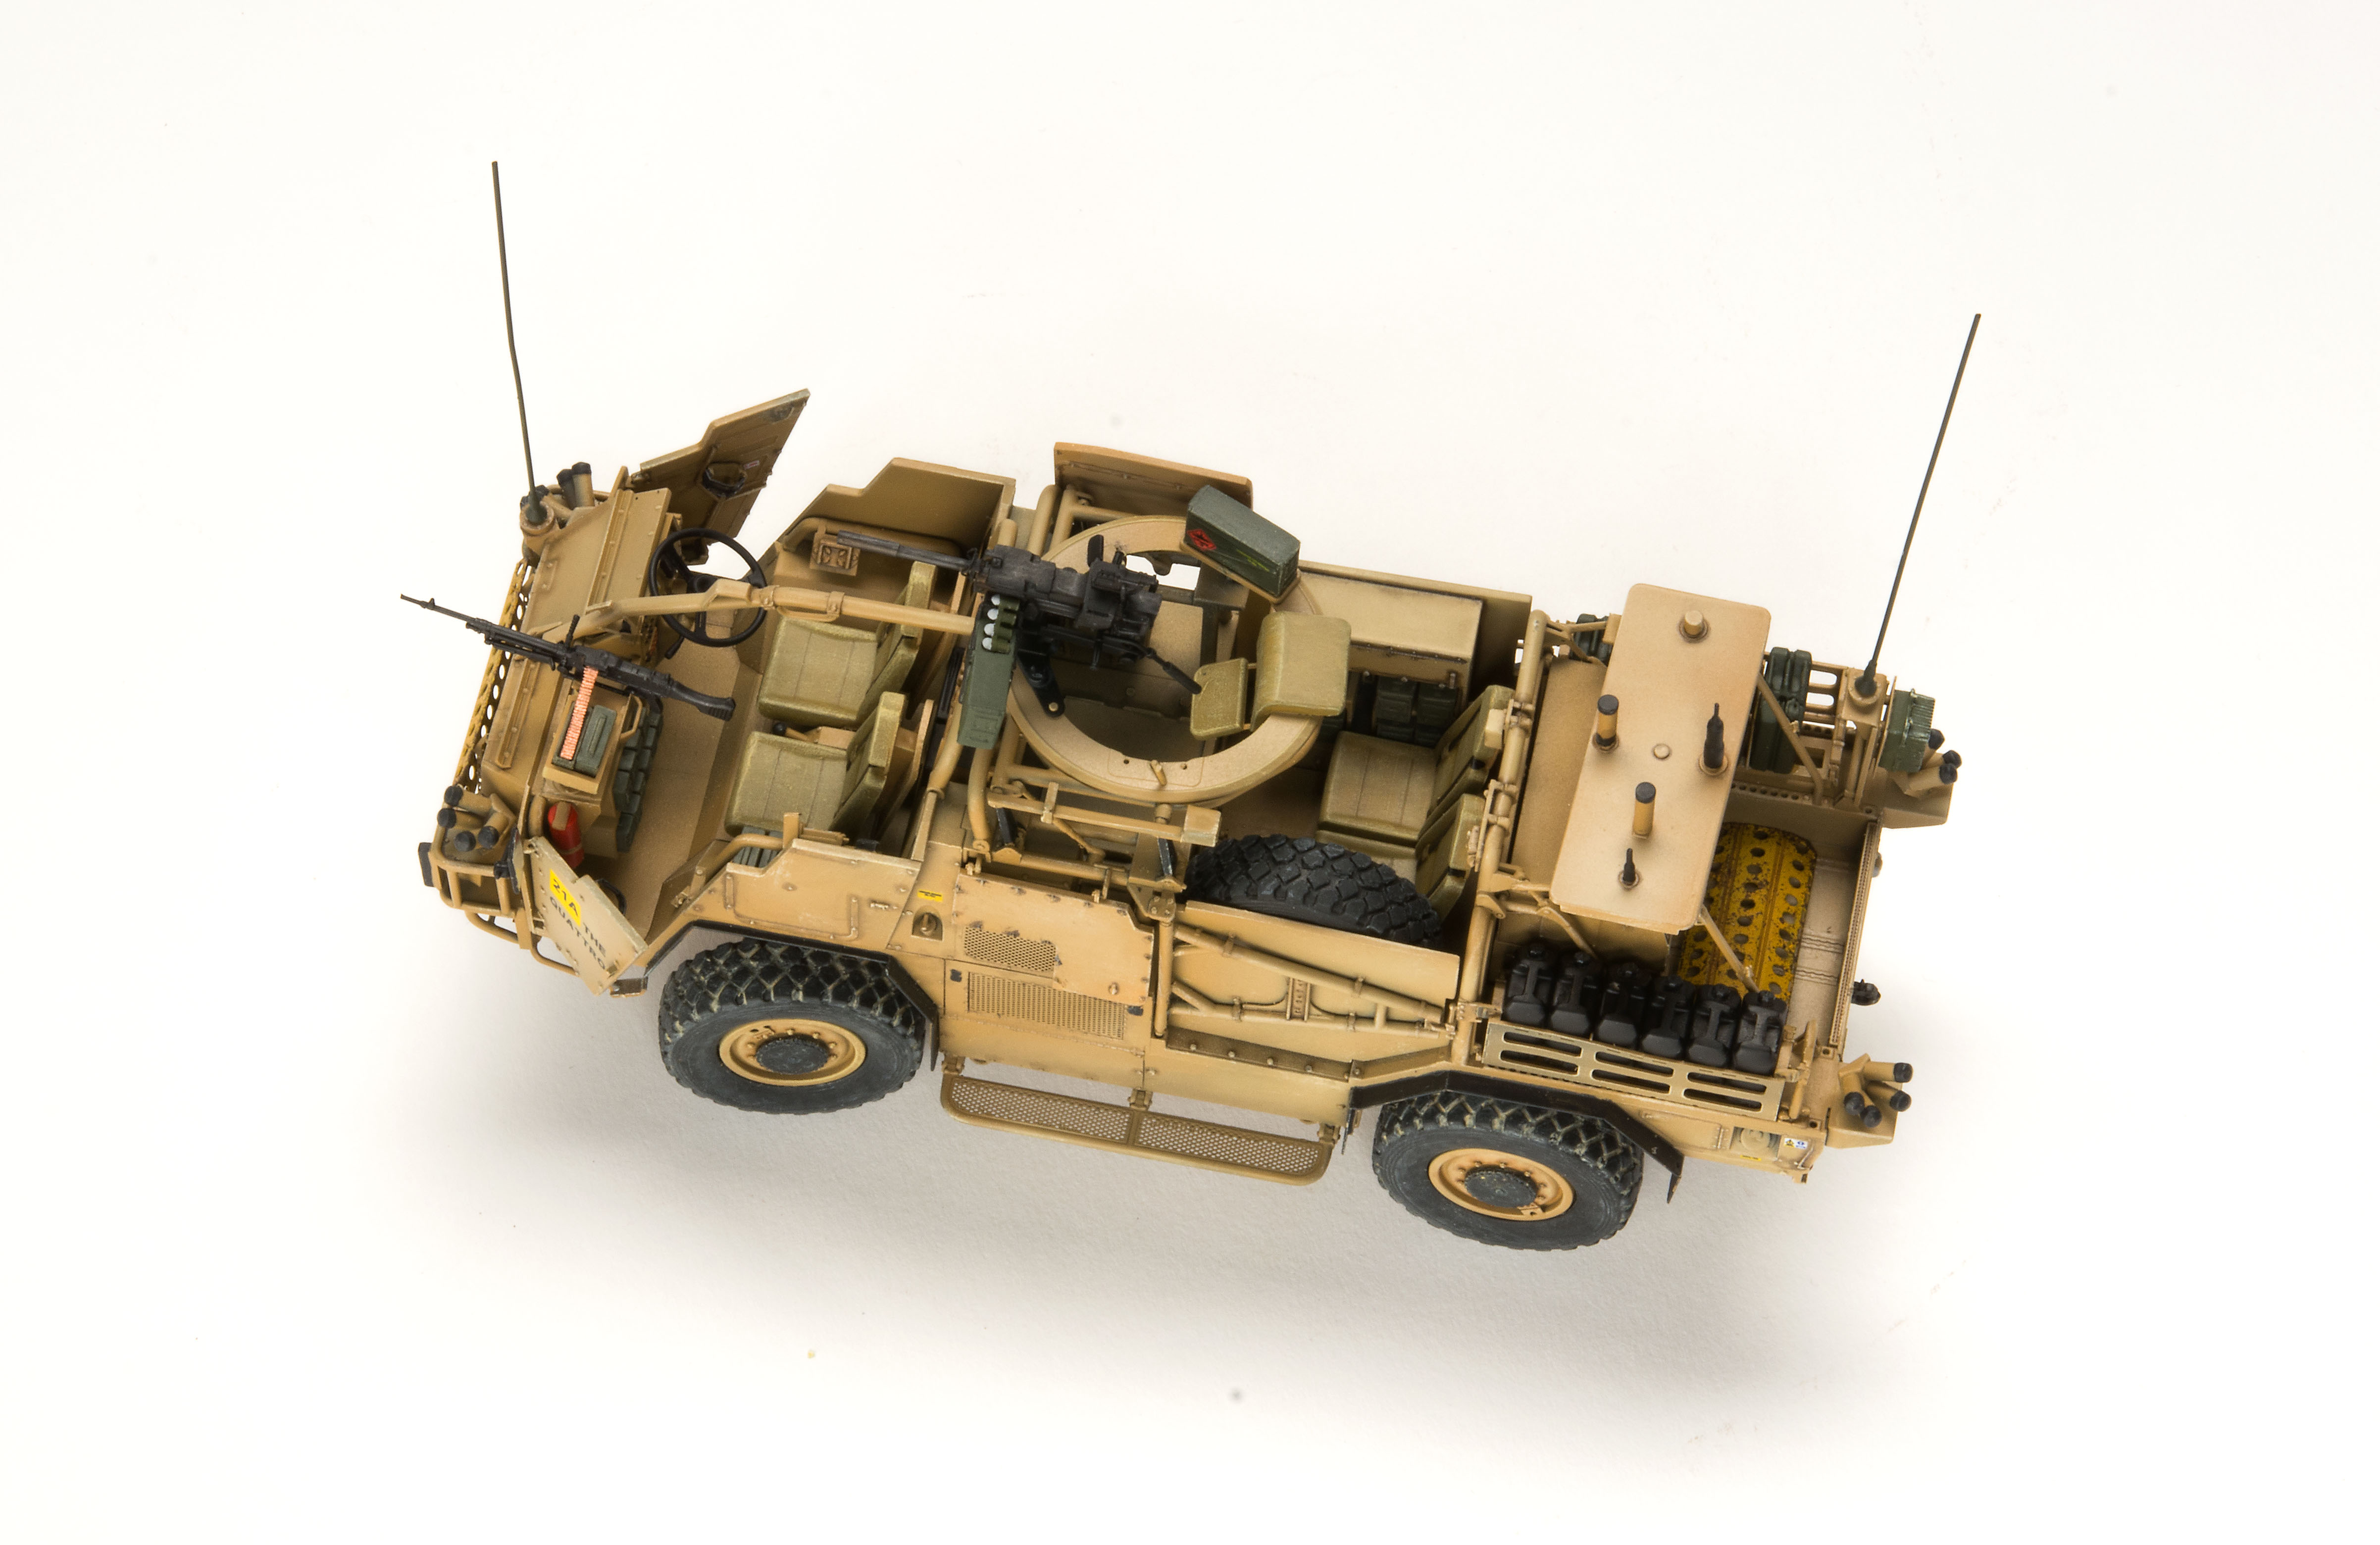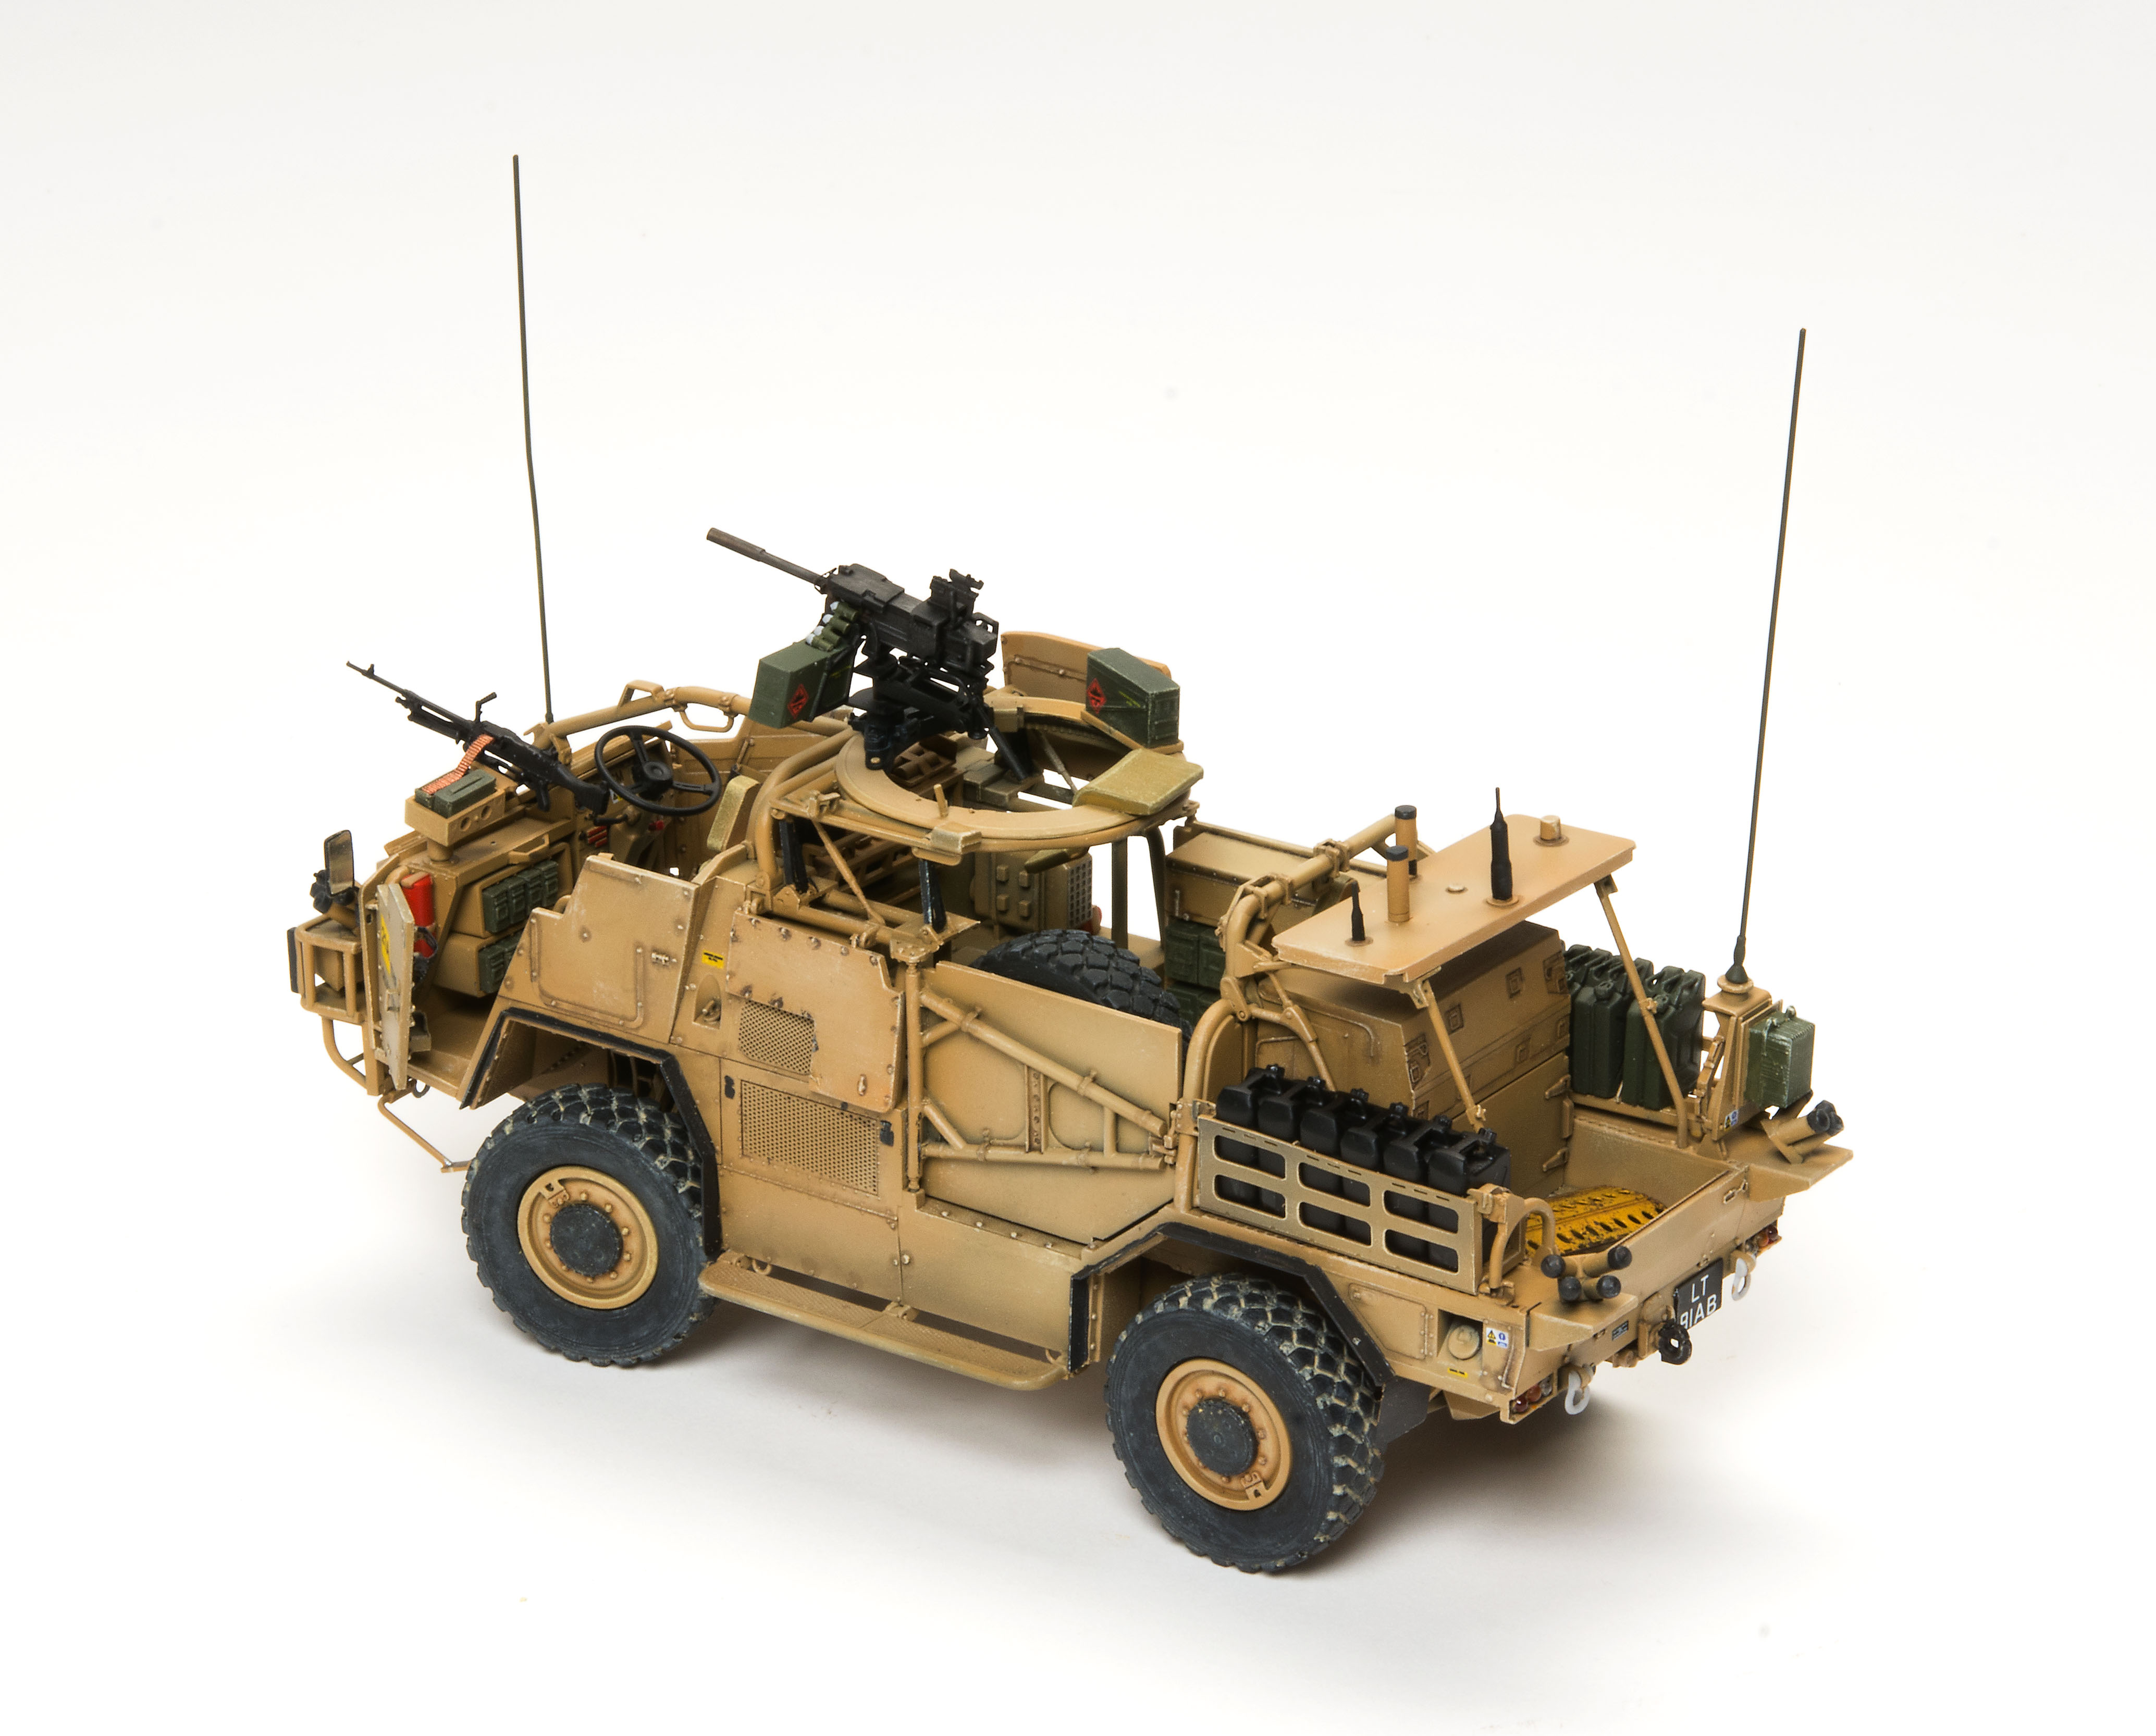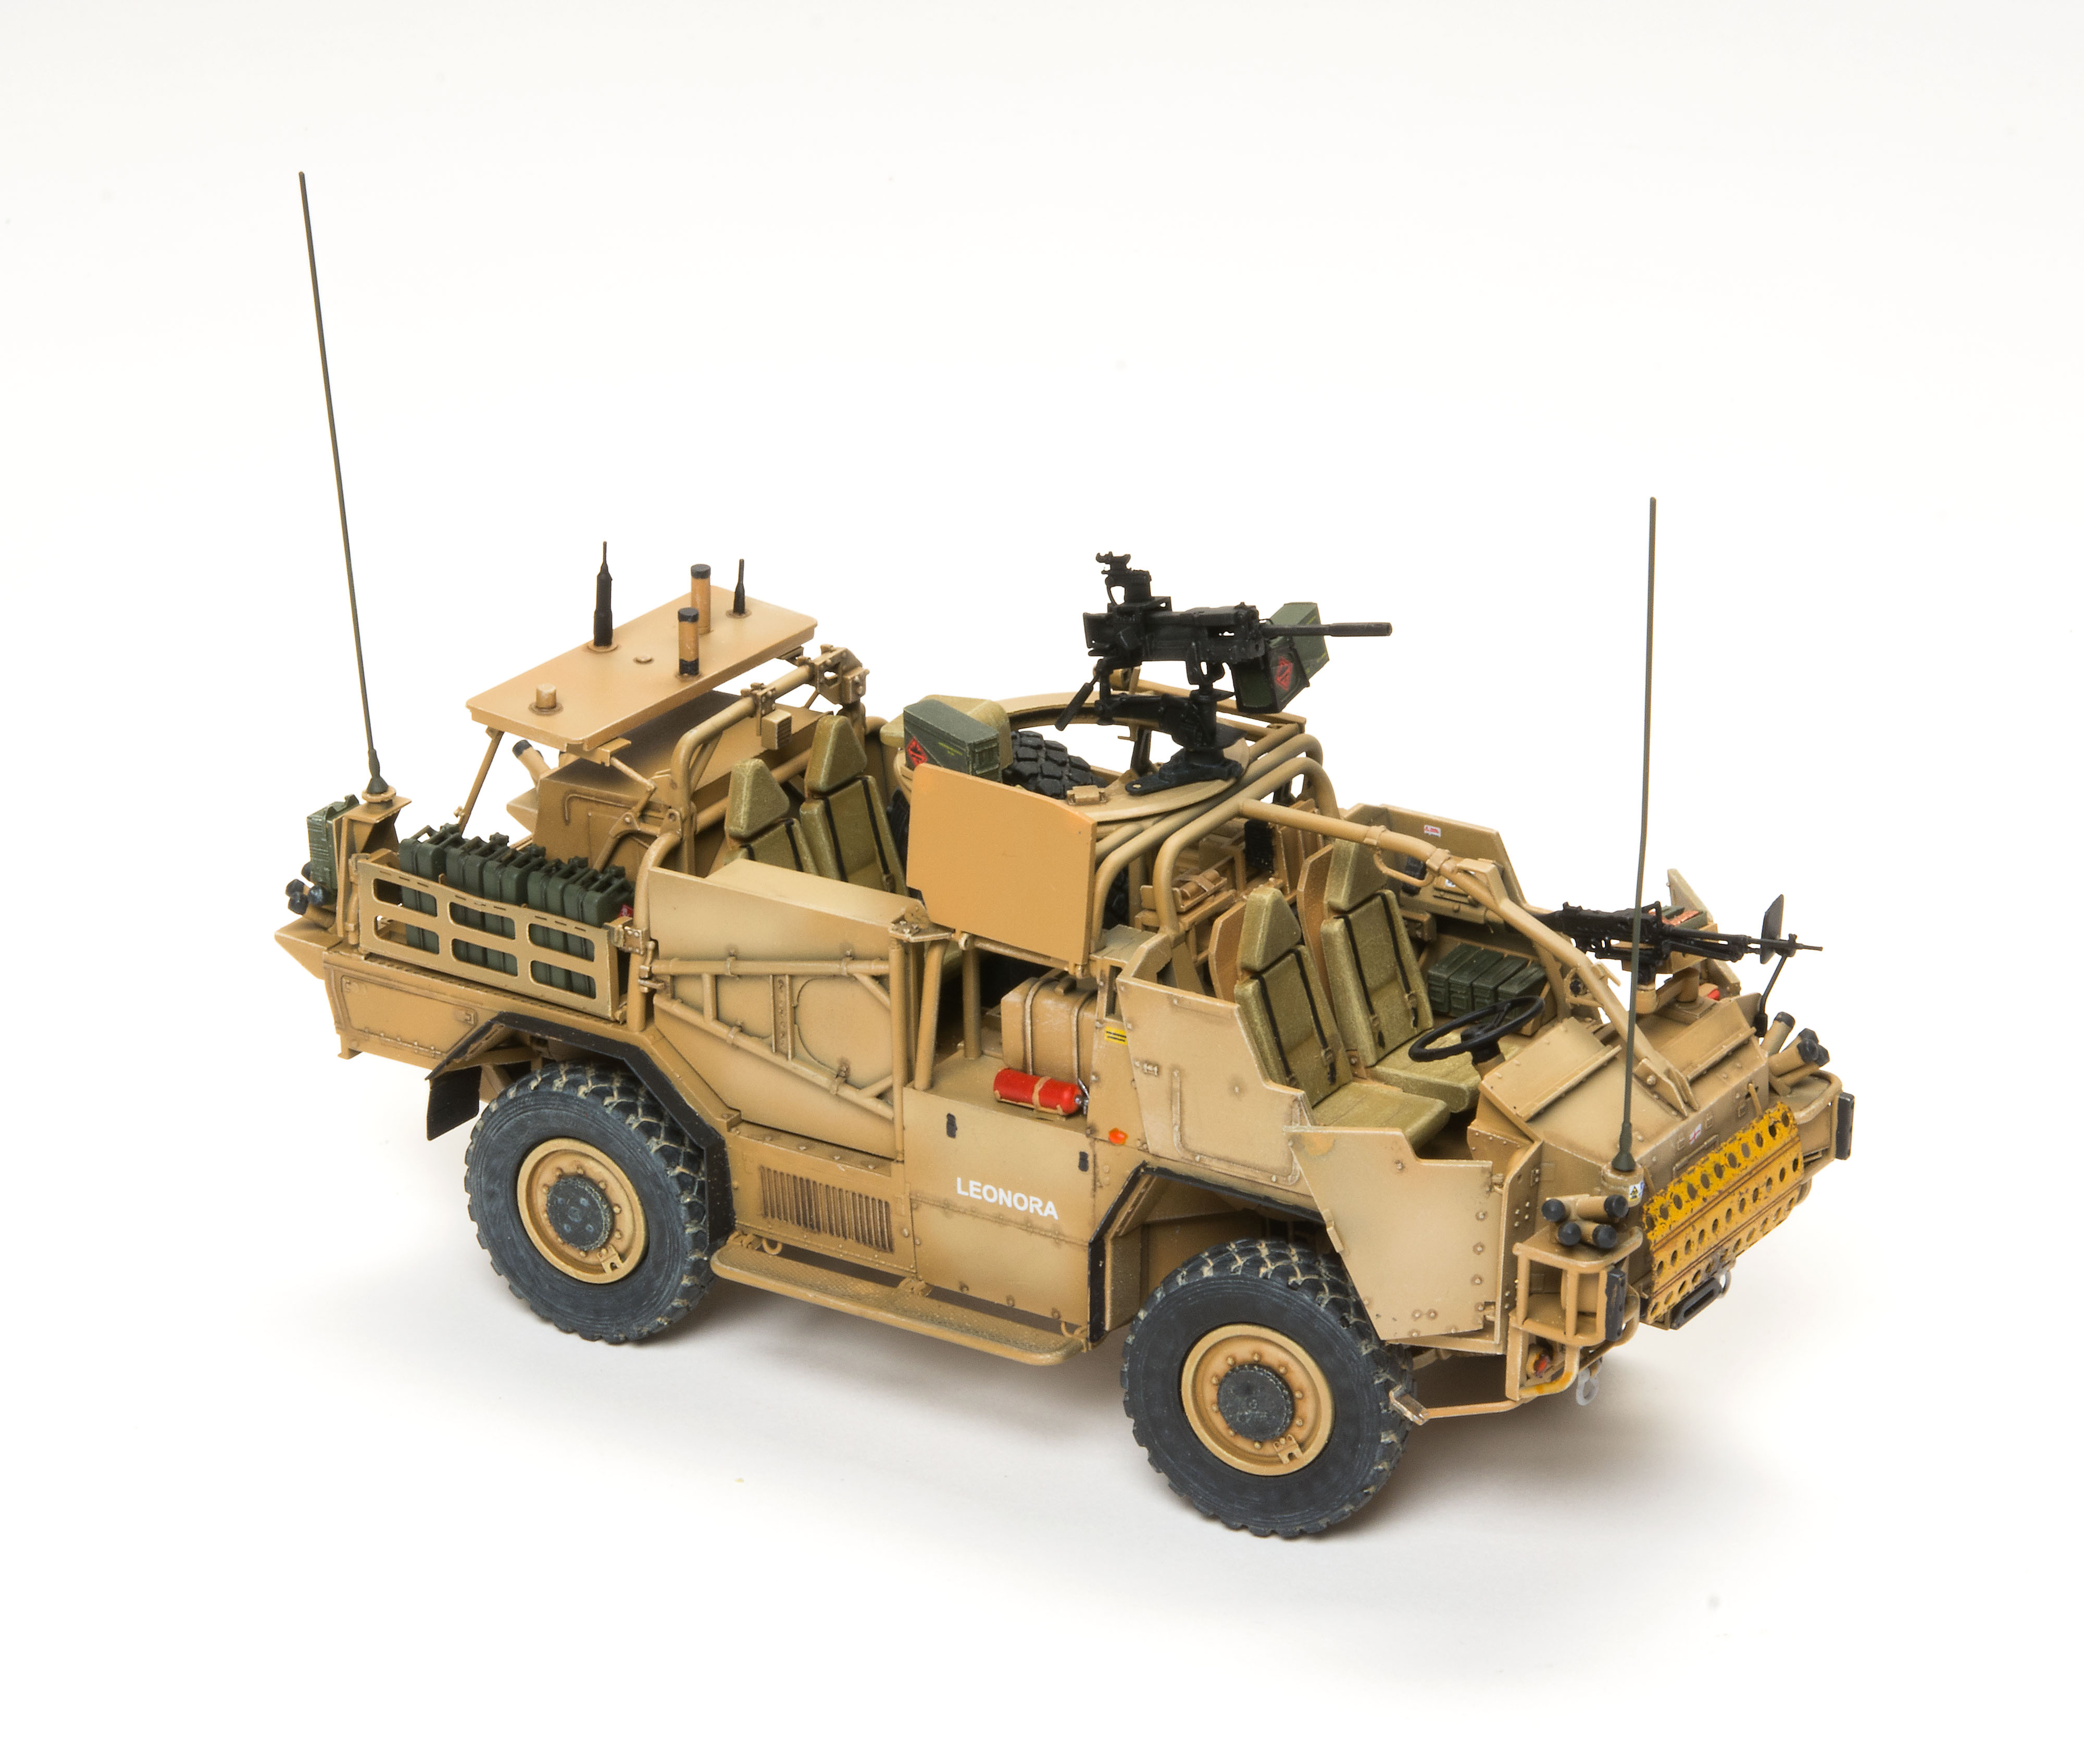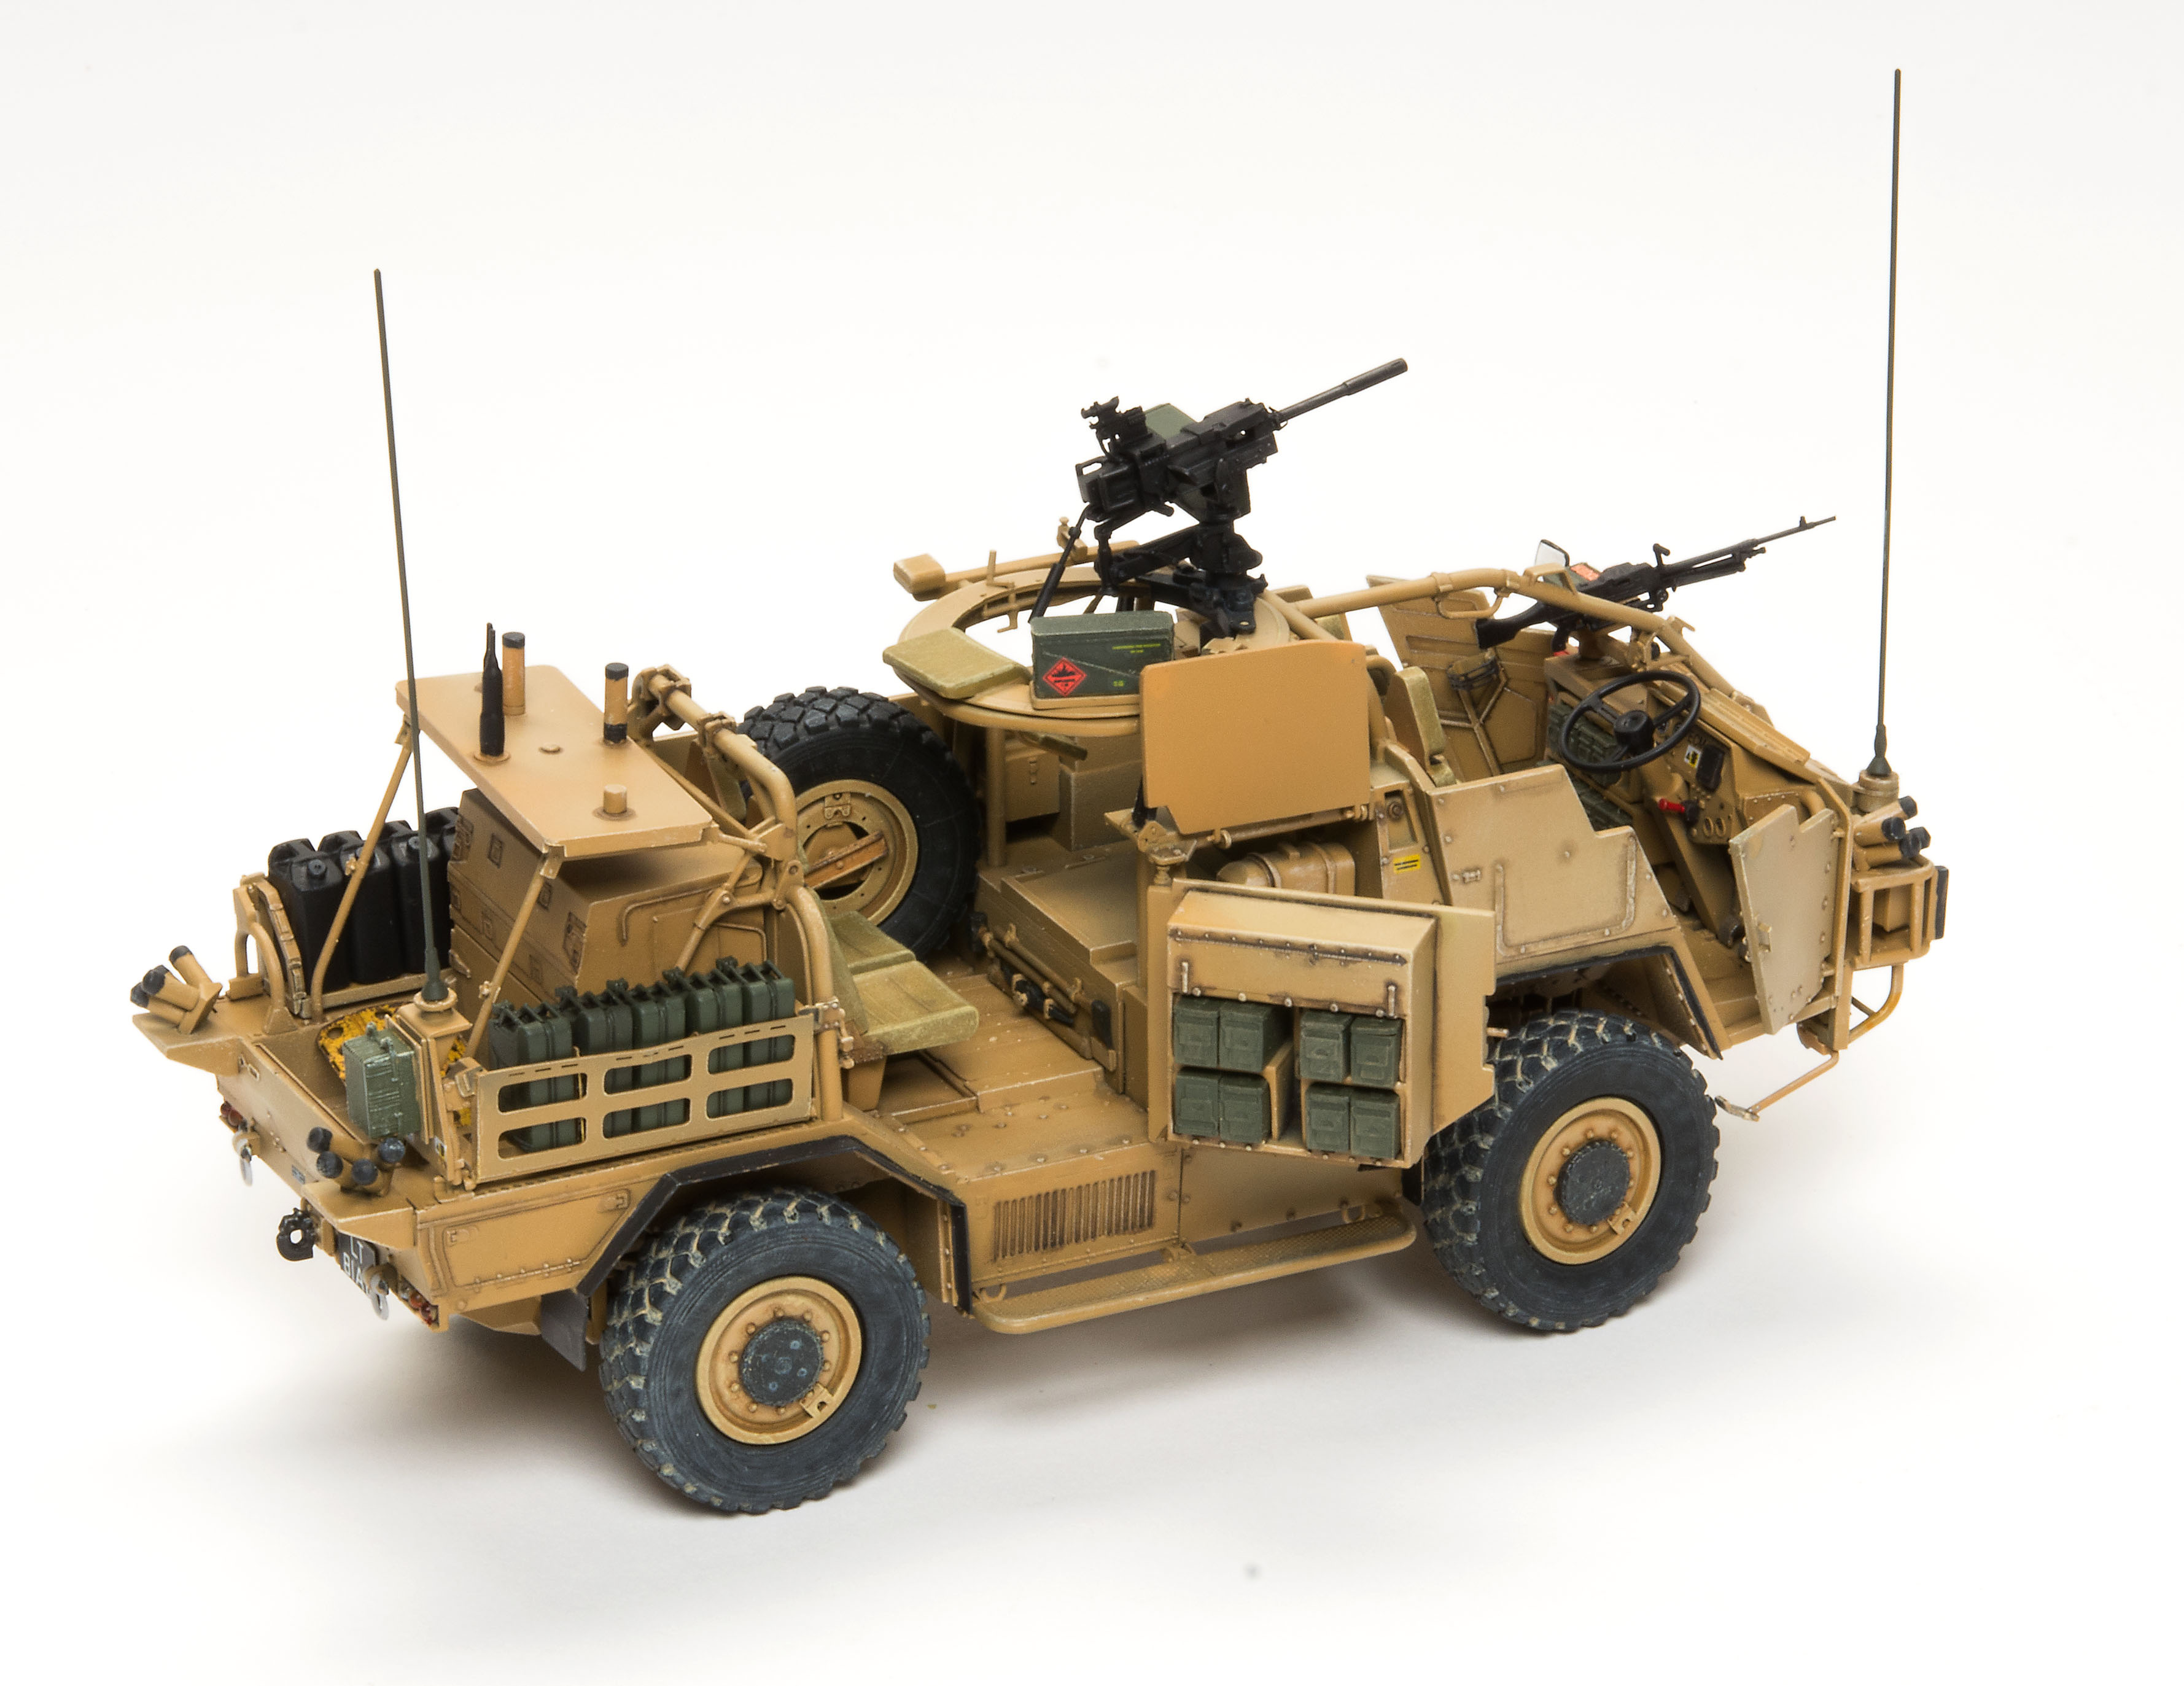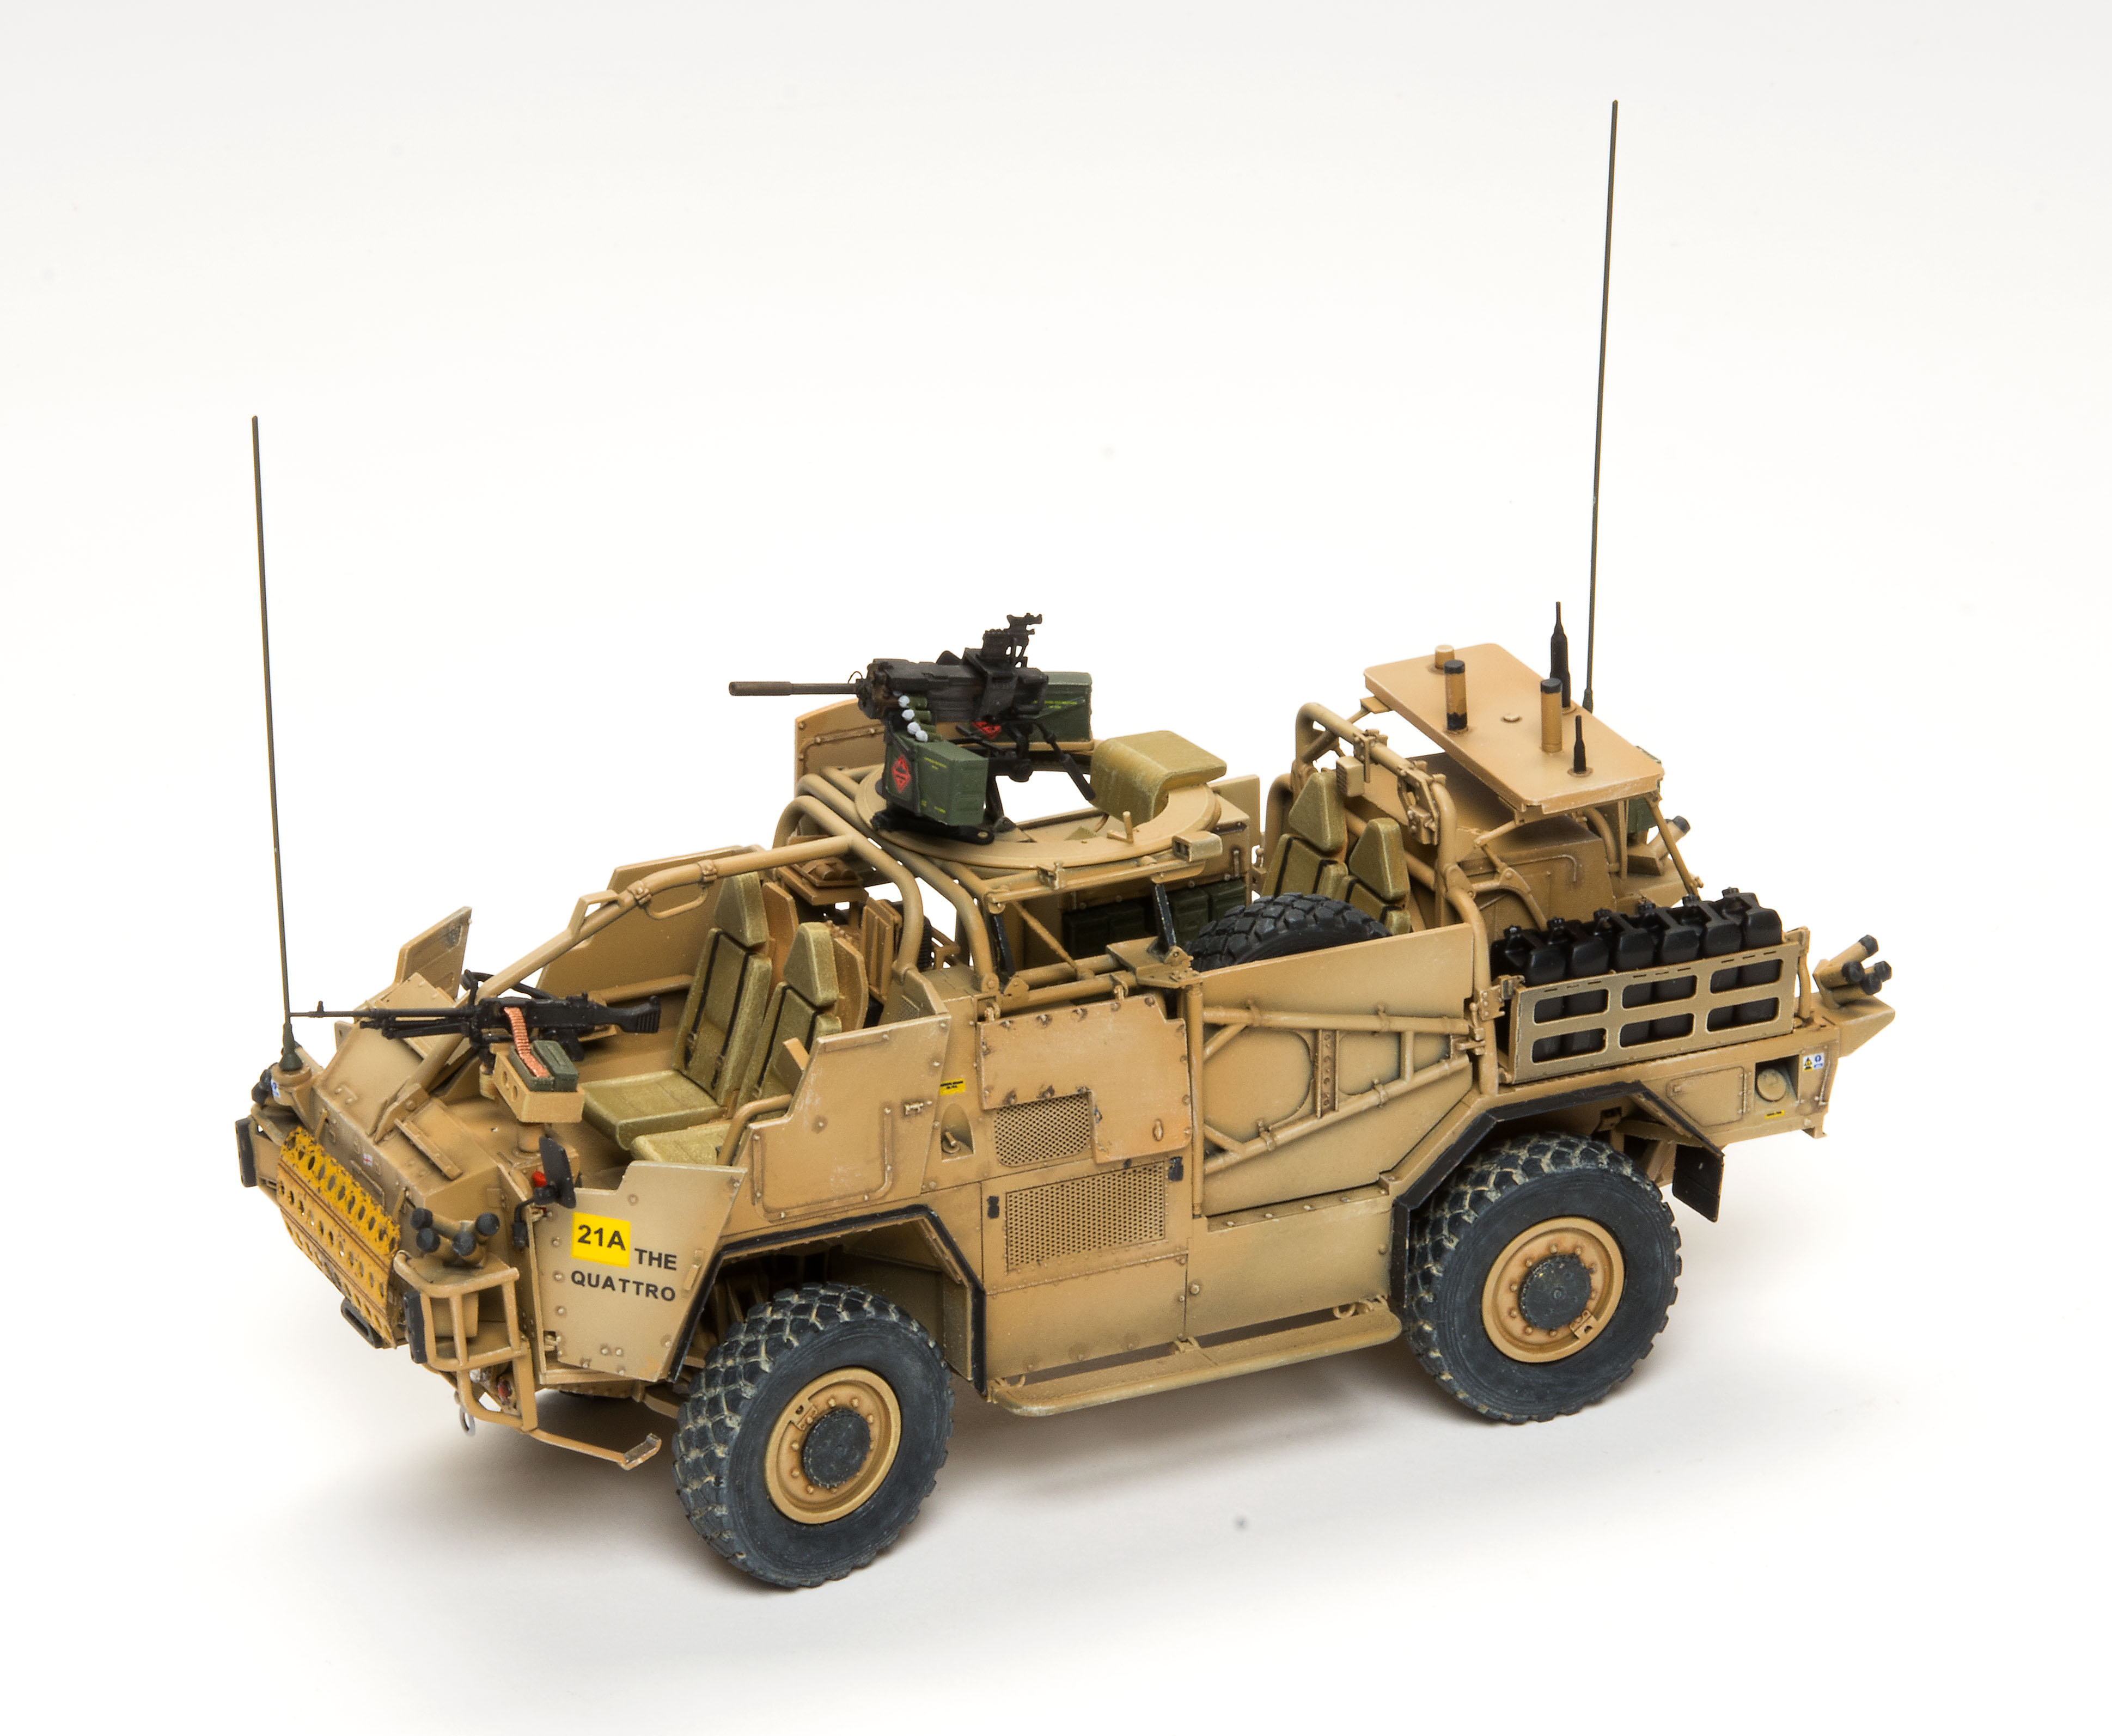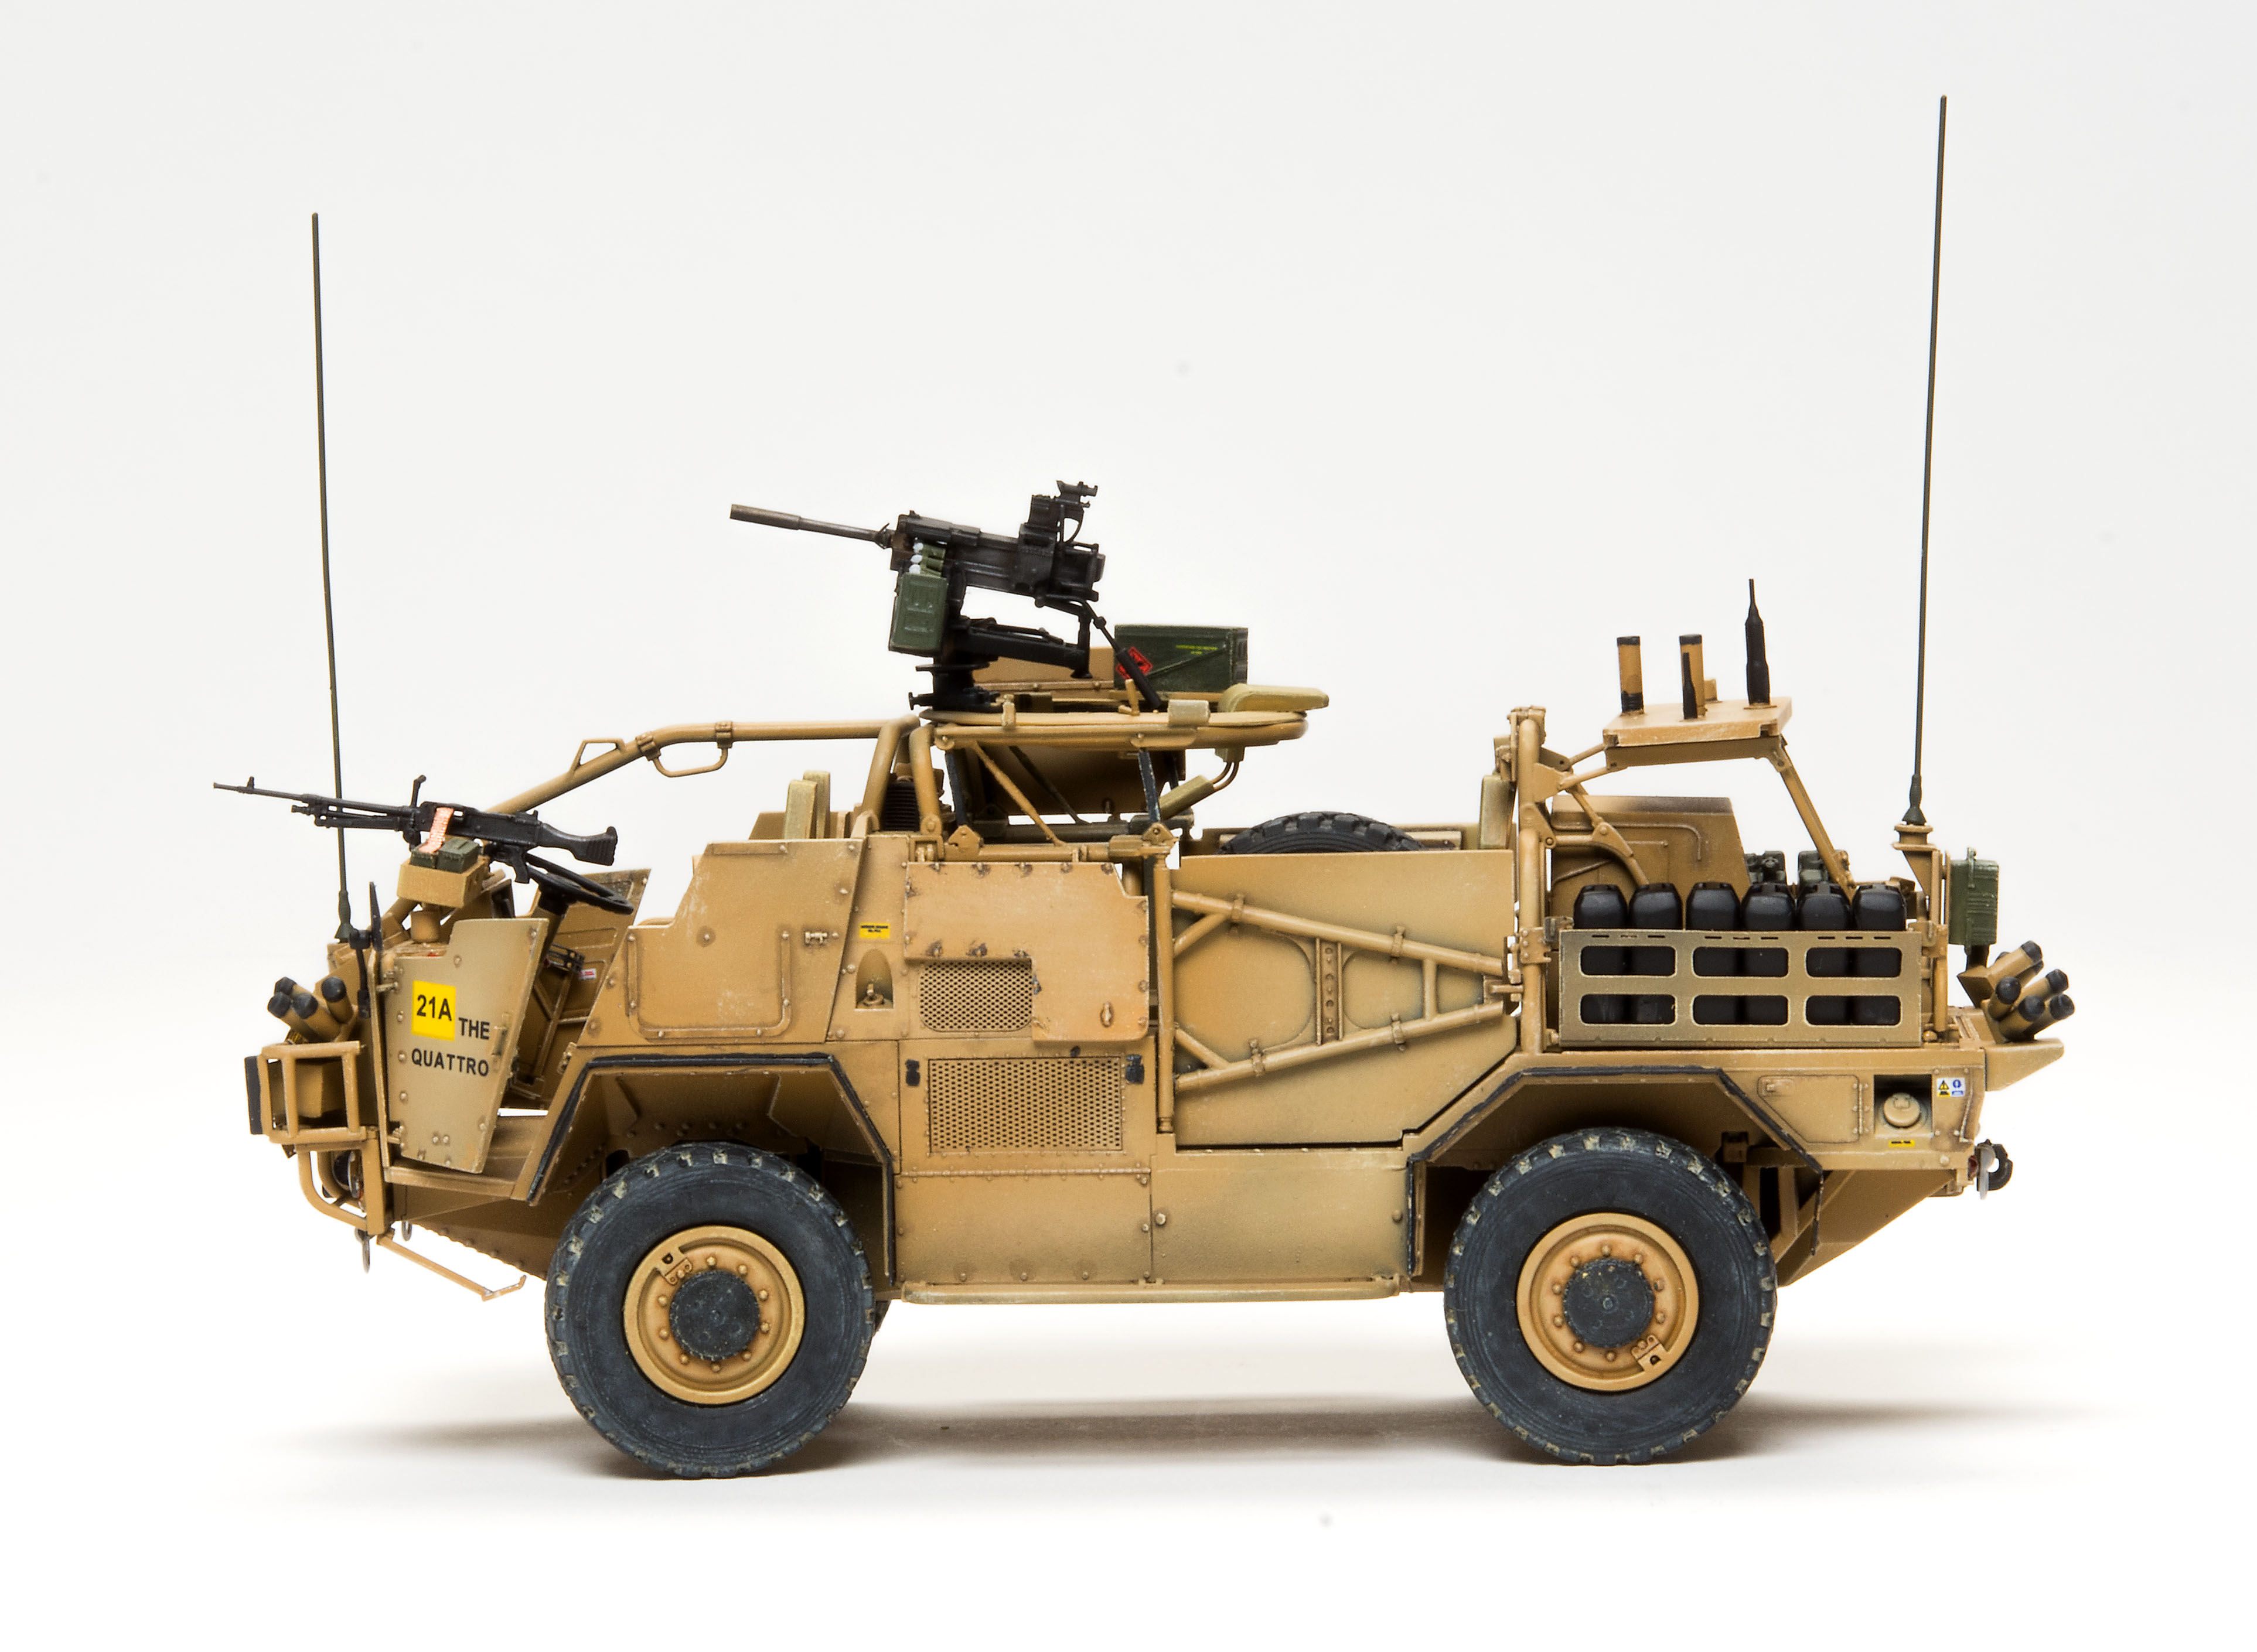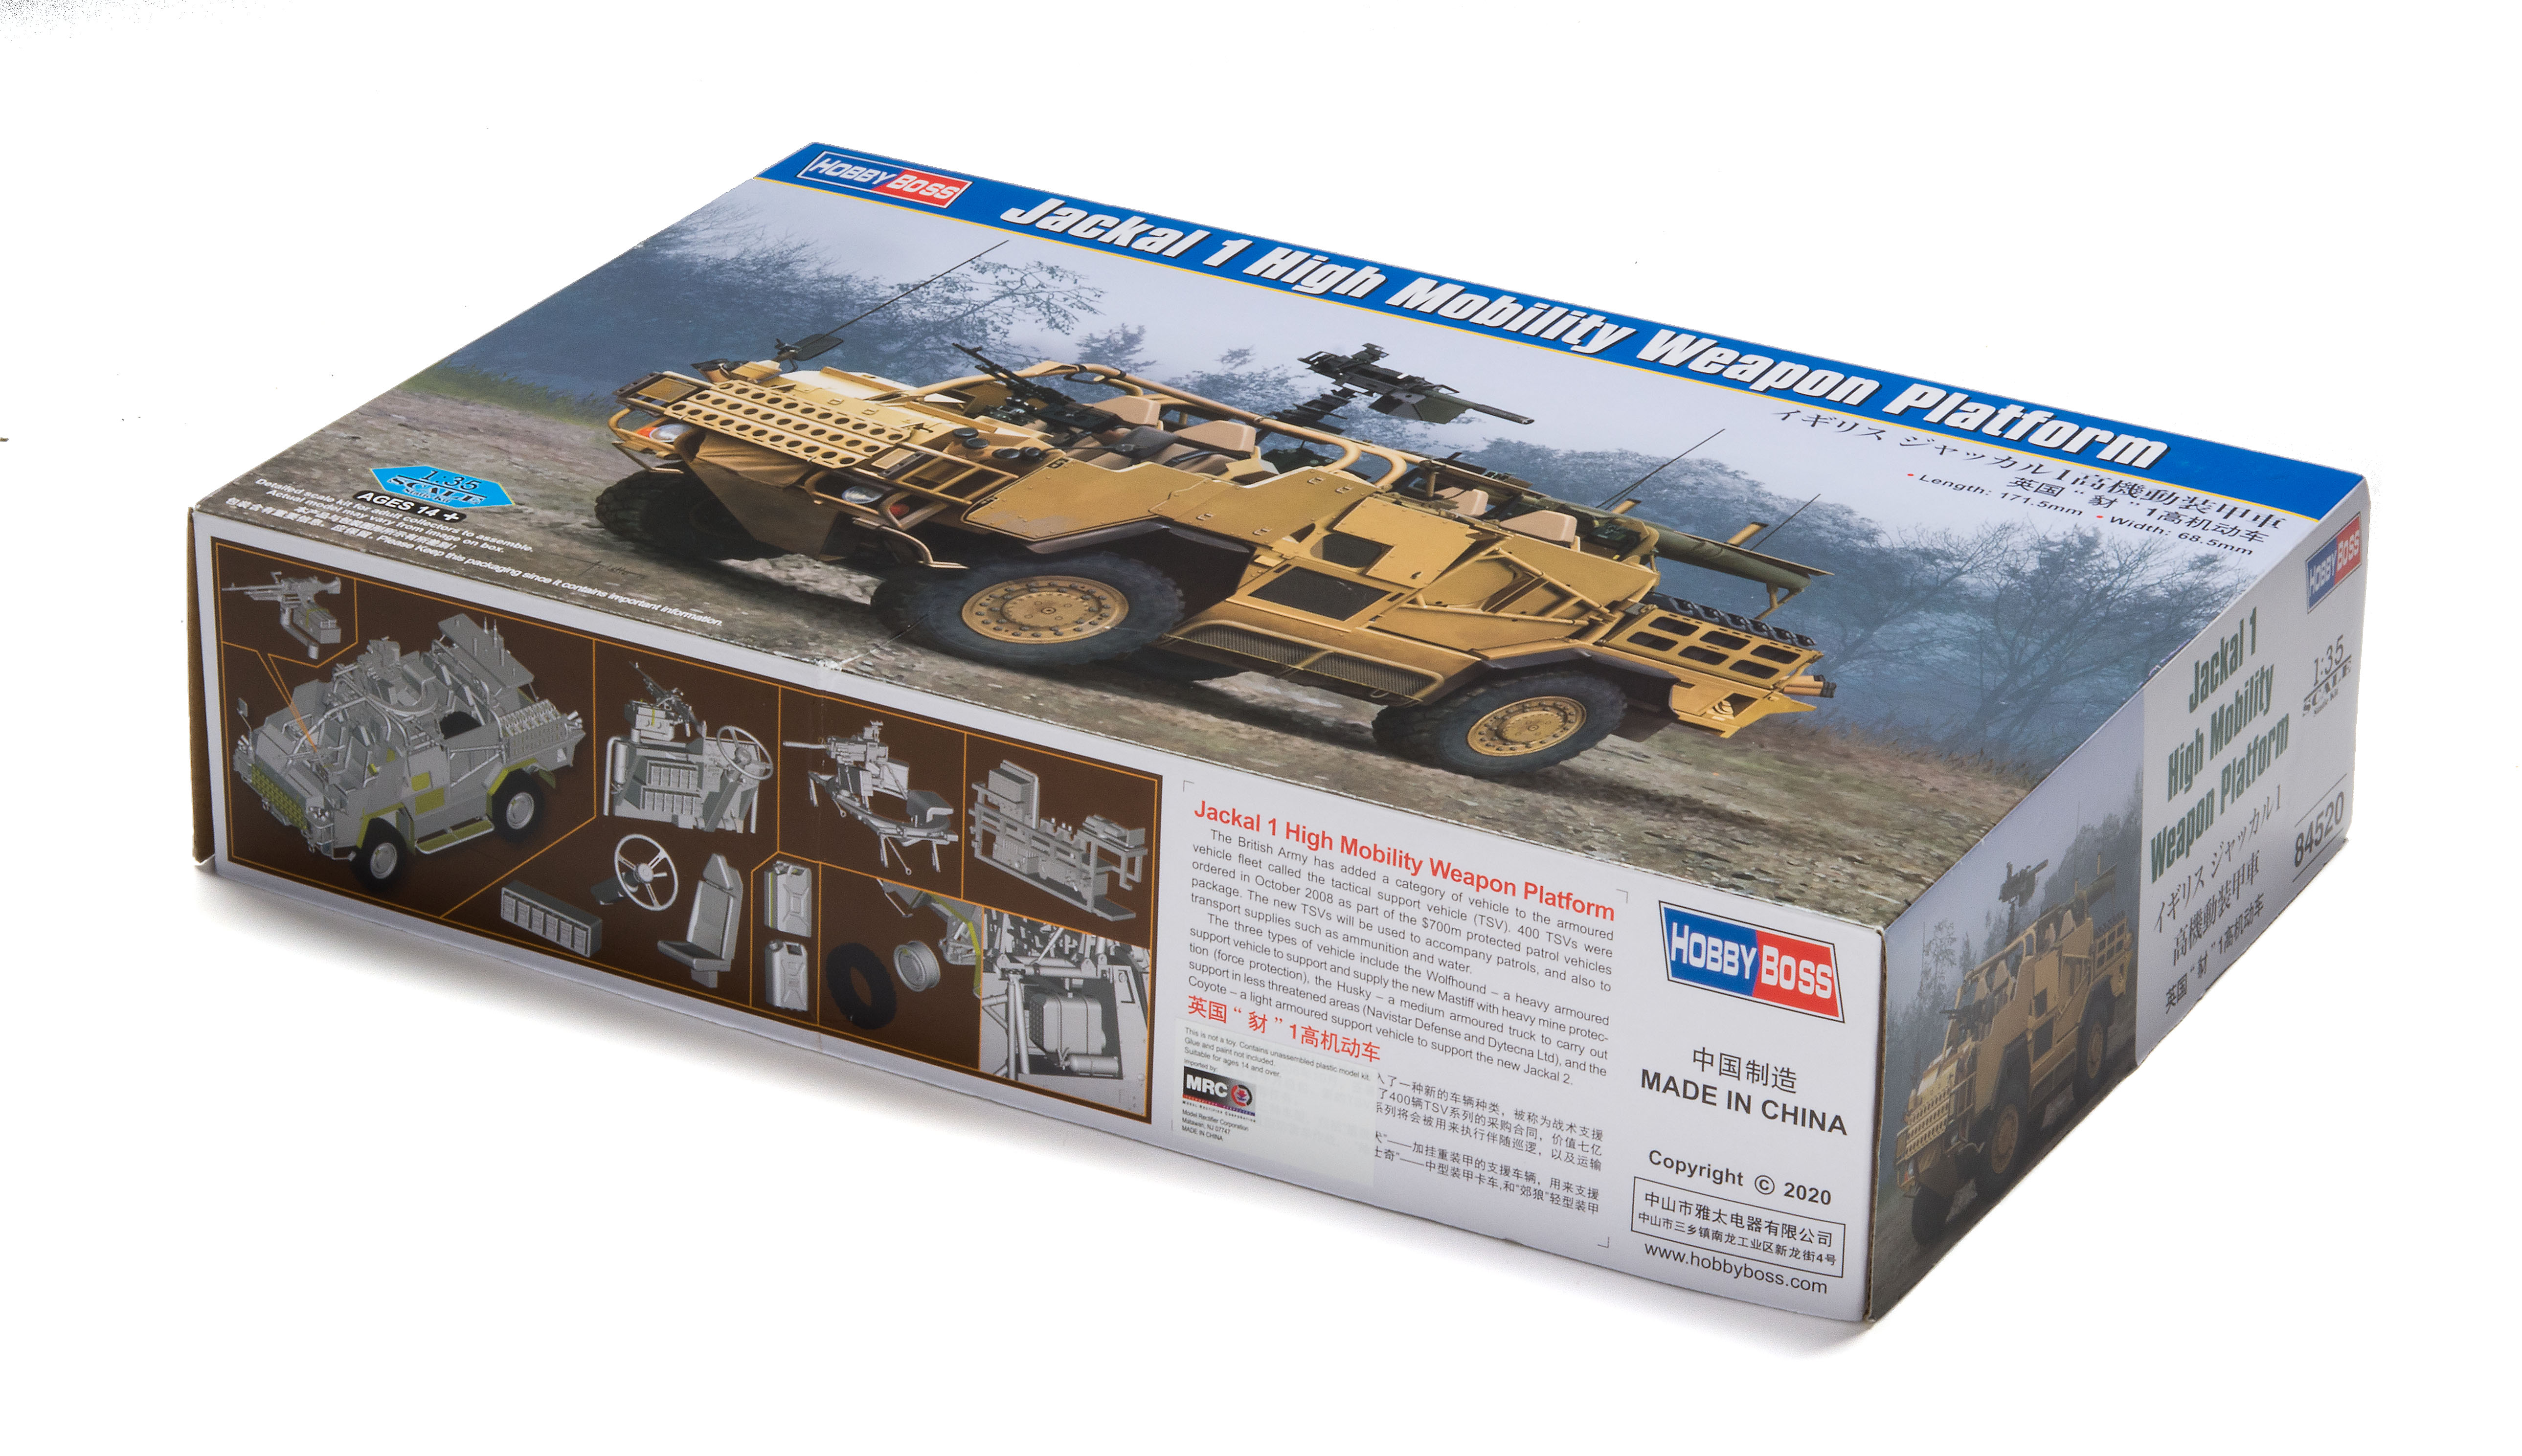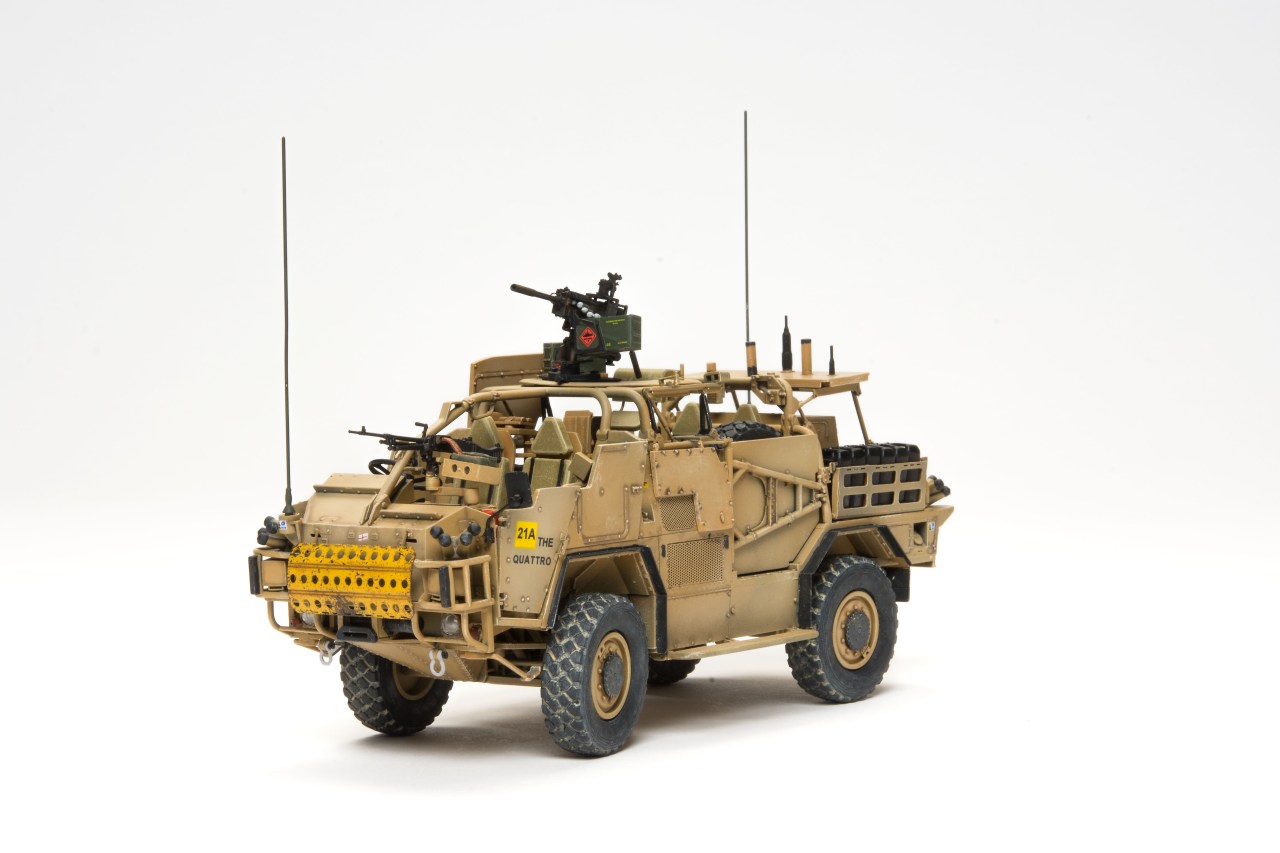
The Jackal High Mobility Weapons Platform was designed by Supercat for the British Army to replace the aging Land Rover Defenders and Wolves in reconnaissance, rapid assault, and fire support roles. They entered service in 2007 and saw action in Afghanistan. The HobbyBoss 1/35 scale plastic kit is labeled as a Jackal 1, but the parts represent a Jackal 2. The 711 injected-molded parts come in dark yellow and clear plastic light lenses. Five vinyl tires and six frets of photoetched metal are also included. Even with the high level of detail, there are surface imperfections and numerous ejector-pin marks that need to be removed. Also, if you have big fingers, be warned: There are a lot of extremely small parts. Overall, the parts fit great, and any filler I needed were because of mistakes I made. The instructions are clear and include a color sheet showing five views of each of the two marking choices. It includes paint callouts for Mr. Hobby, Acrysion, Vallejo, Model Master, Tamiya, and Humbrol.
Study the directions before you begin construction to plan your subassemblies to make painting easier. I started by assembling the major parts of the hull. Make sure the fuel tank and the cap (parts C64 and C65) are in place before gluing the upper and lower hull halves together. I glued the fuel cap to the upper hull instead of the lower hull as shown in the directions.
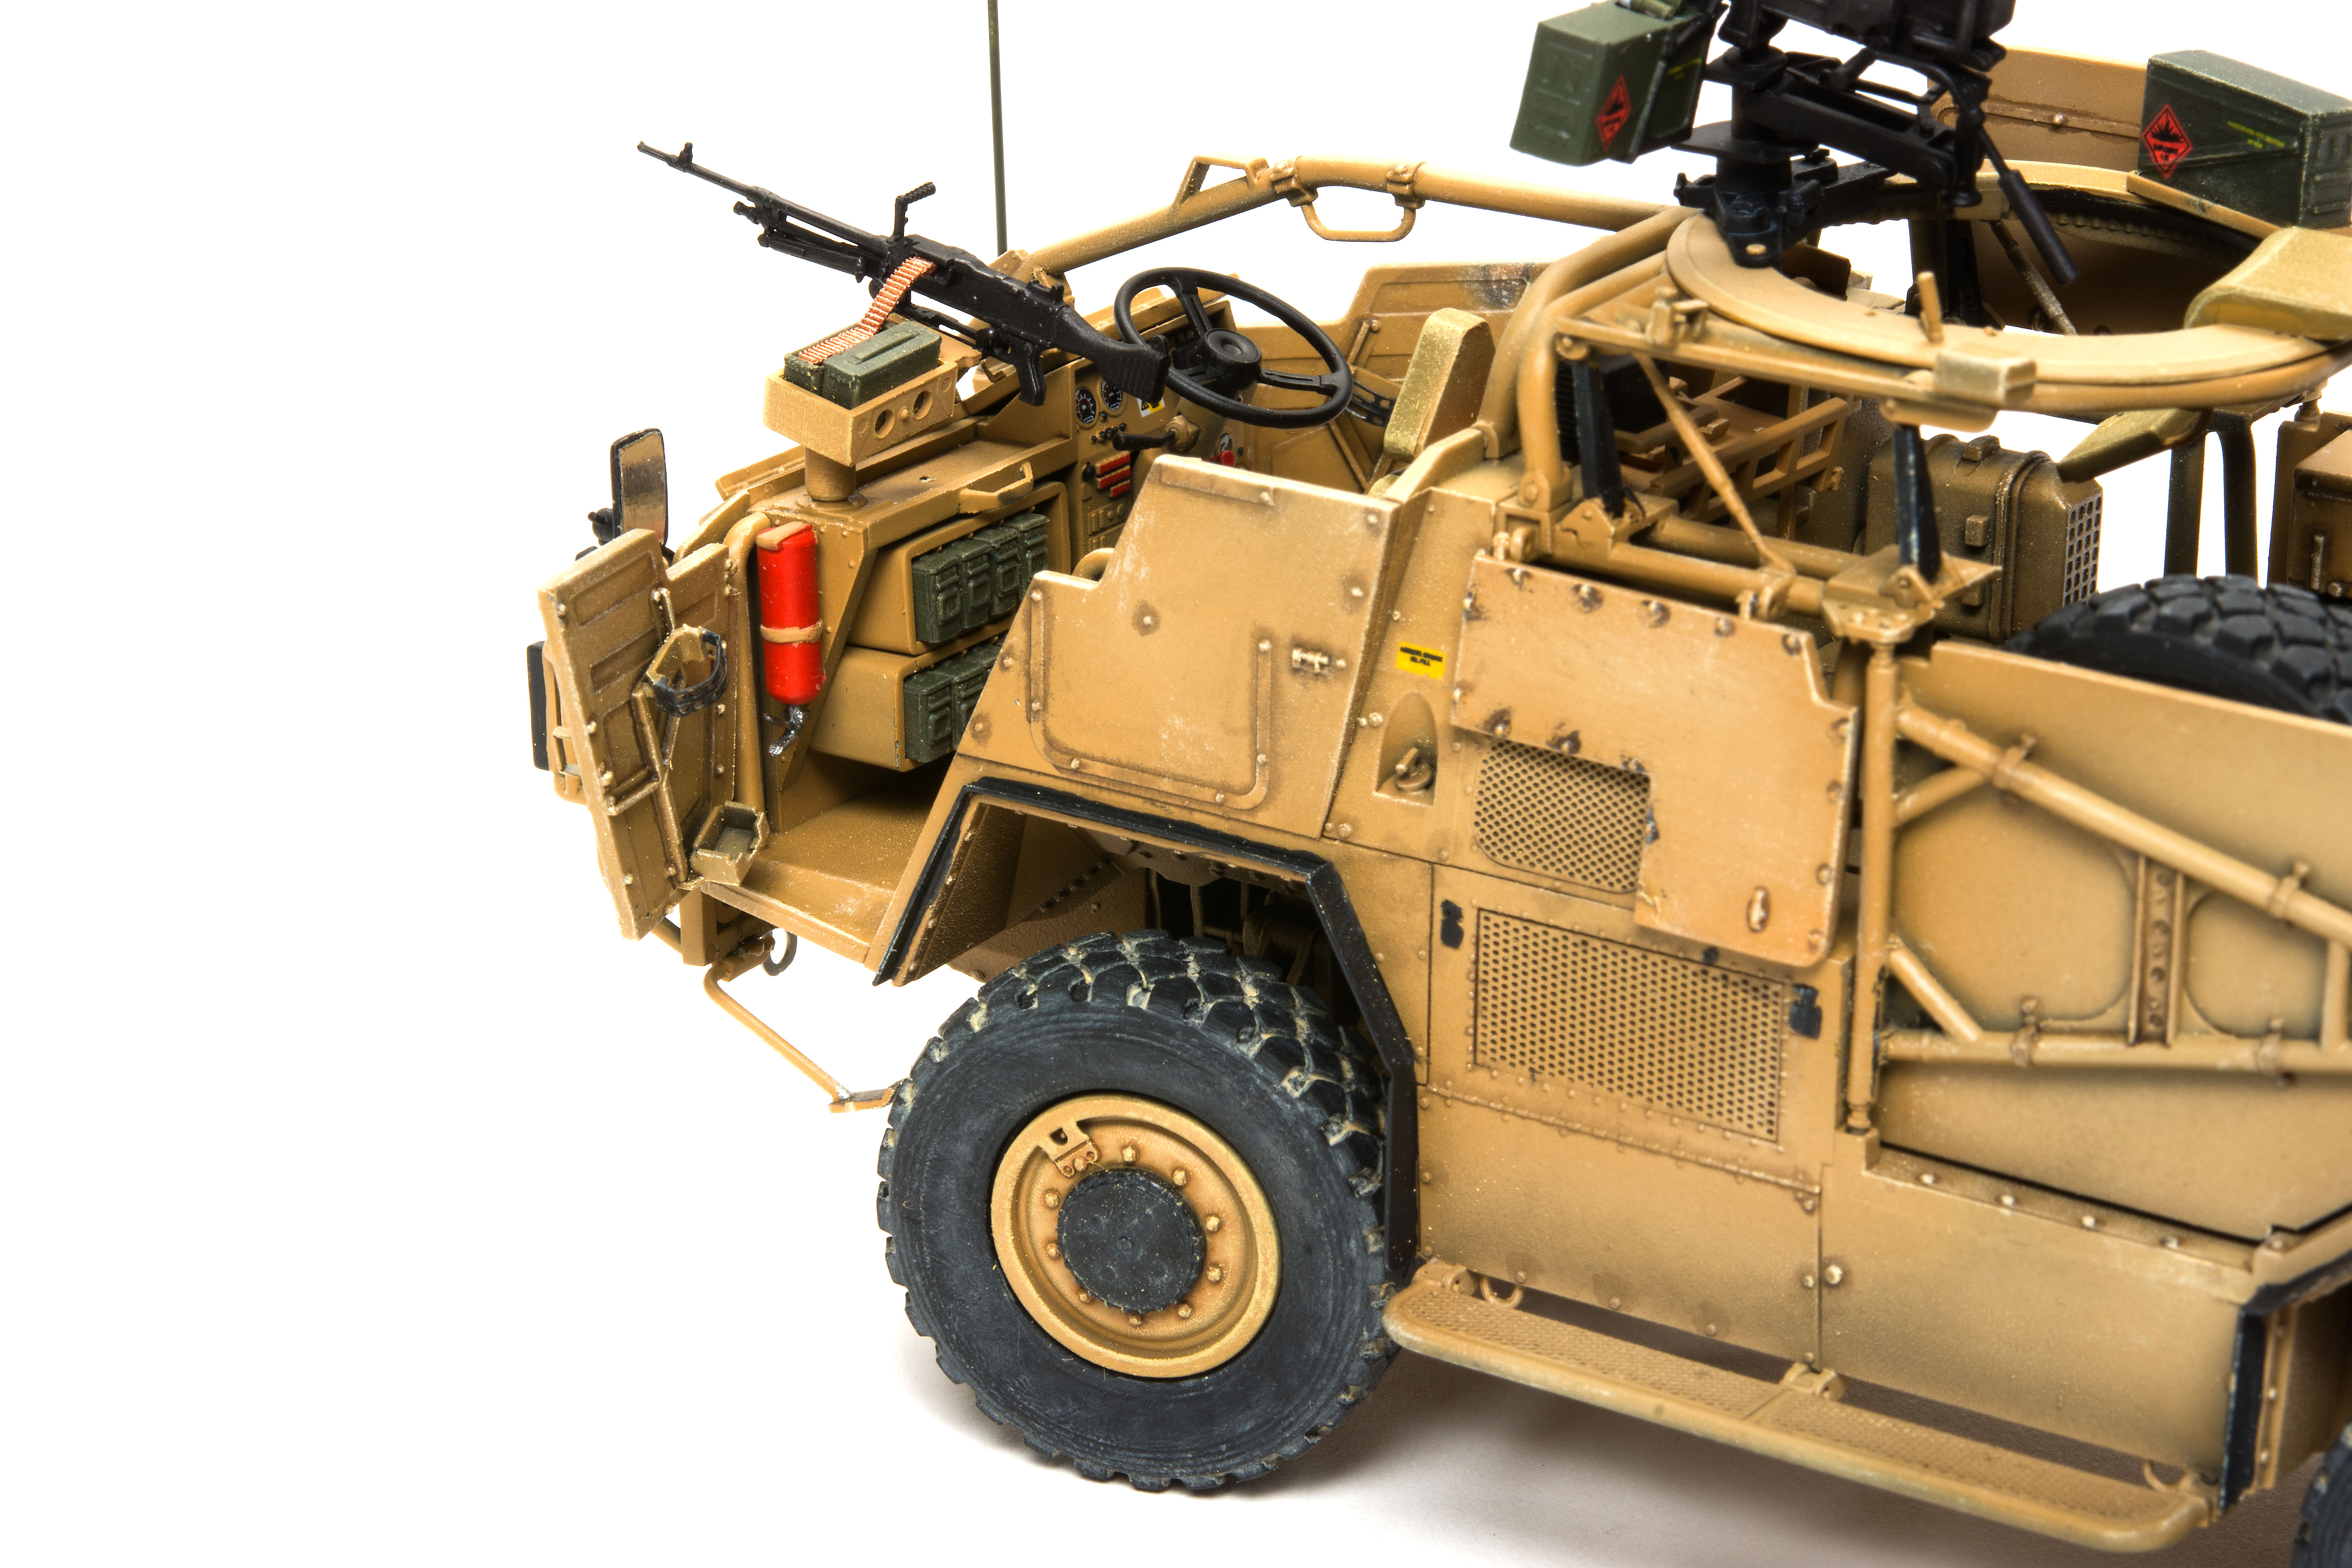
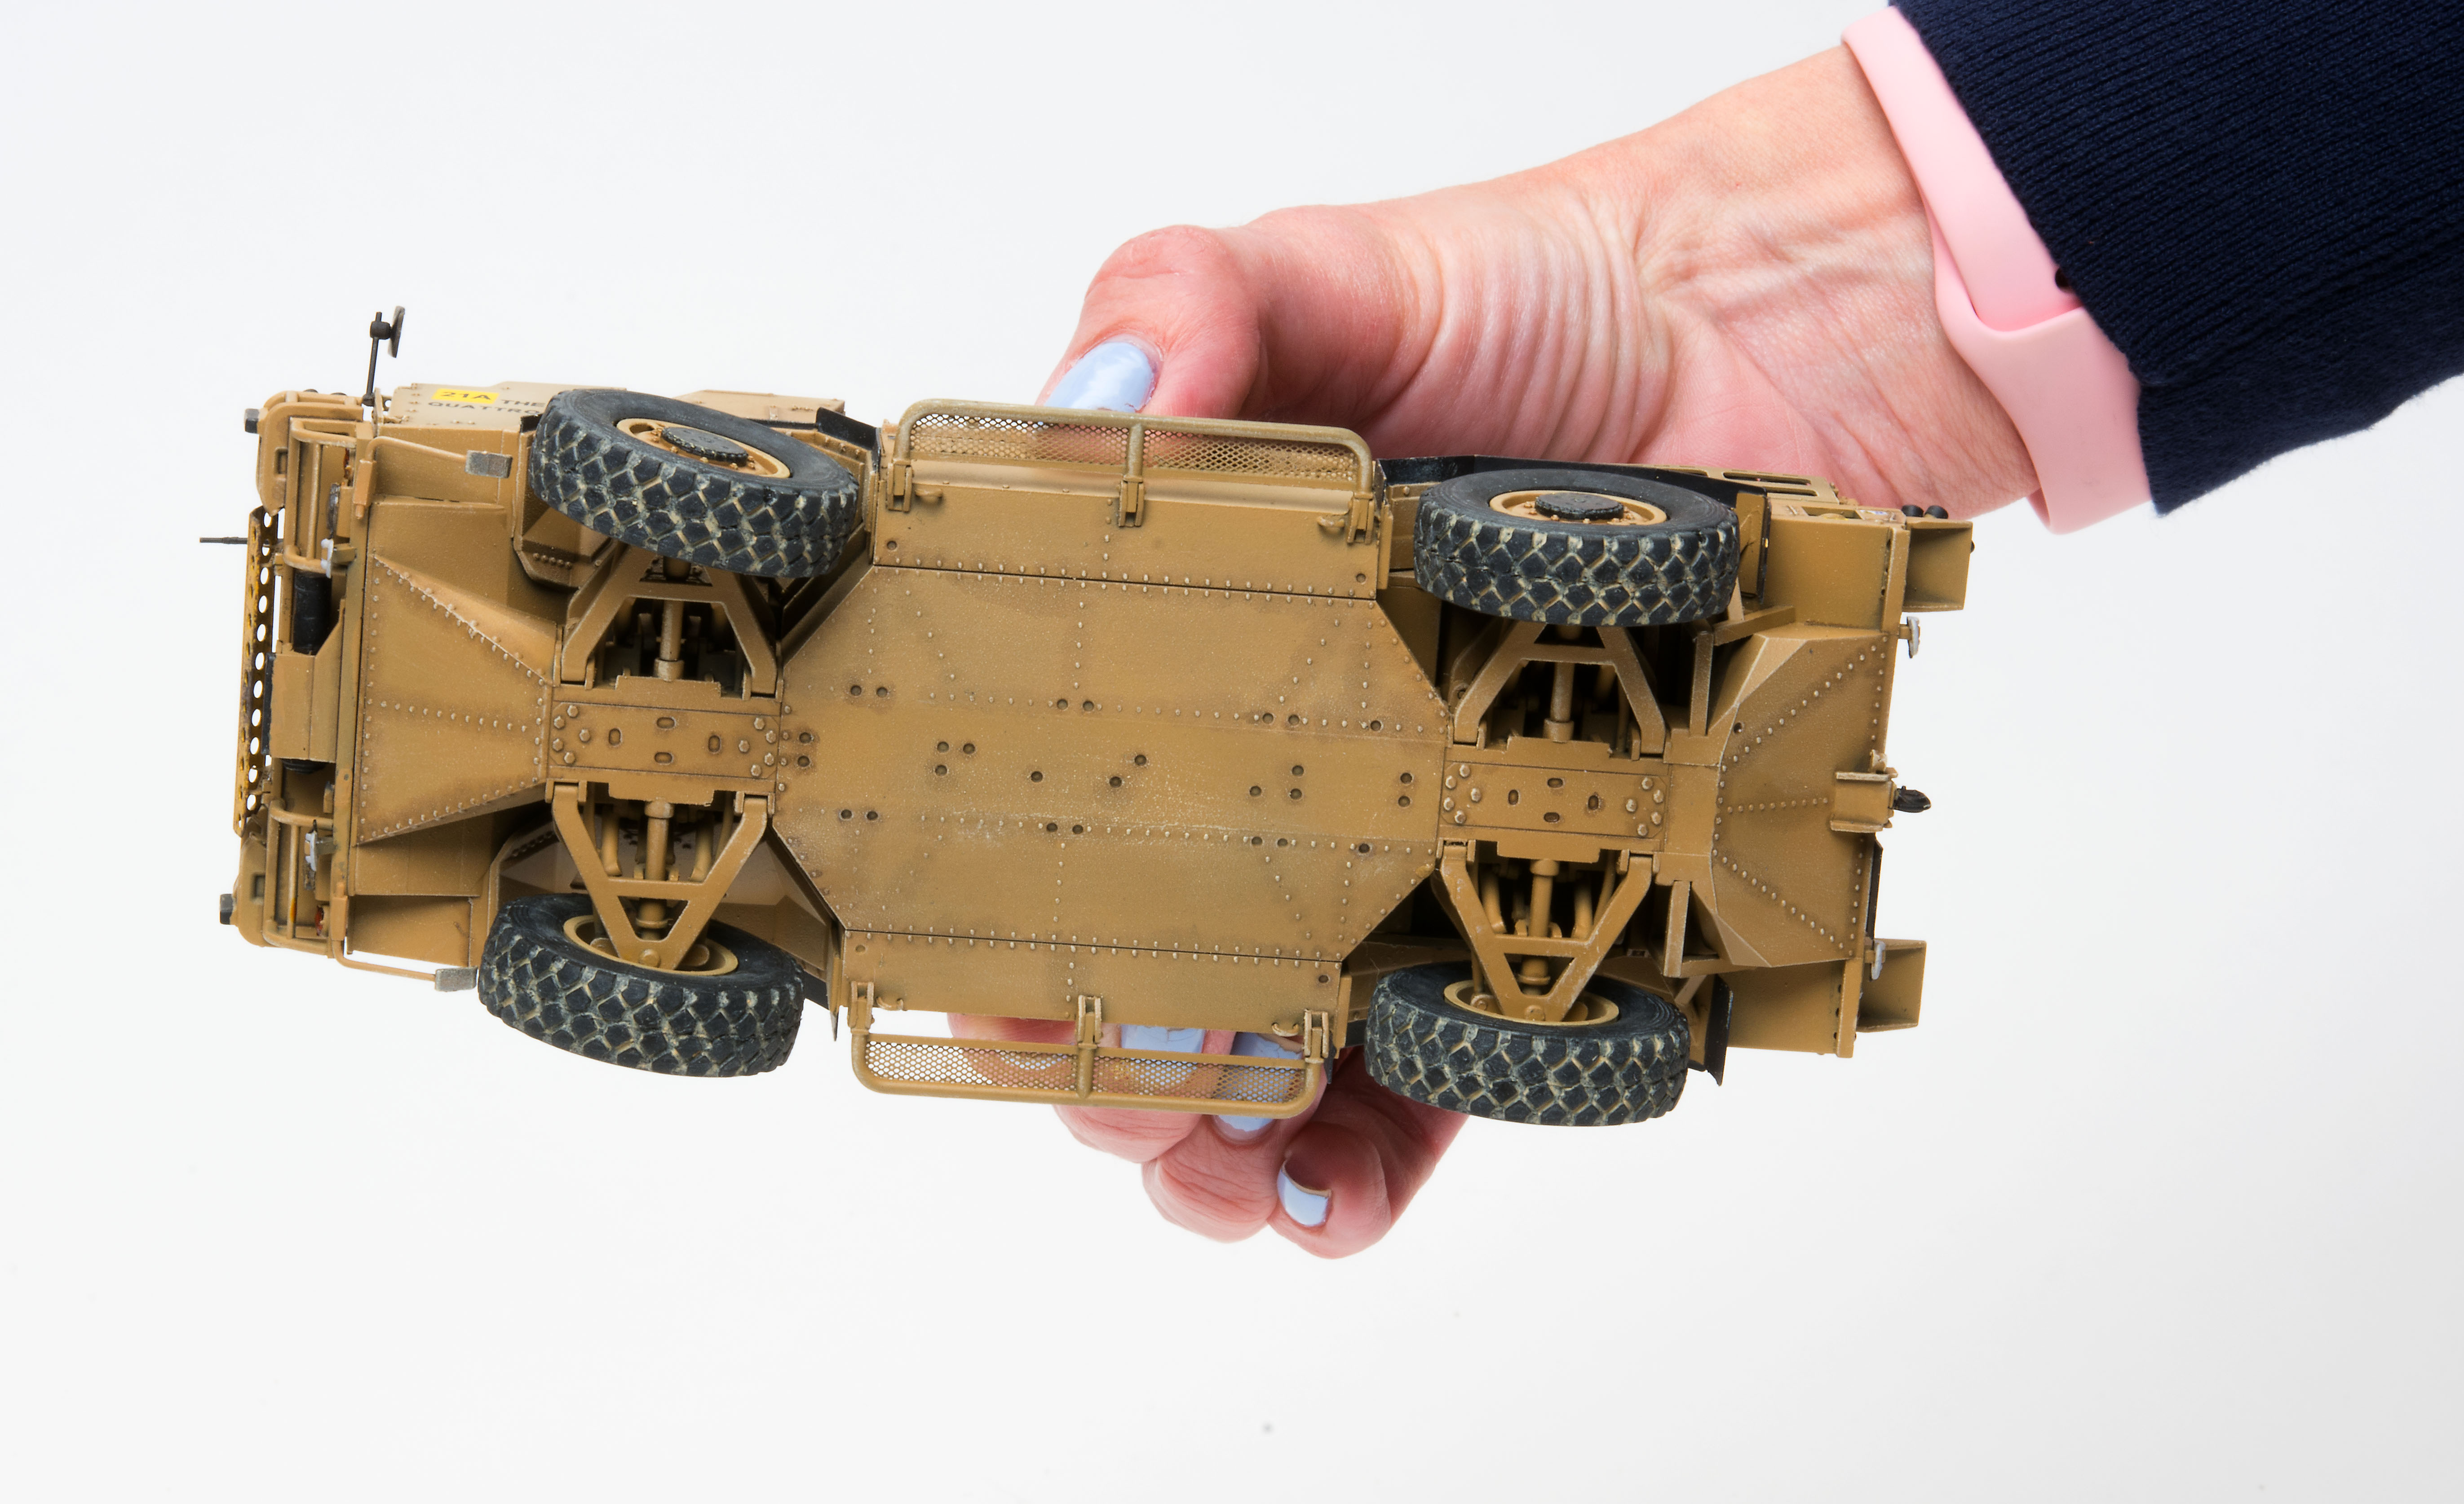
After the major parts of the hull were assembled, I moved on to the suspension. The complicated, independent, double-wishbone suspension will make you wish you had at least another set of fingers to help. Plan to do as much of the suspension at one time as you can. It took me about three hours to complete. I placed every part that would stay without glue and then applied glue to all the joints. A weight on top of the hull made sure all four wheels touched the ground.
Speaking of wheels, all four can be posed. This is great for the front wheels, but you need to take care that the rear wheels are parallel. Sidewall detail on the vinyl tires is OK, but a seam around the center of the each tire proved hard to remove without destroying the tread. I hid the tire seams with liquid pigments. The vinyl tires also fit loosely around the wheel hubs. The posable running boards are fragile, so I glued them lowered; they can also be glued stowed.
All of the doors are designed to be operable, but the two armored doors under the weapons station that lift vertically have nothing to hold them in place. It would probably be better to glue them in place. In Step 14, the instructions don’t show exactly how to position photoetched-metal (PE) Part PE-A8; it is a cover to protect the cables running to Part C6. A small strip of styrene glued to Part C43 will help hold the cover in place. I also drilled a hole for the lever (Part C71) because there was not a lot of surface area to glue it in place.
In Step 18, the small part located next to the winch supposed to be numbered C90. On the real vehicle, the rear racks that hold the fuel/water cans are designed to pivot out of the vehicle to give more room in the rear of the vehicle for extra stowage. The directions do not show this option, but if you glue the small pins (parts B3) to their respective roll bars properly, it theoretically could be made to work.
In Step 22, parts D10 and D11 are reversed. Hobby Boss has armed this vehicle with a grenade launcher, but the directions have you assemble ammunition boxes for .50 cal. machine gun. Ammunition boxes for the grenade launcher are included. However, larger than the machine-gun ammo boxes, they do not fit in the door racks as shown. My references show the antennas to be rather thick, so I removed the top of the antenna base (Part A8), drilled out what remained, and replaced the antenna with a length of styrene rod.
The decals went down with no problems over raised details, and I didn’t notice any silvering. I did separate the gauge decals from each other to allow them to sit better in their positions. The color profiles show an identification plate on the rear of the vehicle. It is supplied as a decal, but there is no place for it to be mounted. I applied the decal to a thin sheet of styrene before gluing it on the model.
The PE in this model is not overly complicated to use, but the large number of small parts and some complex assemblies make the Jackal a model for experienced builders. It took me 50 hours to complete this project, with 40 of those hours spent only on assembly.
I found JACKAL High Mobility Weapons Platform COYOTE Tactical Support Vehicle – Light (Charles Schulze, Tankograd) invaluable when the directions were vague and for detail painting. All of the extra parts left over, after you complete the model, show that a Coyote might be available in the near future.