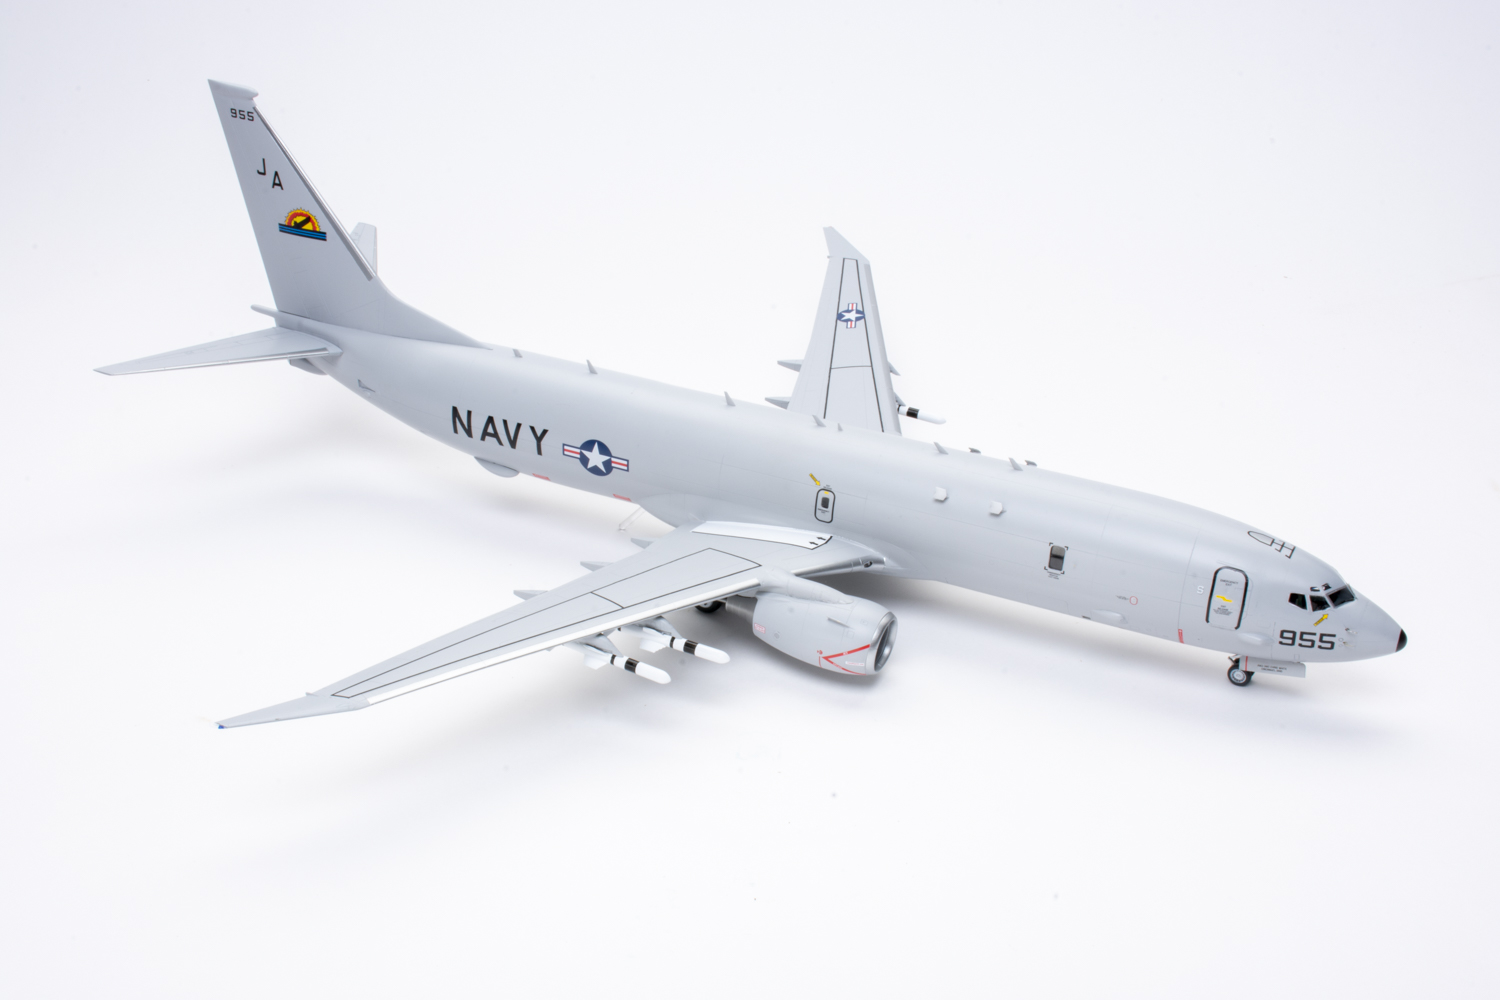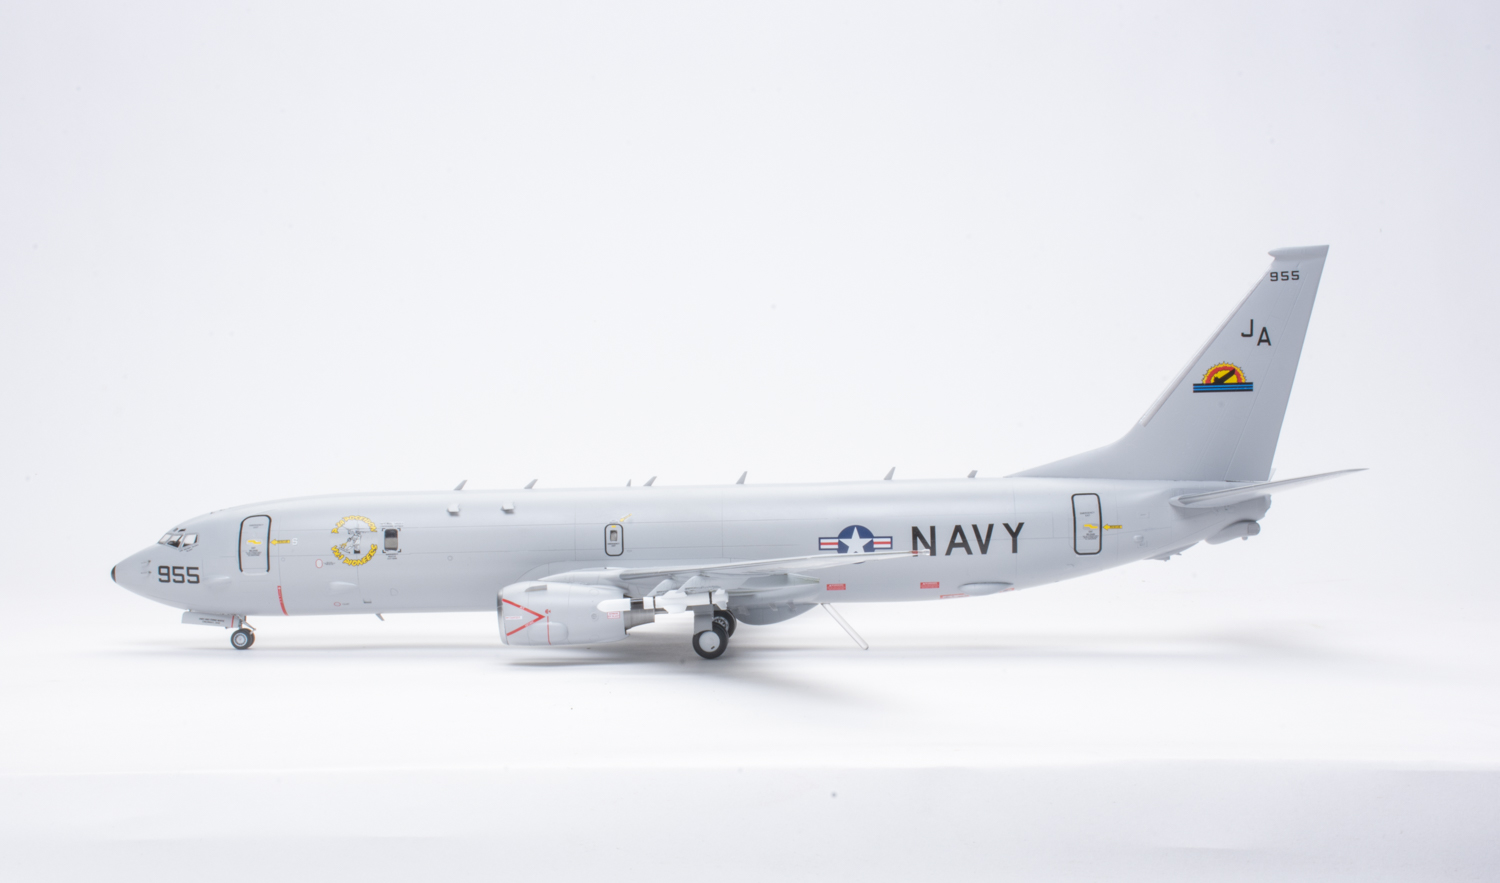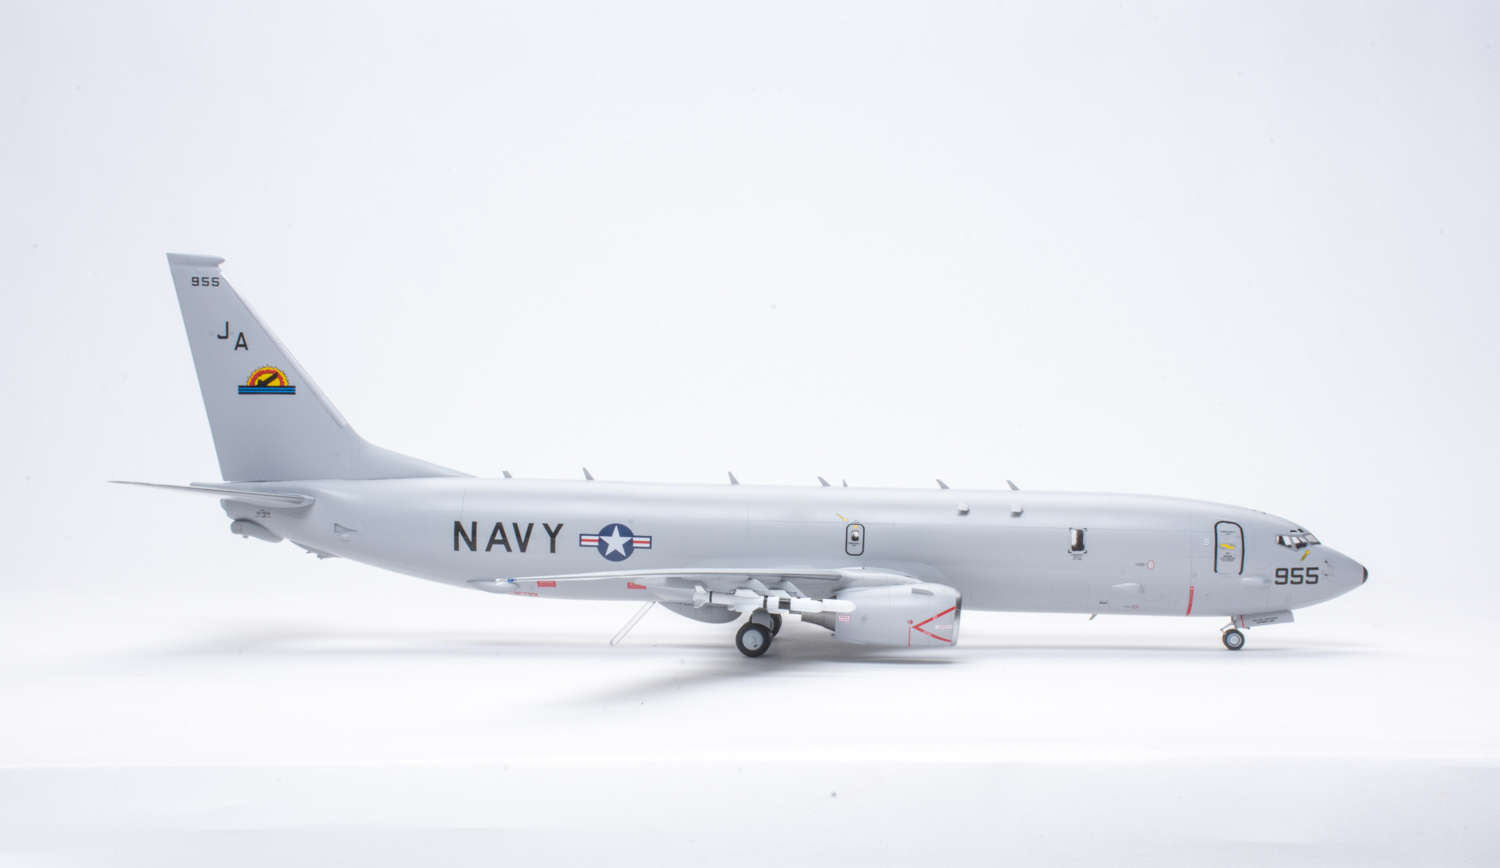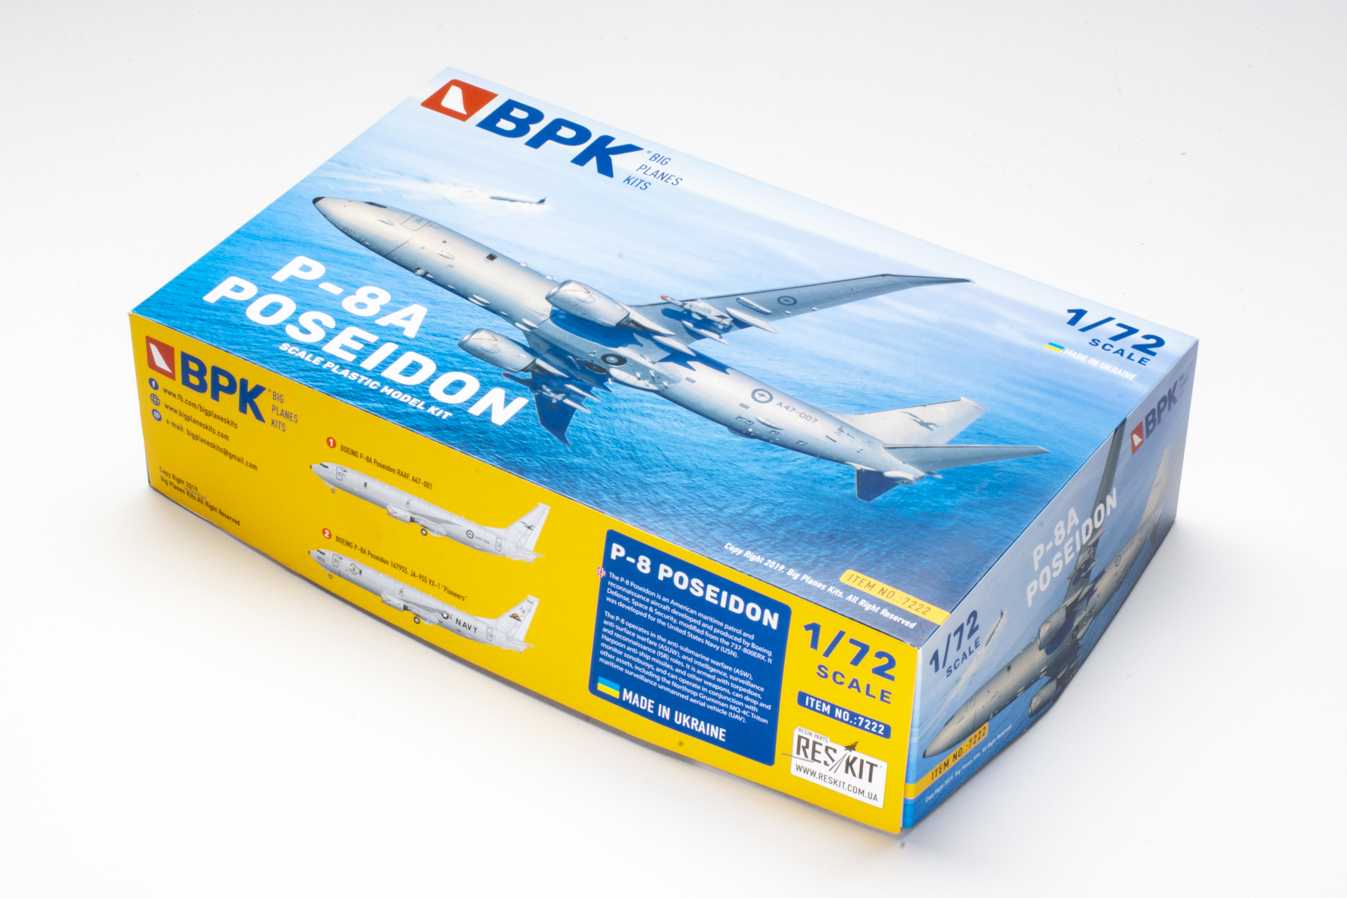
Big Planes Kits, or BPK for short, continues to expand its line of 1/72 scale 737 airliners with a P-8A Poseidon. This highly modified 737-800EX is the latest in antisubmarine, antiship, and reconnaissance patrol aircraft in service with the U.S. Navy and several allied air forces. This kit is a welcome addition to my U.S. military aircraft collection and a fine-looking model once finished! Ah, but putting it together, that’s a different story.
BPK’s 737 kits are modular, so some sprues are specific to the Poseidon, and a few parts on other “universal” sprues are not used at all.
The small, 51-step instruction booklet provides parts maps with part numbers, but there are no corresponding numbers molded on the sprues. The assembly diagrams are tiny, and some steps show many parts from only one perspective. This makes it difficult to understand how the parts go together. Few positive locators and small mating surfaces further complicated the assembly process.
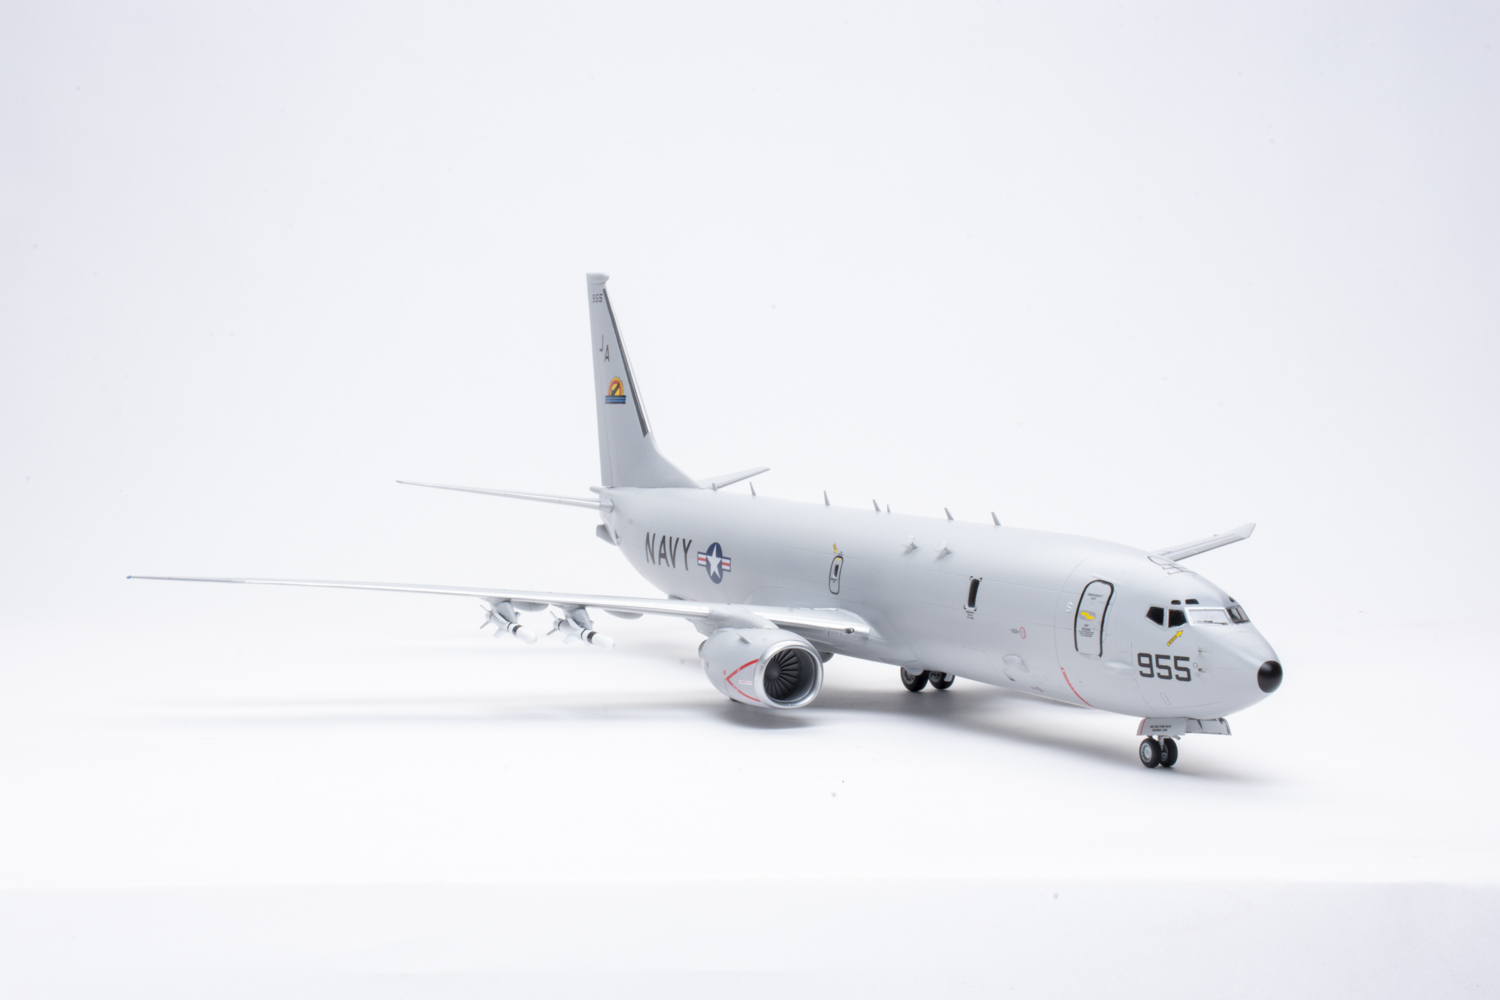
BPK provides loads of detail in the 28-piece cockpit, but you won’t see much of it through the windows. More detail parts fit into the main landing gear bay, but they will be hard to see, as well.
The kit splits the fuselage into six pieces: left and right forward halves, left and right aft section, the bottom of the wing structure, and an aft belly pan. The diameter of the aft section is about 1mm larger than the forward section, resulting in a noticeable step. Oops!
Since there were no assembly aids other than a butt joint, I added a bonding surface by gluing strip styrene inside the rear edge of the forward fuselage.
Another complication: the belly pan of the rear section includes the molded-closed weapons-bay doors that extend forward into the space for the belly of the wing section. Barely noticeable in the instructions is a knife-blade label and a shaded portion of the wing section’s belly. Oops!
You must cut away 8mm from the trailing edge of the wing section’s belly to make room.
In my sample, flash covered the viewing ports in the escape doors on the left forward fuselage and needed to be cleaned out.
The instructions don’t indicate that weight has to be added to the nose to keep the model balanced on the landing gear. Oops!
How much? I don’t know because I didn’t discover the problem until the model was nearly finished. I inserted a piece of clear-rod stock into a hole drilled in the belly to serve as a tail prop.
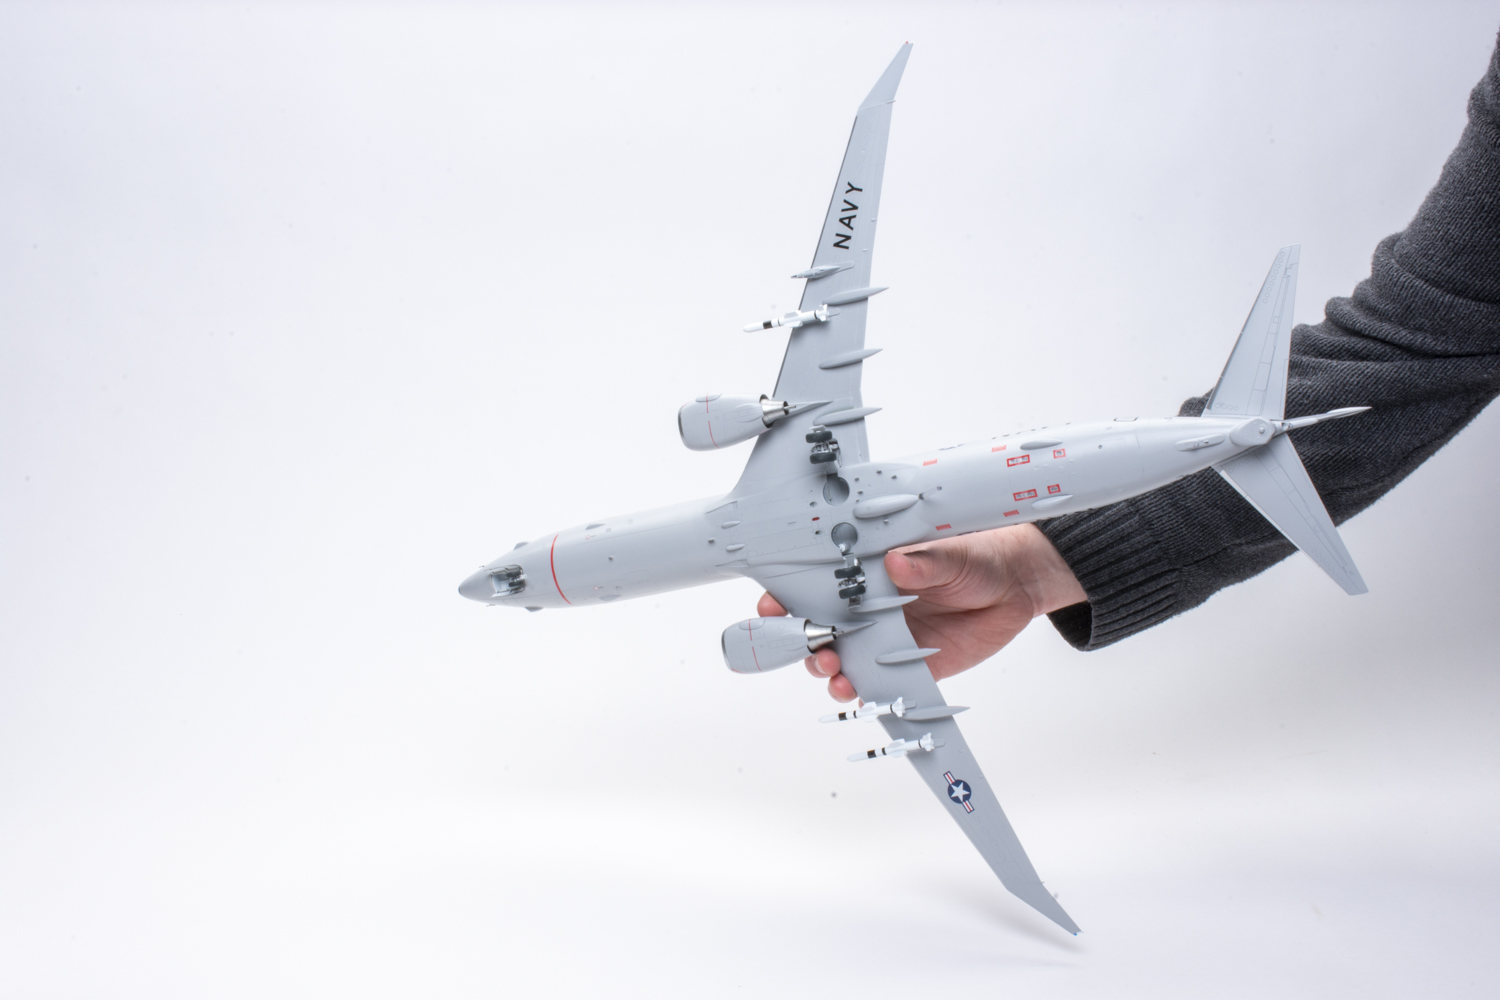
The wings fit well, but I found the swept tips fit better after cutting off the tiny tabs along the mating surfaces. Also, wingtip Part C1 fits better to the right wing, and wingtip Part C12 goes on the left wing, the opposite of what is indicated in the instruction diagram.
There are no locators molded on the wing for the missile pylon bases, which are misnumbered in the diagrams: Two on the right wing should be Part C6, with two on the left Part C3. Oops!
The instructions show that you must cut off the tip of the fin halves to install the special tip halves for the Poseidon. No part numbers are given, but they are parts C2 and C13. Oddly, the bottom of the fin assembly is open, so there are no holes for the mounting pins to be added to the fuselage. Oops!
The kit features a beautiful set of resin (perhaps 3D-printed) detail parts for the two engines interspersed throughout the assemblies. But there are no positive locators for fitting them into the cowls. Be prepared for a long session with a razor saw to separate the resin parts from their bases.
Getting closer to final assembly, the instructions show the addition of dozens of tiny, photoetched-metal parts, like air-flow vanes, vents, and door handles. The diagrams for many of them are even smaller than the parts, and I left off most of them. I got my engines mixed up on my model; the prominent vane should be on the inboard side of each cowl. My bad!
Installing the landing gear is trouble. The instructions provide only a long view with small arrows aiming the gear into the open wells. Oops!
The main-gear wells sport no sturdy pins or holes, just subtle crescents molded into the thin walls. These represent the bearing surfaces that hold the front and rear ends of the main struts. In the nose-gear well, it isn’t clear how the V-shaped door retraction arms should be positioned.
There are fewer locators molded onto the surface of the top and bottom of the fuselage than antennas, and the instructions aren’t clear on the locations, either.
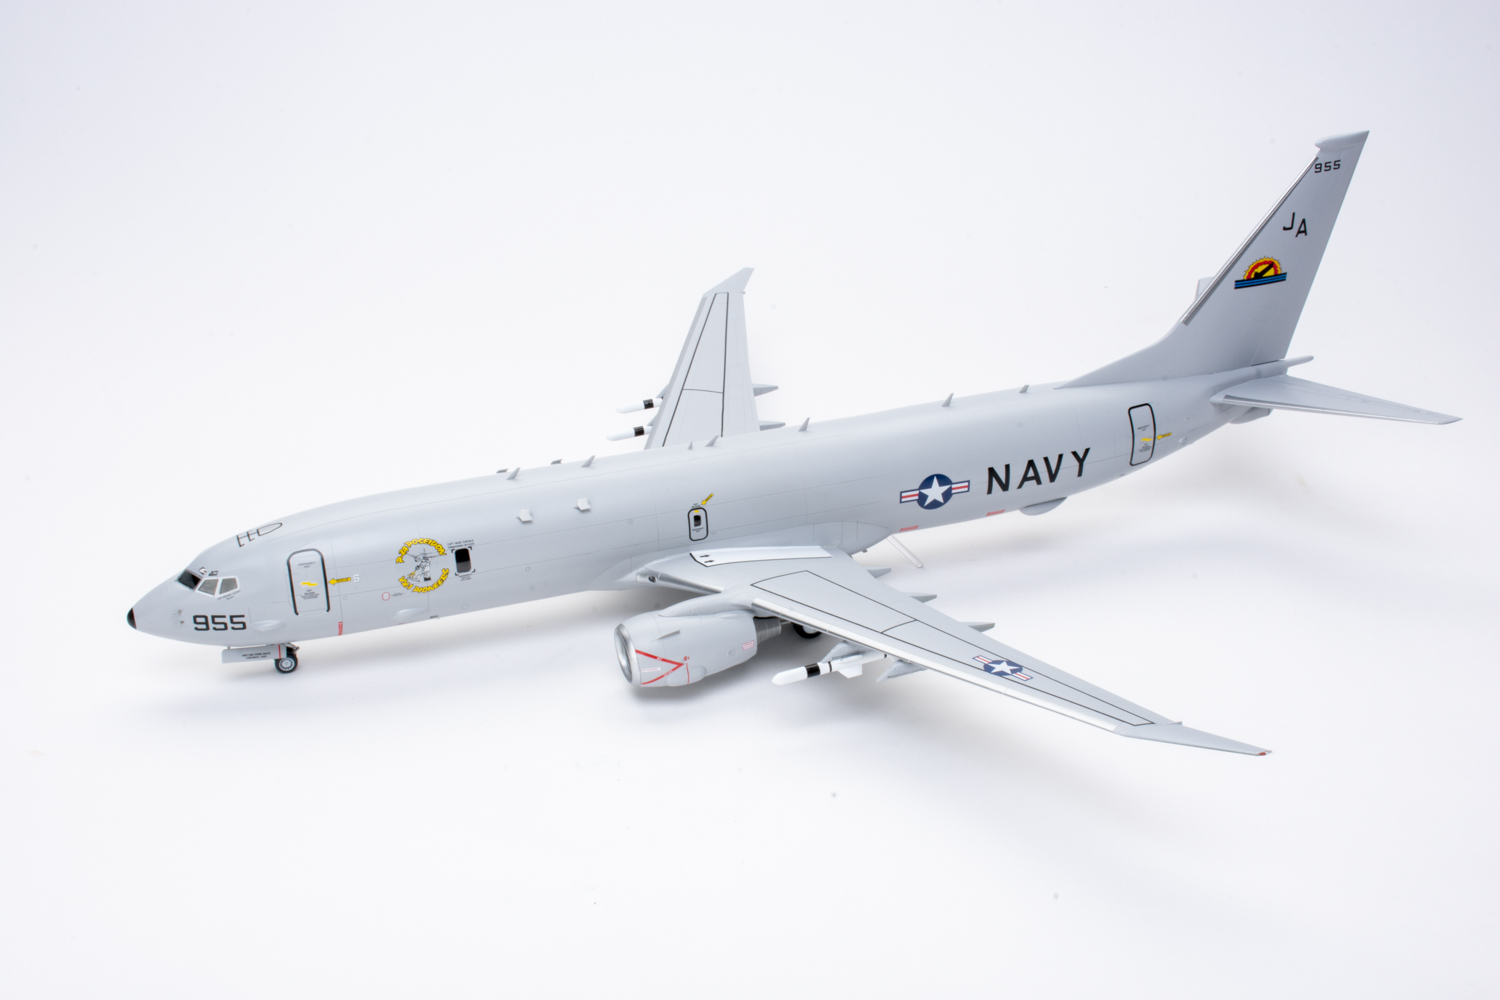
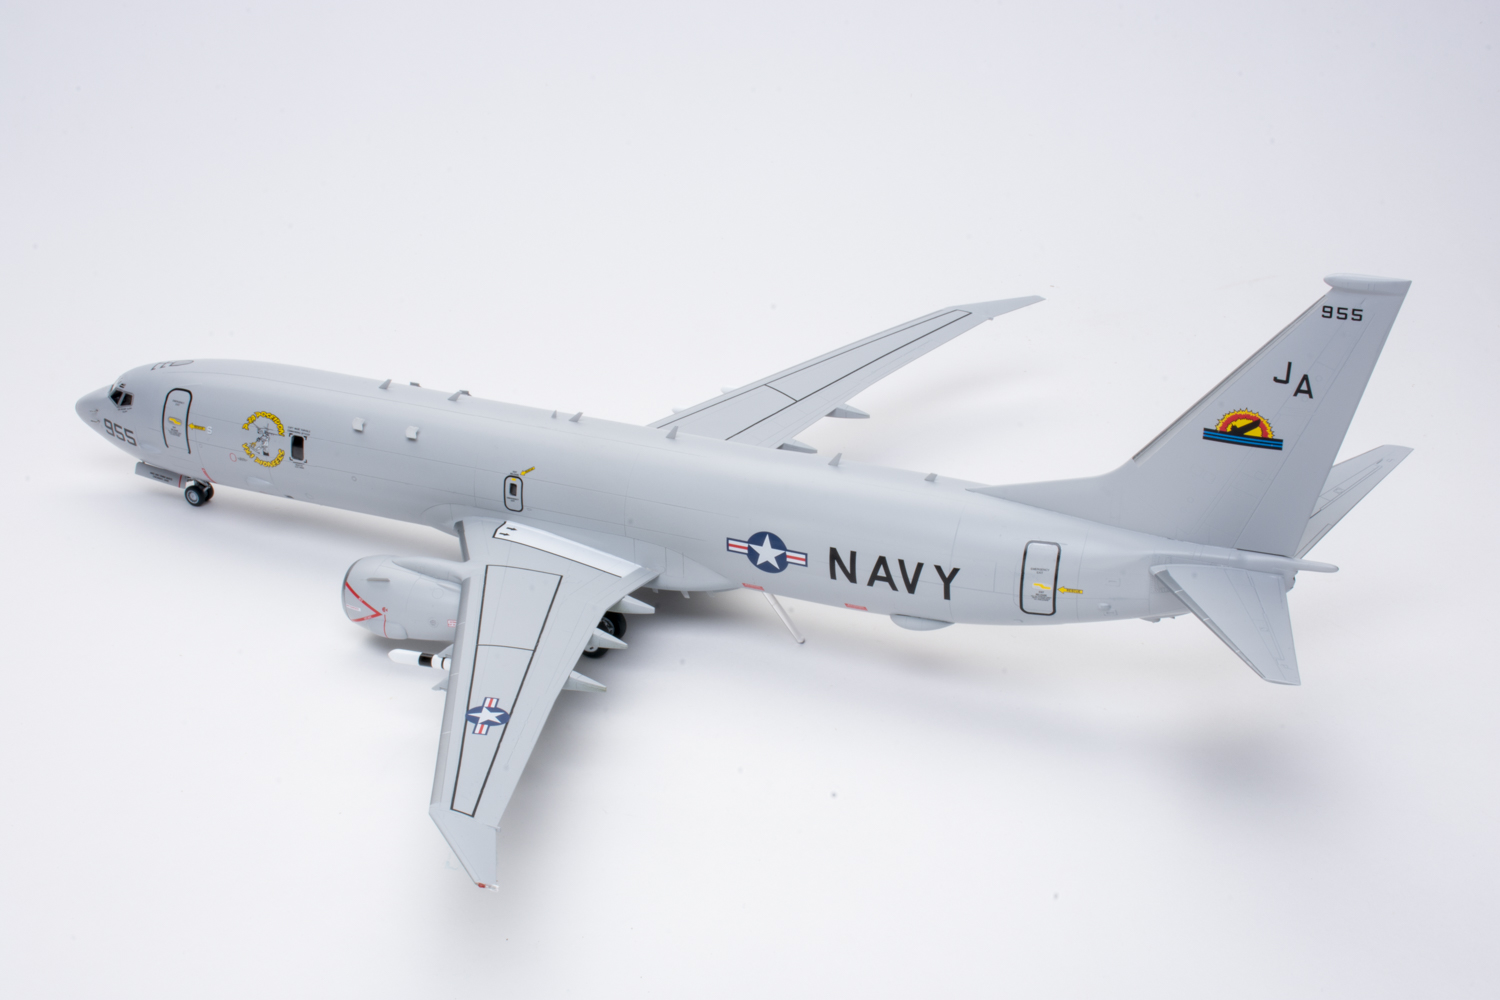
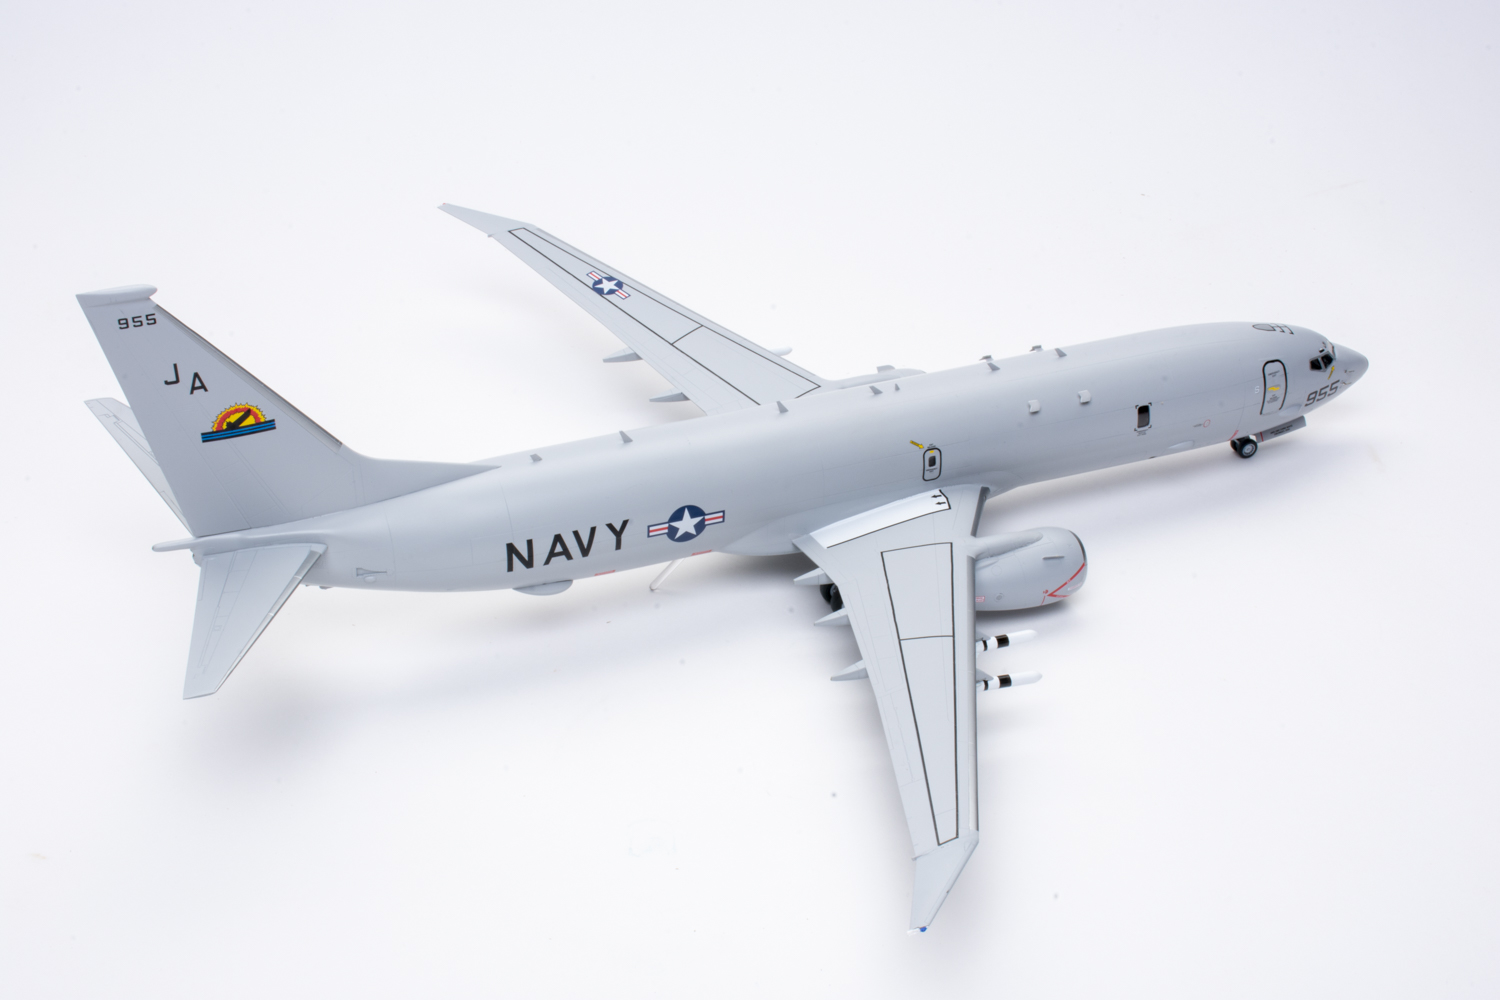
The kit includes four Harpoon antiship missiles to go on the wing pylons, but the instructions remain vague regarding their fit. A featureless representation of the Poseidon’s retractable electro-optical/infrared sensor turret appears in the instructions for the bottom of the forward fuselage, but I left it off of my model.
The instructions provide color callouts for the interior details but no advice for the landing gear, engines, or antennas. I painted the gear white, the engines with several metallic shades, and the antennas gray. Ah, but which gray?
The instructions show the overall color of the Poseidon to be FS36495, but it should be “Boeing Gray” FS16515. For expedience, I painted my model with gray Tamiya Primer; it’s a bit too dark and cool but looks OK. I painted the leading edges of the flying surfaces and the intakes aluminum.
BPK provides a set of pre-cut, self-adhesive masks for the cockpit and door windows, but the instructions fail to mention where they go or how to use them. I made the mistake of using the masks for the cockpit “eyebrow” windows; photos show they were not evident on the real Poseidons.
The beautifully printed kit decals have markings for a test bird with the U.S. Navy’s VX-1 “Pioneers” at Pax River and a Royal Australian Air Force Poseidon. Only one pair of intake warning chevrons is supplied (Oops!), so I put them on the outboard sides of the cowls. Beware, the decals are super thin and difficult to move if mislocated. I recommend you apply a coat of Micro Liquid Decal Film to make them easier to handle.
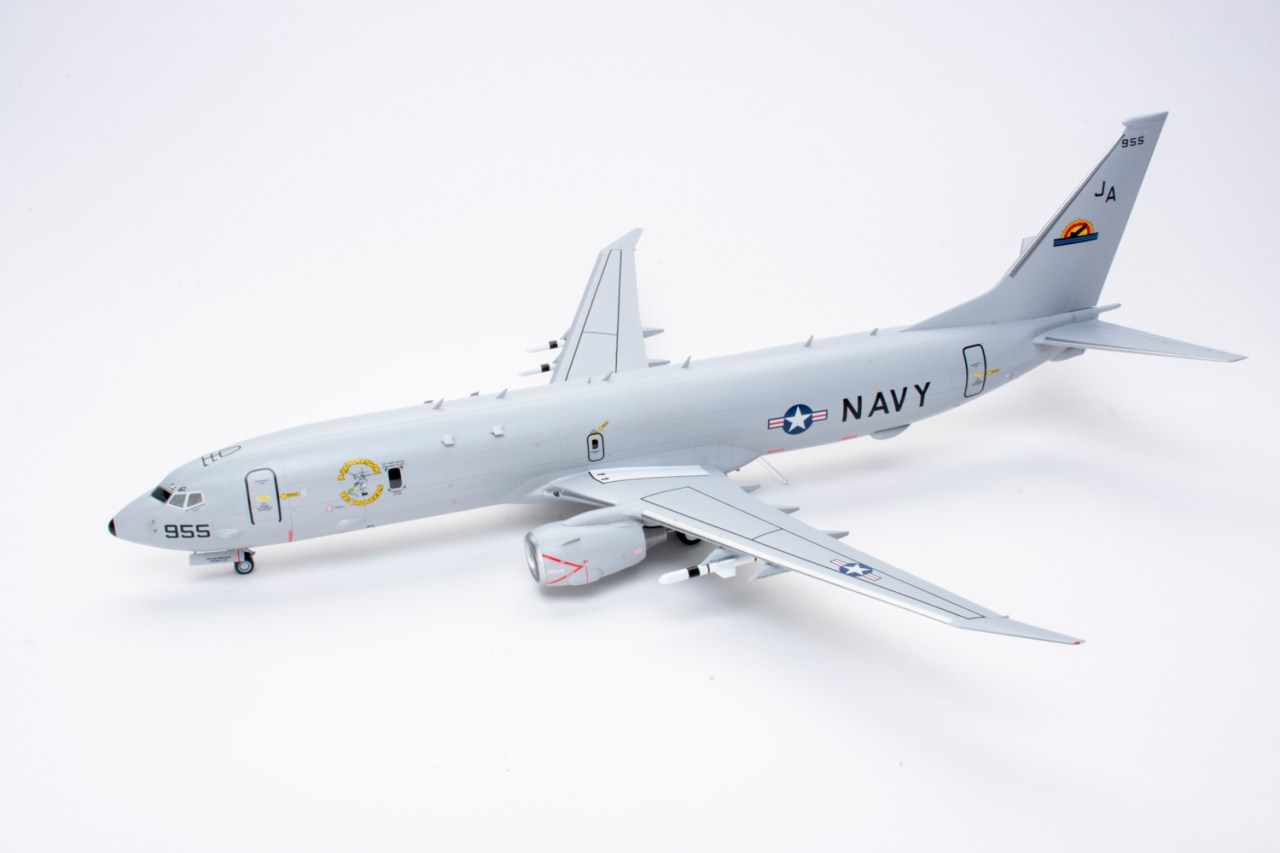
My P-8 took 43 hours to finish. The mostly-monochromatic paint job was the quick part — interpreting the instructions, determining how the parts go together, and reinforcing glue joints were the real time-eaters. I recommend this kit, but only to experienced builders with several difficult models to their credit; beginners may be frustrated by assembly puzzles and confusing instructions.