One of the six Japanese navy carriers that launched the attack on Pearl Harbor, the Akagi, or at least its island and adjacent flight deck, is re-created in the Takom 1/72 scale plastic model kit. Consisting of 373 parts, including a massive, single part for the flight deck, the kit is well-detailed and a great way to display a Pearl Harbor aircraft. The deck is large enough to accommodate one Kate or a couple of Vals or Zeros.
Studying the instructions, I determined it was best to leave the upper deck loose so I could install the clear bridge windows and portholes after painting and finishing. Details abound, including multipart lookout equipment and searchlights, and many, many voice pipes. I left much of this separate for painting.
Extreme detail marks the bridge, too, with gauges, a compass platform, and lookout equipment. Unfortunately, the interior walls have numerous ejector-pin marks. I filled them, but you probably don’t need to bother — the inside of the bridge is difficult to see, especially when all the futon anti-splinter mats are in place.
Study the instructions carefully. Myriad pipes and drains run all over the island. Some runs are difficult to fathom from the drawings, so go slowly and mount them one at a time — you’ll find the fits quite well.
Be extremely careful removing the thin pipes, railings, and ladders from the sprues. No matter how cautious I was, I still managed to break a handful of them. Superglue, tweezers, and patience provided a fix. Be warned, there is a railing (Part F32) on the aft portion of the bridge deck that must be installed before the shelf (Part E46), or you will need to cut the railing into two parts to install it. There are some parts for the bridge — I assume they are supplemental armor plates — that were difficult to mount because they seem to just hang on the edge of the bridge wall,
The main mast is in two parts with separate supports and details. Take care aligning major pieces so the mast doesn’t become kinked. There are no flags or flag bags included in the kit, so you will need to add those details if desired.
Several pipes mounted on the island touch the deck, and I carefully trimmed the pipes flush with the deck. I used the deck as a jig to ensure the large pedestals forward of the bridge were aligned correctly.
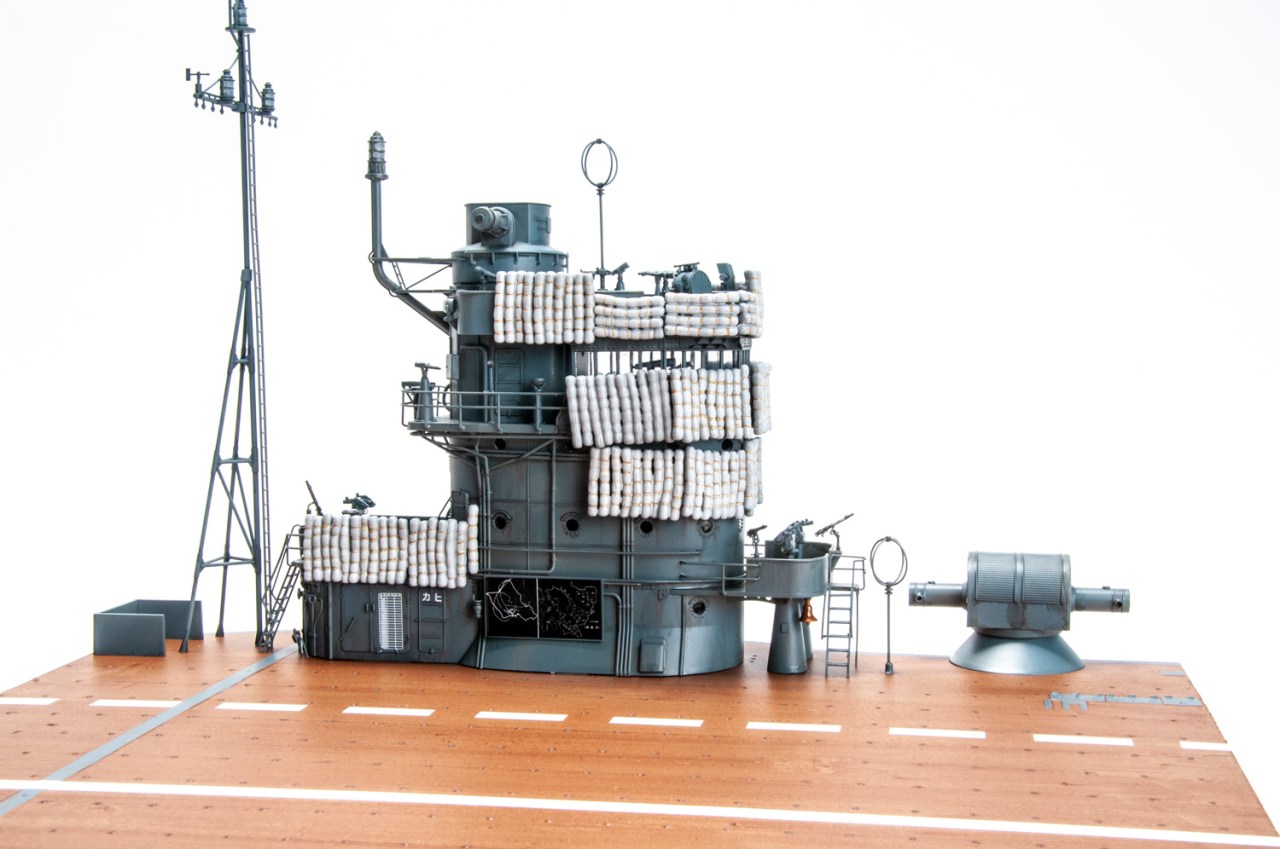
The deck was painted and finished separately using craft paint and Krylon acrylics. The decals worked well. The color painting and marking guide seems to show gaps for the long white lines, but they are long enough to overlap slightly. You’re on your own to carefully space the short “dashed” decals. I used a gray pencil to highlight the numerous deck tie-downs.
The island was primed with a generic gray spray paint and then airbrushed with Tamiya Light Grey (No. XF-66). I weathered it with Tamiya Panel Line Accent Color Dark Grey (No. 87199) and a rust-colored watercolor pencil. The clear parts were installed, and then I mounted the island to the deck.
Lastly, I mounted the anti-splinter mats around the island after painting them off-white and drawing on the ropes with a tan watercolor pencil. Only a few of the mats have any indication of how they attach and the CAD-style drawings are difficult to interpret. I used alligator clips to clamp the mats in place on the railings prior to applying glue, which helped considerably. I drilled out the muzzles on the machine guns before painting them and added them at the end.
The Takom 1/72 scale IJN Aircraft Carrier Akagi Island & Flight Deck Pearl Harbor Attack 1941 plastic model kit looks great when finished and will reward time spent adding touches like flags and rigging. Plan on being careful; it’s a good kit but not an easy build. I spent a little more than 40 hours on it and could have spent much more. Now the question is what to build to fill the deck. A Zero? Or a Val? Oh, I know, a Kate.


