Considered by many to be the finest fighter of World War II, the North American P-51 Mustang helped turn the tide against the Luftwaffe. With its superior range, the Mustang escorted bombers closer to their targets ensuring a successful mission. It’s also pretty nice to look at.
Model kit companies have thoroughly covered the P-51. So, modelers may not need another Mustang kit in 1/72 scale, but you will want the Eduard 1/72 scale P-51D-5 Mustang plastic model kit in your stash. This new kit from Eduard focuses on the first production run of the D-model without the tail fillet.
The first thing you will notice when opening the big box is the large number of parts inside. Don’t worry, though, many parts are for other variants and will end up in your spares bin. The parts you do use are exquisitely molded in gray with fine recessed details. Decals for five marking options and die-cut masks for the canopy and tail wheel are included. The 20-page full-color instruction manual breaks the assembly into multiple steps, but pay close attention as you build for notes regarding differences for the version you choose.
As usual, the assembly starts with the cockpit. The detail is fantastic, including separate parts for the sidewalls, radio equipment, and controls. For the instrument panel, options are provided for an injection-molded plastic part with a decal and pre-colored photo-etched metal (PE) parts. Other PE enhancements for the seat belts and side panels dress the Mustang up even more, though some are really tiny and fiddly. The parts are well engineered with positive locations and exceptional fit, so despite the high level of detail, the assembly went smoothly.
The first step in building the wing is assembling the main landing gear bay. Here, again, the detail is exceptional. You may want to leave part A7 off until the final assembly to make masking easier. There are a couple of panel lines to fill on the lower wing and another panel to scribe with a neat PE template provided. Gun ports are separate pieces, so de-seaming the leading edge is a snap. Be sure to drill the necessary holes if mounting the drop tanks. Ailerons and flaps are separate, with the flaps mounted in the down position. Even the navigation lights in the wingtips are separate (with a couple of spares just in case).
Mating the fuselage and wing revealed a near perfect fit as did the remainder of the airframe pieces. The only part I had trouble with was mounting the drop tanks to the pylons. There just isn’t any real positive join. I ended up drilling a hole through the pylon and into the top of the drop tank and inserting a piece of wire to help hold things together. Then it’s off to paint.
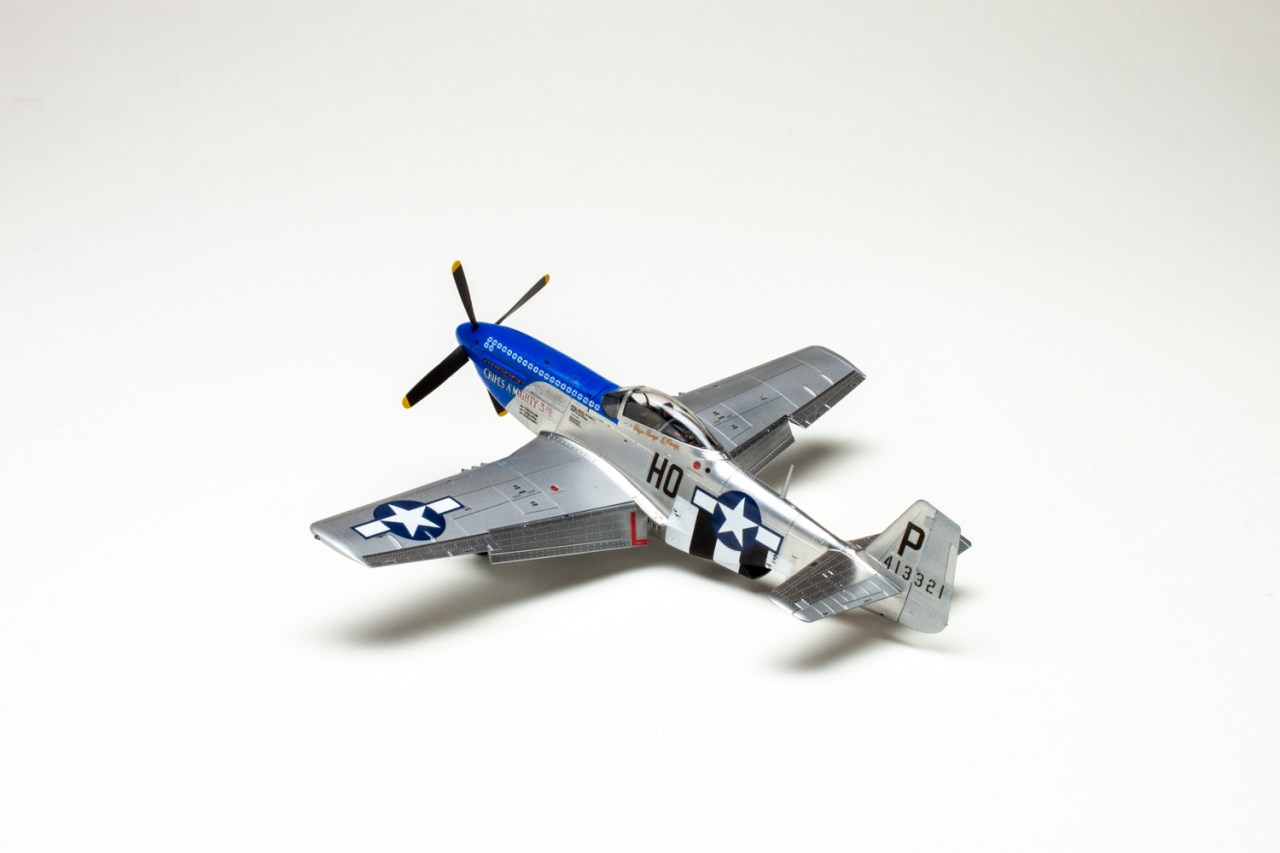
The last step is to add decals. I’ve heard tales about removing the clear carrier film from Eduard’s new decals after applying them. I didn’t try this and I don’t see the need to since they performed flawlessly. It may make more of a difference in a larger-scale model, but in 1/72 scale, I don’t know if it’s worth the anxiety.
We may not need another Mustang kit, but the Eduard 1/72 scale P-51D-5 Mustang plastic model kit is worth a look. I think it’s the best Mustang yet! I don’t know what I would do to improve on it; it’s close to perfect for an intermediate modeler and has plenty of options.


