
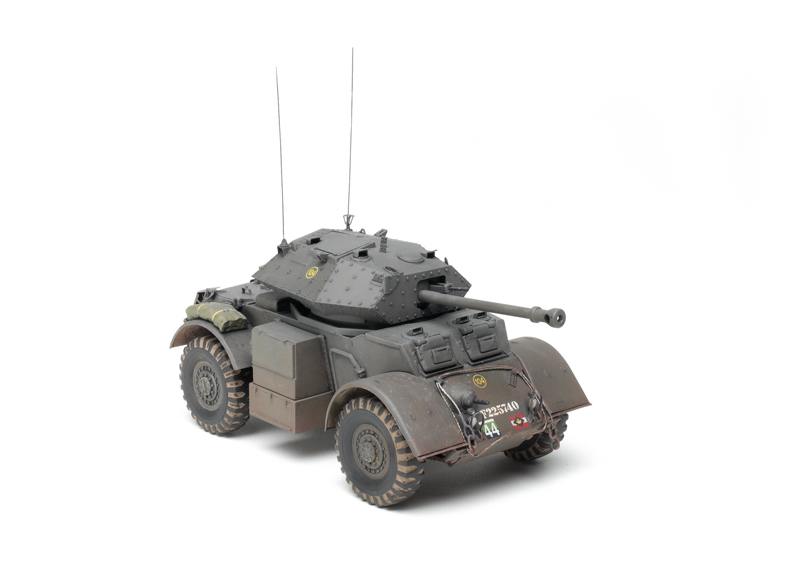
Welcome to the world of scale modeling: This is the third of four articles introducing you to a great hobby.
In the last installment, we showed you some of the basic tools you need to build a model. This time, we’ll talk about how to use those tools — and show you a few more, too — as we walk through seven major steps of a build and show you some of the fundamentals of good construction.
1. Prepare the parts
When you open the kit box, inspect the contents and take inventory. Most kit instructions have a parts map you can compare to the sprues (parts trees) to make sure everything is there. In other words, take a few practice cuts before swinging away. There is absolutely nothing wrong with a simple model built well.
Plastic injection-molded parts may still have traces of manufacturing oils or grease by the time they get to you. Leave the parts on the sprues and wash them in warm, soapy water; a few drops of dish detergent will do the trick. Scrub gently with a soft brush (an old toothbrush is the usual), rinse thoroughly, and let the parts air-dry. (Tip: If you are washing the parts in a sink, put a fine-mesh strainer over the drain to be sure you don’t lose any parts that might come loose.)
Notice that most kits label the sprues by letter; this will help you locate parts as you follow the instructions.
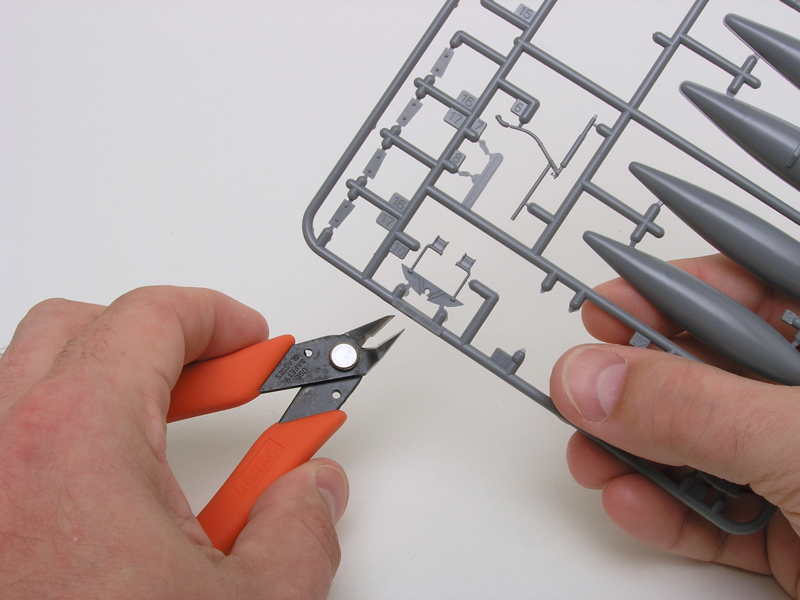
Use clippers to cut (not twist) parts from the sprue (parts tree). Cut as close as you can to the part. Be careful to cut only excess plastic, not molded detail or locating pins. If you invest in high-quality clippers, don’t use them for anything else.
Clip parts from the sprue only as you need them. That way, you’re less likely tto lose them or mix them up.
After you’ve removed a part from the sprue, inspect it. Is there any remnant of the sprue? Are there raised lines or other irregularities left over from the molding process? Sand away mold lines and any other irregularities on the part before gluing it. If the part has ejector-pin marks (little circles made as the sprue is ejected from the mold), you may have to use filler to repair them. (More on that shortly.)
When you are satisfied with the pieces to be joined, test-fit them without glue to make sure they go together as they should. Lightly sand mating surfaces for a better bond. Then, choose your glue.
2. Decide which glue will do
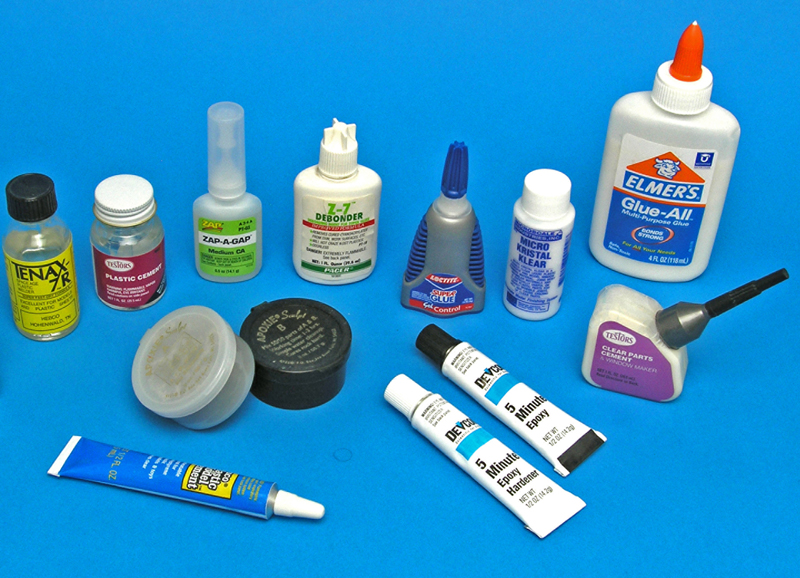
A little dab of tube glue can help you tack pieces in place. However, liquid styrene cement is neater and more efficient. Apply it sparingly with a small, fine brush: Join two pieces, load the brush with a minimal amount of cement, and merely touch the join. Capillary action will pull the cement out of the brush and into the join, where it will melt and fuse the plastic mating surfaces.
And here’s a bonus for beginners: If you happen to glue the wrong two things together, often you can apply a little more liquid cement and part the pieces.
Some kits contain resin and photoetched-metal pieces. Styrene cement will not work on those materials. Instead, use super glue or epoxy: The former is less messy, but the latter works well for joining large, relatively rough surfaces. Beware of letting epoxy seep out of a join, though — it is tough stuff to sand off.
3. Working with photoetched metal, resin, and other materials
If you are a modeler returning after decades away from the hobby, you will be surprised by what kits look like now. Back in the day of Aurora monster figures and Monogram hot rods, when Revell’s 1/72 scale B-17 Memphis Belle was still a fairly new kit, the box would contain plastic parts, maybe a few vinyl pieces (usually for tires), and occasionally some metal.
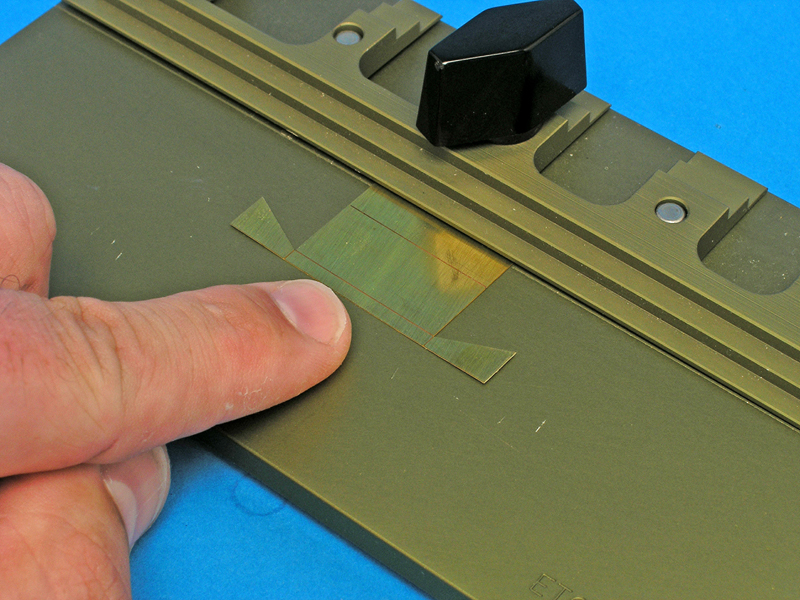
Nowadays, “multimedia” kits may supply resin and white-metal castings, injection-molded plastic, and finely detailed photoetched metal (to say nothing of what’s available in a burgeoning aftermarket full of specialized accessories you can add to kits). Each has unique characteristics that require slightly different techniques: Resin is heavier, more brittle, and may require more sanding and filling than injection-molded plastic; white-metal castings (often used for landing gear) may require metal files for cleanup; and bending or folding photoetched metal is much easier with additional specialized tools.
4. Join, wrap, or clamp
Using liquid styrene cement, you will be able to join most parts simply by applying the glue. However, larger assemblies, such as a tank hull, aircraft fuselage, or a wing, may need additional persuasion to fit well and eliminate seams.
Let’s use the example of a two-piece fuselage: Hold the pieces together and flow cement into the seam as before. Now, as the plastic melts, you can press the halves together and see molten plastic ooze out of the seam. This is good, as it fills the join for the desired seamless appearance.
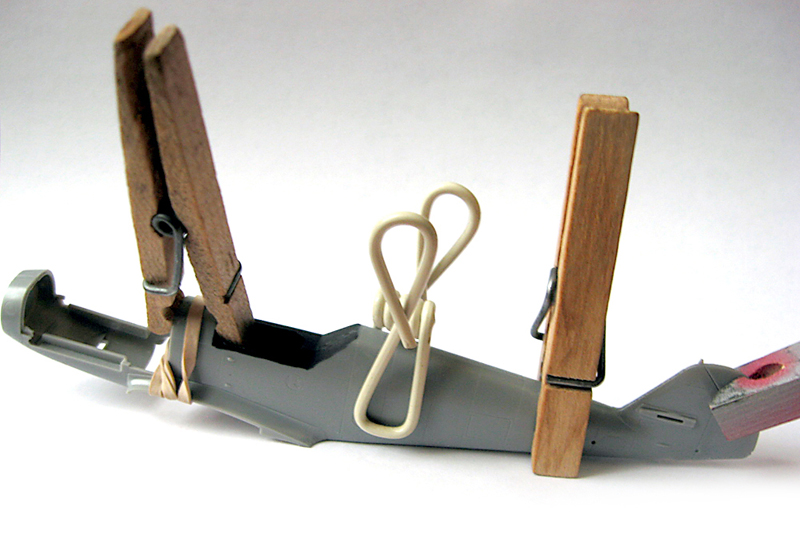
Before the glue is dry, clamp the halves together with modeling clamps, clothespins, or even rubber bands. (Be careful not to get glue on the rubber bands, though; styrene cement can melt them or, worse yet, run along their edges and mar nearby surfaces.)
When you tighten the clamp on the fuselage halves, more molten glue will ooze out. Don’t use too much glue or clamp too tightly or you’ll deform the parts. After clamps are applied to an assembly, check to make sure everything is receiving the right amount of pressure. Then leave it alone for 24 hours to make sure the glue is dry before proceeding.
5. Preparing canopies and clear parts
Returning modelers may also remember discovering that styrene cement will fog up clear parts. Use white glue (such as Elmer’s), Aleene’s Tacky Glue (a common craft item), or Testors Clear Parts Cement & Window Maker. These glues dry clear, and they won’t craze clear plastic.
Additionally, if a kit supplies resin and photoetched-metal parts for the interior, and the interior is covered by a canopy or windshield, the fumes from the super glue required for interior assembly can fog up the glass. You can protect clear plastic with a clear coat.
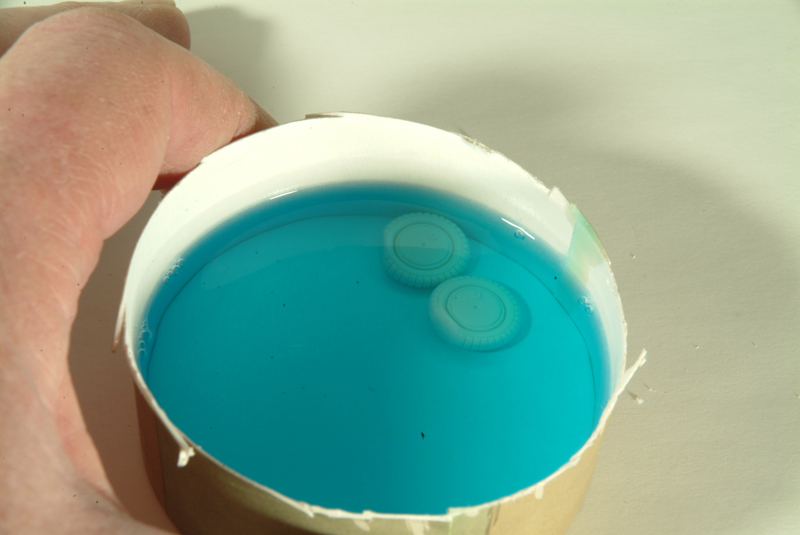
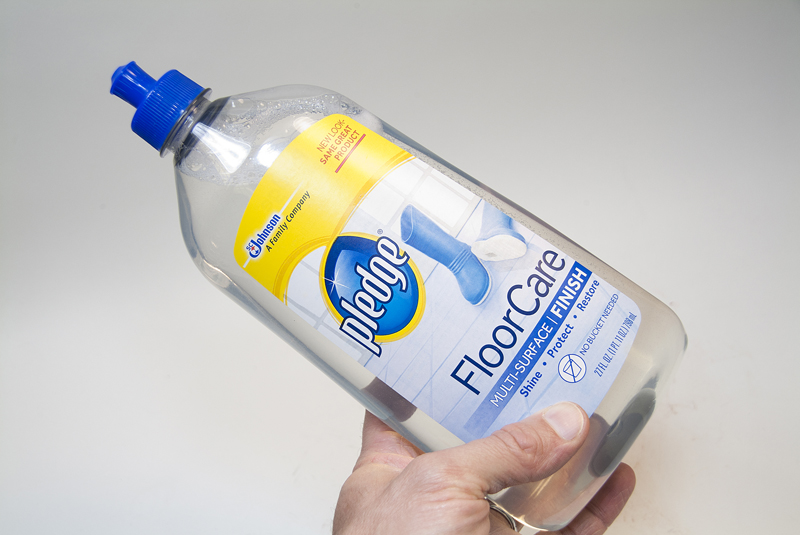
Pledge FloorCare Multi-Surface (or PFM for short) is an acrylic clear that adds brilliance and clarity to the clear plastic and protects it from those pernicious fumes. Submerge the clear plastic in Future, pull it out, and drag it along a paper towel to wick off excess. Then let it dry dust-free for at least 24 hours (even better, 48). Don’t fiddle with little imperfections: Future levels as it dries, resulting in a smooth finish. You can even use a little more Future to attach the clear parts.
6. Fill and smooth
If you stand in an airport terminal and look out at the planes, you’re not likely to see one with a longitudinal seam on top. Effective seam-filling is key to a realistic model.
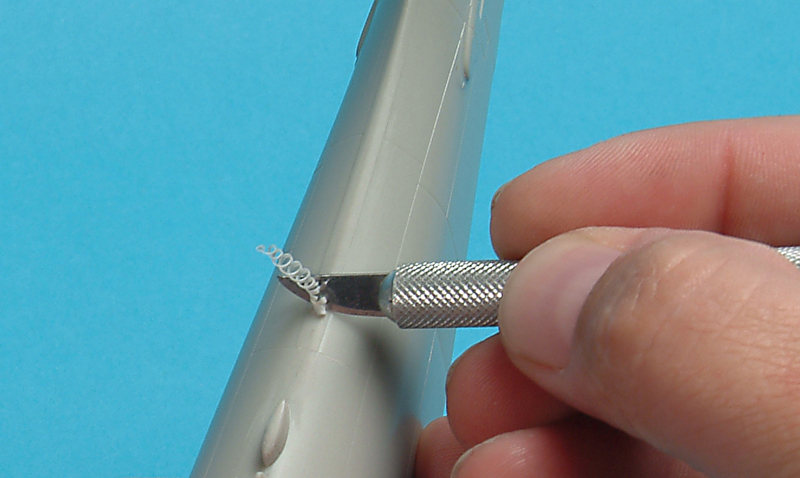
The best way to eliminate a seam is to sand (or carefully slice off) the plastic that oozed out when you glued it. Sometimes that’s enough to conceal a seam. But a long seam like a fuselage join will probably have gaps where the seam is not filled.
Modelers all have their favorite fillers. Many use super glue, either the standard thin viscosity (great for running along fuselage seams) or gap-filling (for larger gaps). If you fill with super glue, sand it before it cures. Otherwise, it’s tougher than the plastic around it.
A solvent-based filler, Squadron Green Putty can be scooped and smoothed before it hardens. However, it shrinks when it dries. Also, it stinks to high heaven and, in fact, contains toluene, a toxic irritant.
Two-part epoxy putty, such as Milliput, has more body and is easy to sculpt before it cures. However, after curing is much tougher to sand smooth. A water-soluble counterpart is Apoxie Sculpt two-part putty.
Then there are several water-based or relatively inert fillers, such as Deluxe Materials Perfect Plastic, which work well. And in the FineScale Modeler mail basket are several do-it-yourself-type accounts from people claiming success with wall-joint compound, spackle, even Liquid Paper correction fluid.
Whatever you choose for a filler, the idea is to fill the gap or imperfection and, once the material is in an optimal state, sand it smooth so the repair disappears underneath a coat of paint. Padded sanding sticks work well for this, riding on the high spots without damaging the surrounding “good” plastic. As you work off the excess filler, use progressively finer grits so that when you are finished no scratches are visible.
Surface treatments such as Gunze Sangyo Mr. Surfacer can take you to the last step by filling in fine scratches and sanding smooth for the desired finish.
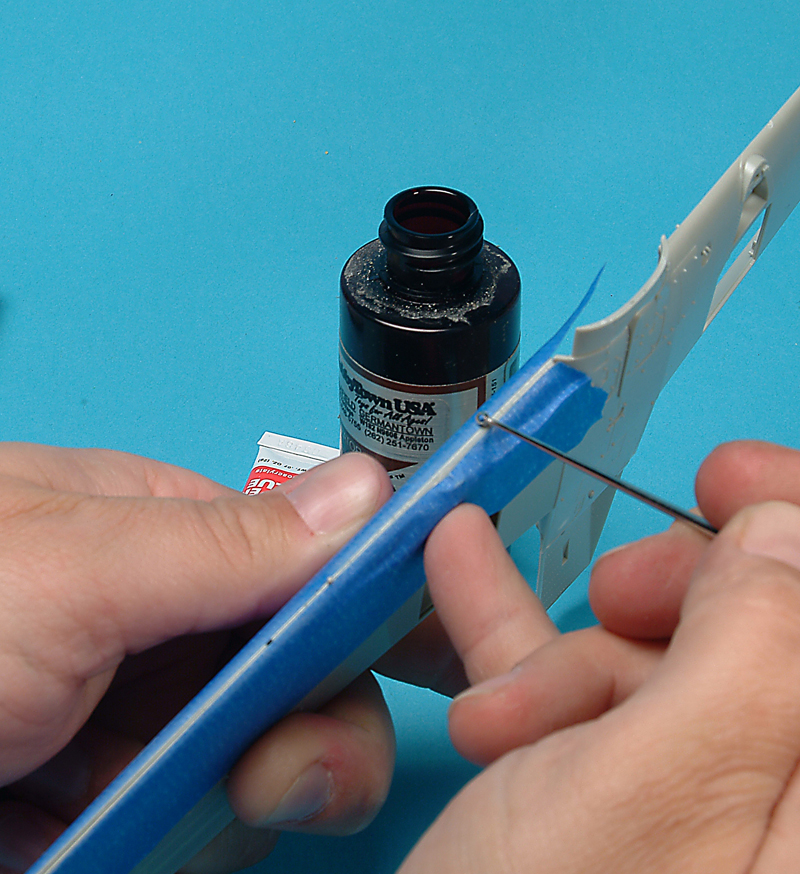
7. Prime, fill, sand, repeat
After you have filled and sanded a seam smooth, you can check your work by dragging a toothpick across it. If the pick catches, the seam needs more work. If the area feels smooth, wipe it down with alcohol, Testors Plastic-Prep, or even a little bit of water to remove sanding dust. Use an old toothbrush to remove dust from panel lines and other recesses, and wipe the model down again until you are sure the surface is clean before applying primer.
Primer may reveal slight imperfections. Apply more filler, sand it, wipe it down, and prime again. Repeat as necessary.
Remember, perfection most often comes from correction. Take the time to make it right. Patience is a virtue that helps build better models!
Next time: Build great scale models, Part 4: Finishing with paint and decals.
Remember …
When you subscribe to FineScale Modeler magazine, you can register at www.FineScale.com and have unlimited access to bonus features, thousands of free kit reviews, and a database of more than 15,000 products.