Modeler Carmine Mari of Salerno, Italy, shatters some modeling conventions. The first one is “you can’t improve a Tamiya kit,” and the second, “you can’t make a great model without an airbrush.” Carmine takes the excellent Tamiya 1/48 scale F4U-1A Corsair, adds even more detail, and then hand-brushes an incredible weathered paint job that rivals any achieved with an airbrush.

Carmine sent hundreds of photos of his Corsair project that we’ve distilled to show readers all the amazing work he’s done. Follow along and discover his techniques. You’re sure to find ideas to apply to any model — Tamiya kit or not!


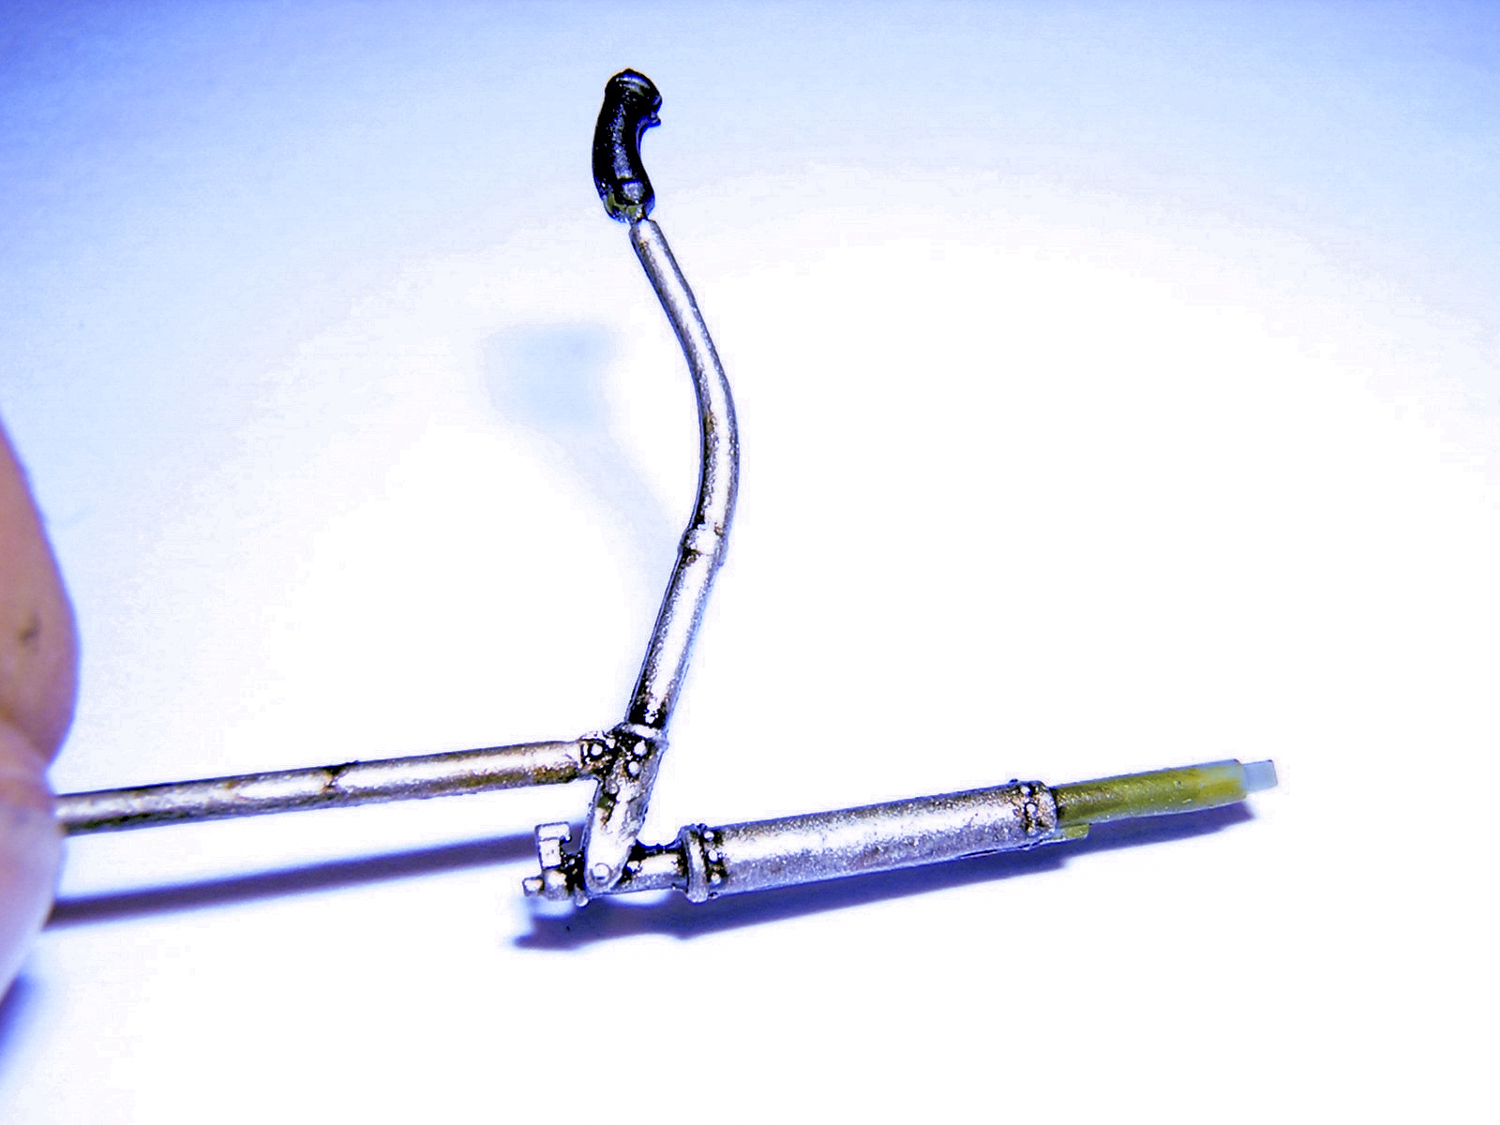
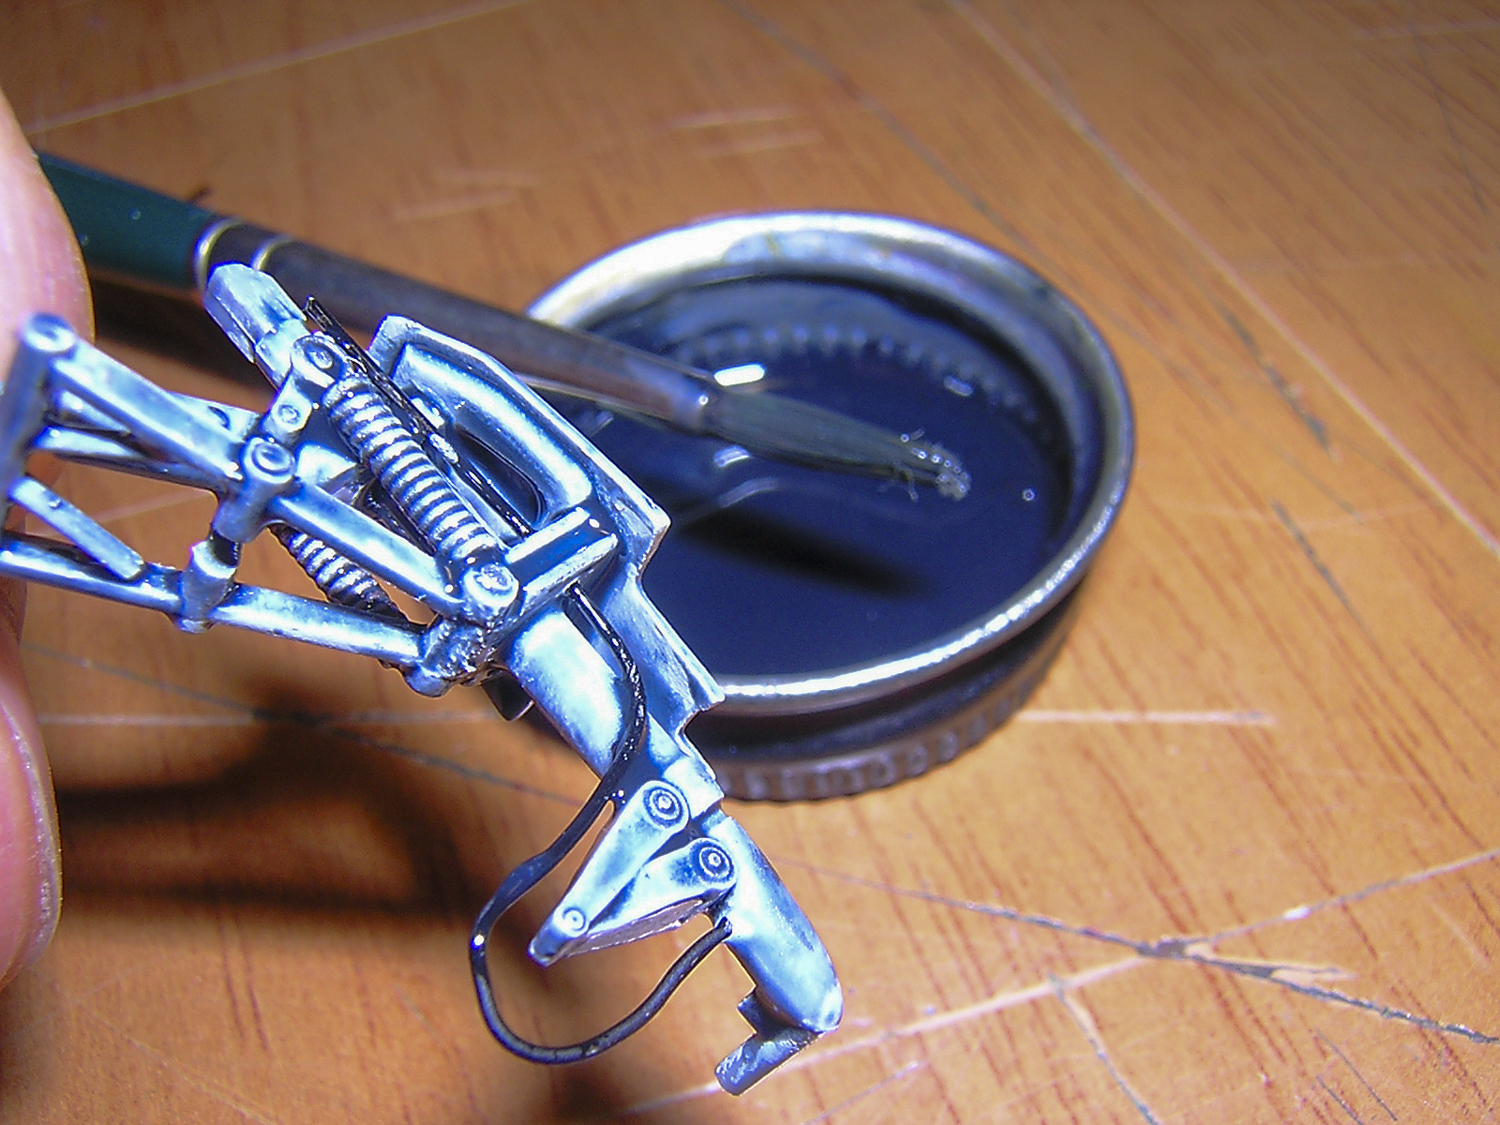
Carmine dressed up the Tamiya kit’s interior, starting with detailing the control stick.

Lead foil was used to produce the seat harness.


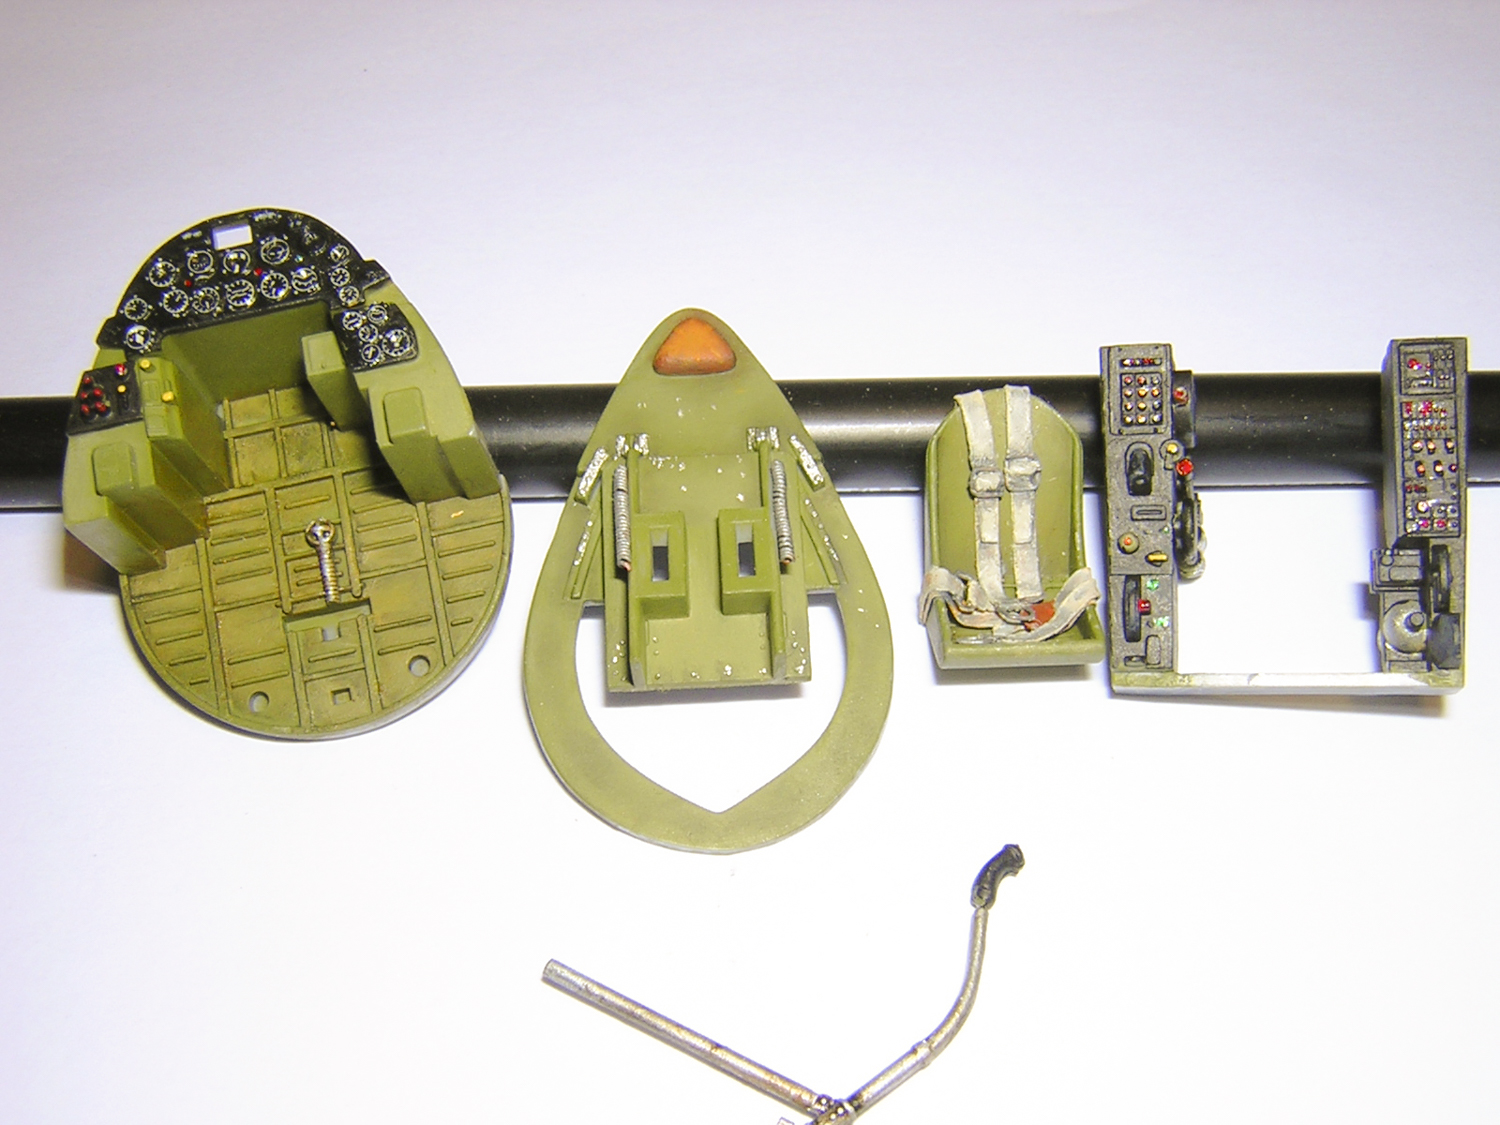
Here are all the interior components awaiting installation. Carmine punched out decal gauges for the instrument panel. Note the coiled wire for the seat adjustment springs on the rear bulkhead.
Here’s the interior assembled, ready to drop into the Corsair fuselage. Dash one Corsairs had no cockpit floor, just troughs guiding the pilot’s feet to the rudder pedals.

The sliding bubble canopy received photoetched metal rear-view mirrors and latch handles.

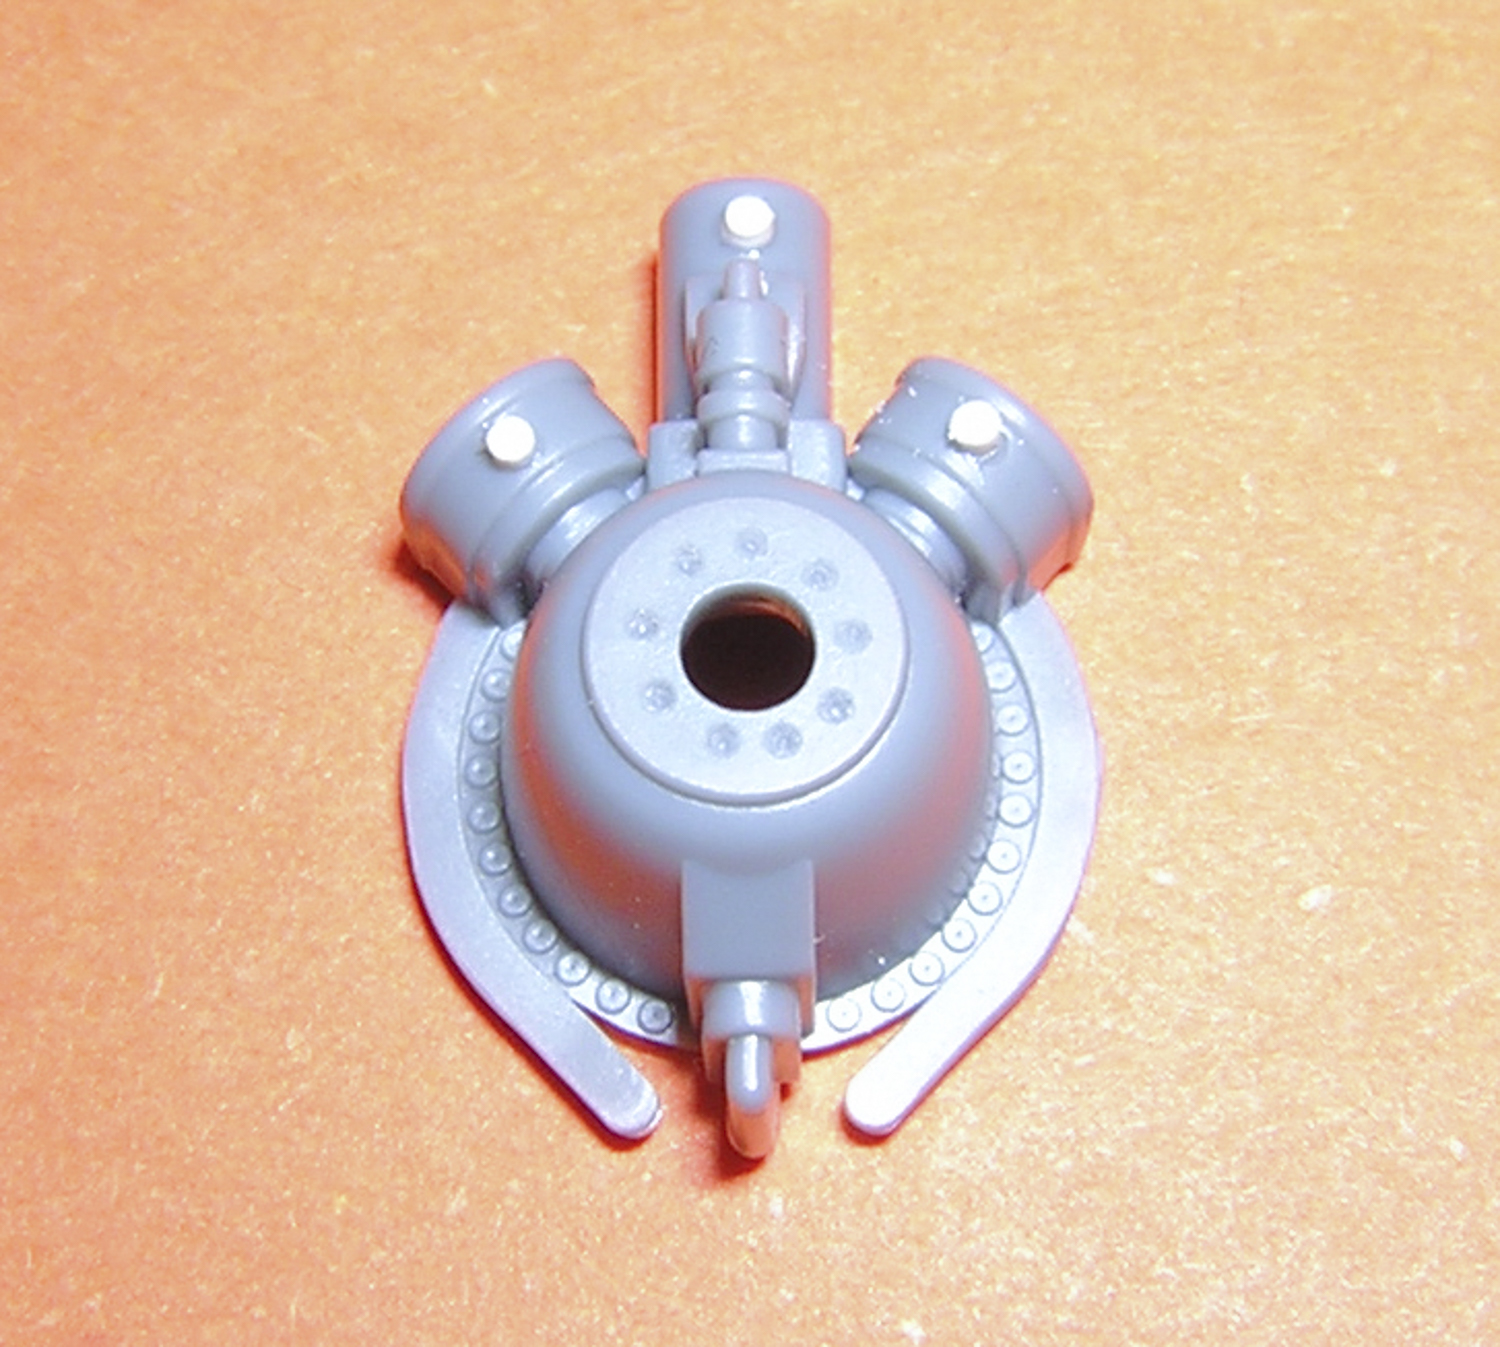
The engine crankcase gets a few plastic tidbits on the magnetos.


Carmine “threaded” the engine with single strands of copper wire to represent the ignition wires. Each cylinder has two spark plugs to ensure ignition.

The completed engine is attached to the firewall on the fuselage.

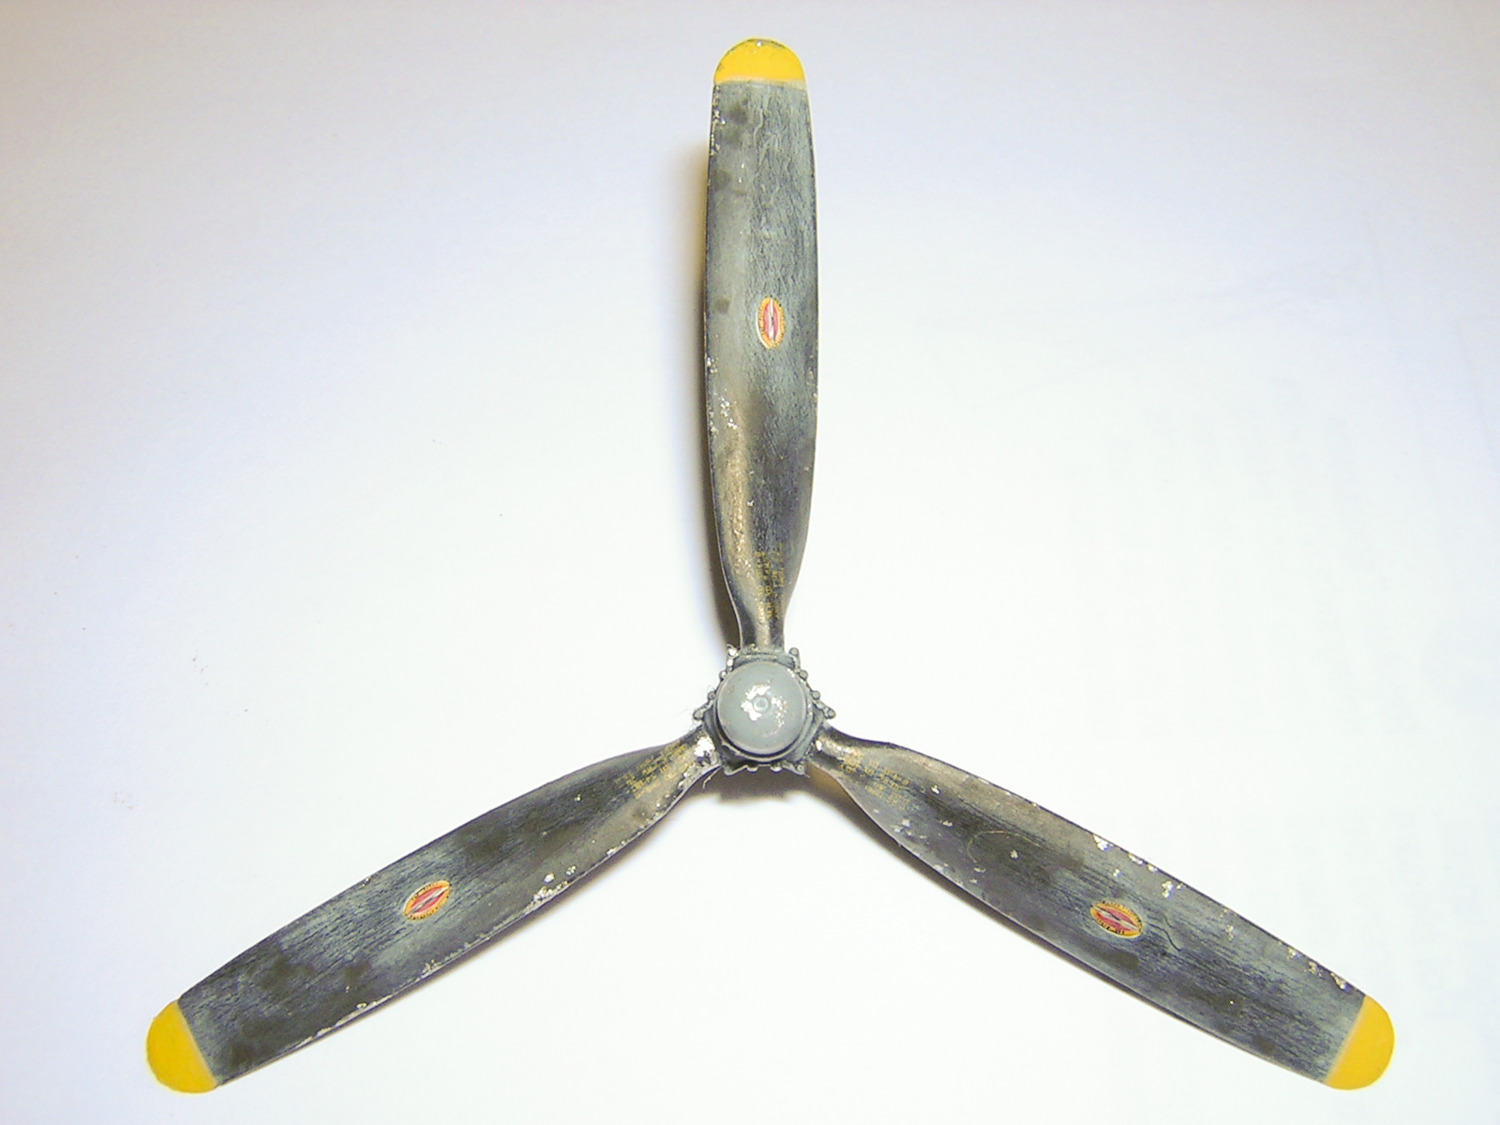
Carmine painted the propeller and weathered it with the appropriate scuffing and wear of a combat machine.


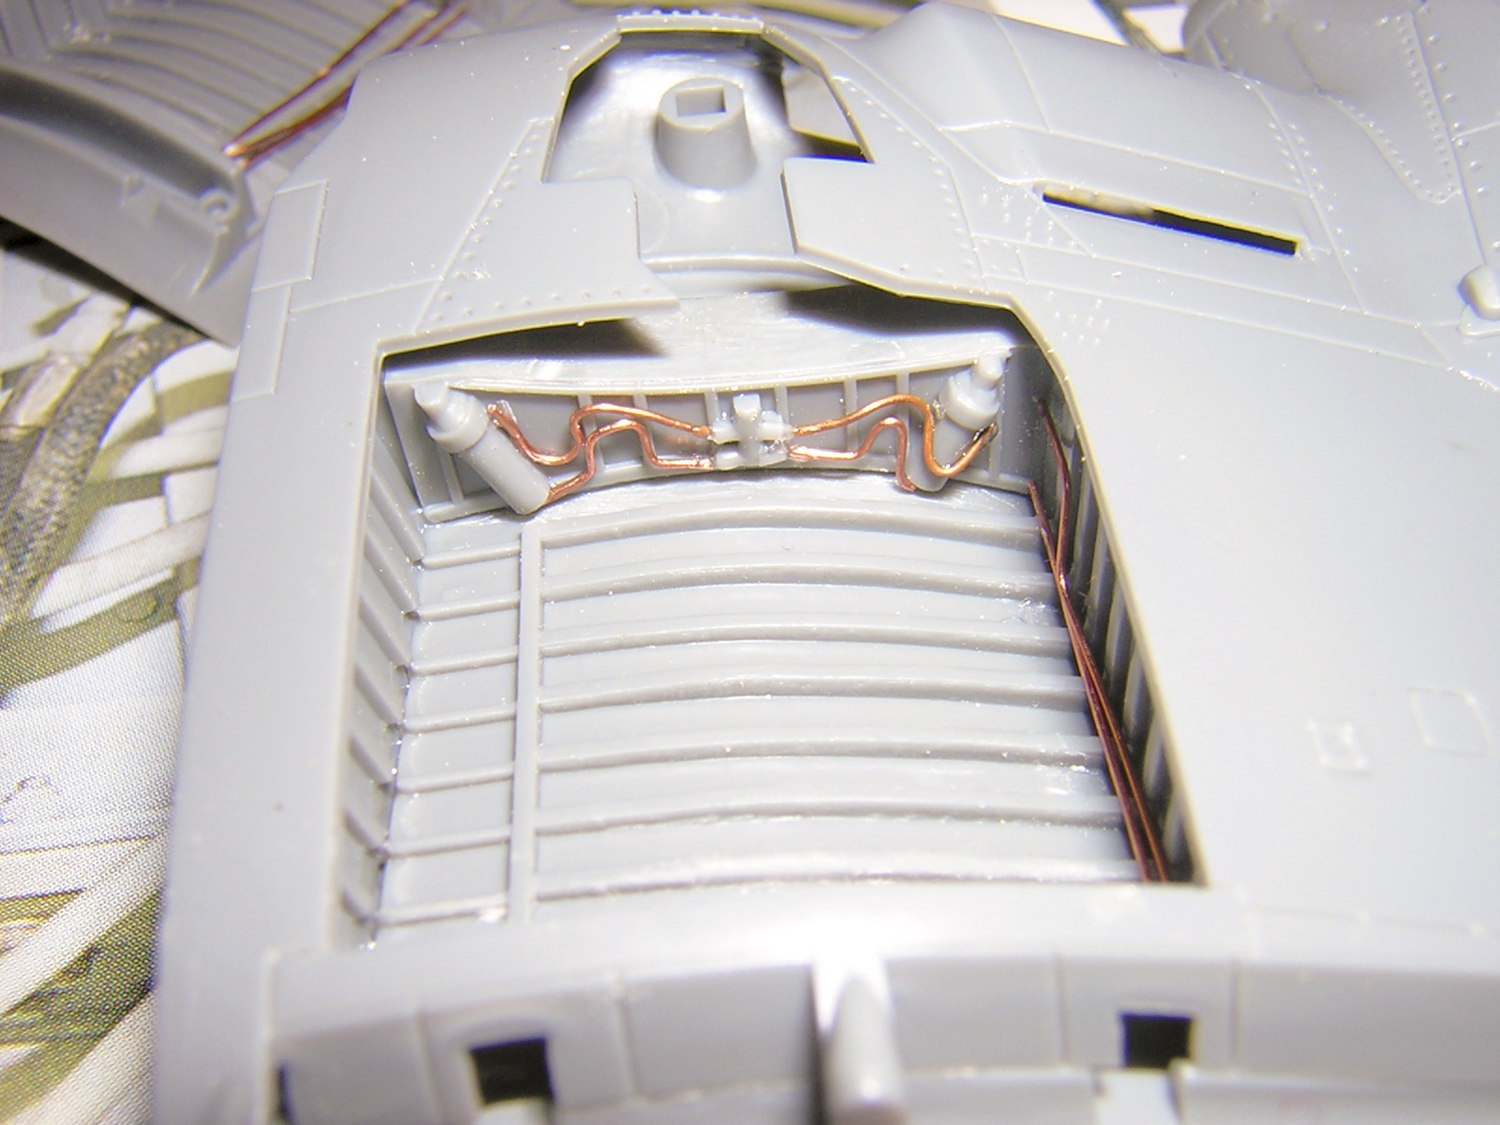
The option of open cowl flaps invited more detail, so Carmine made the actuators with copper wire and bits of styrene.

The insides of the cowl flaps were painted and given an oil-paint wash to add visual depth.

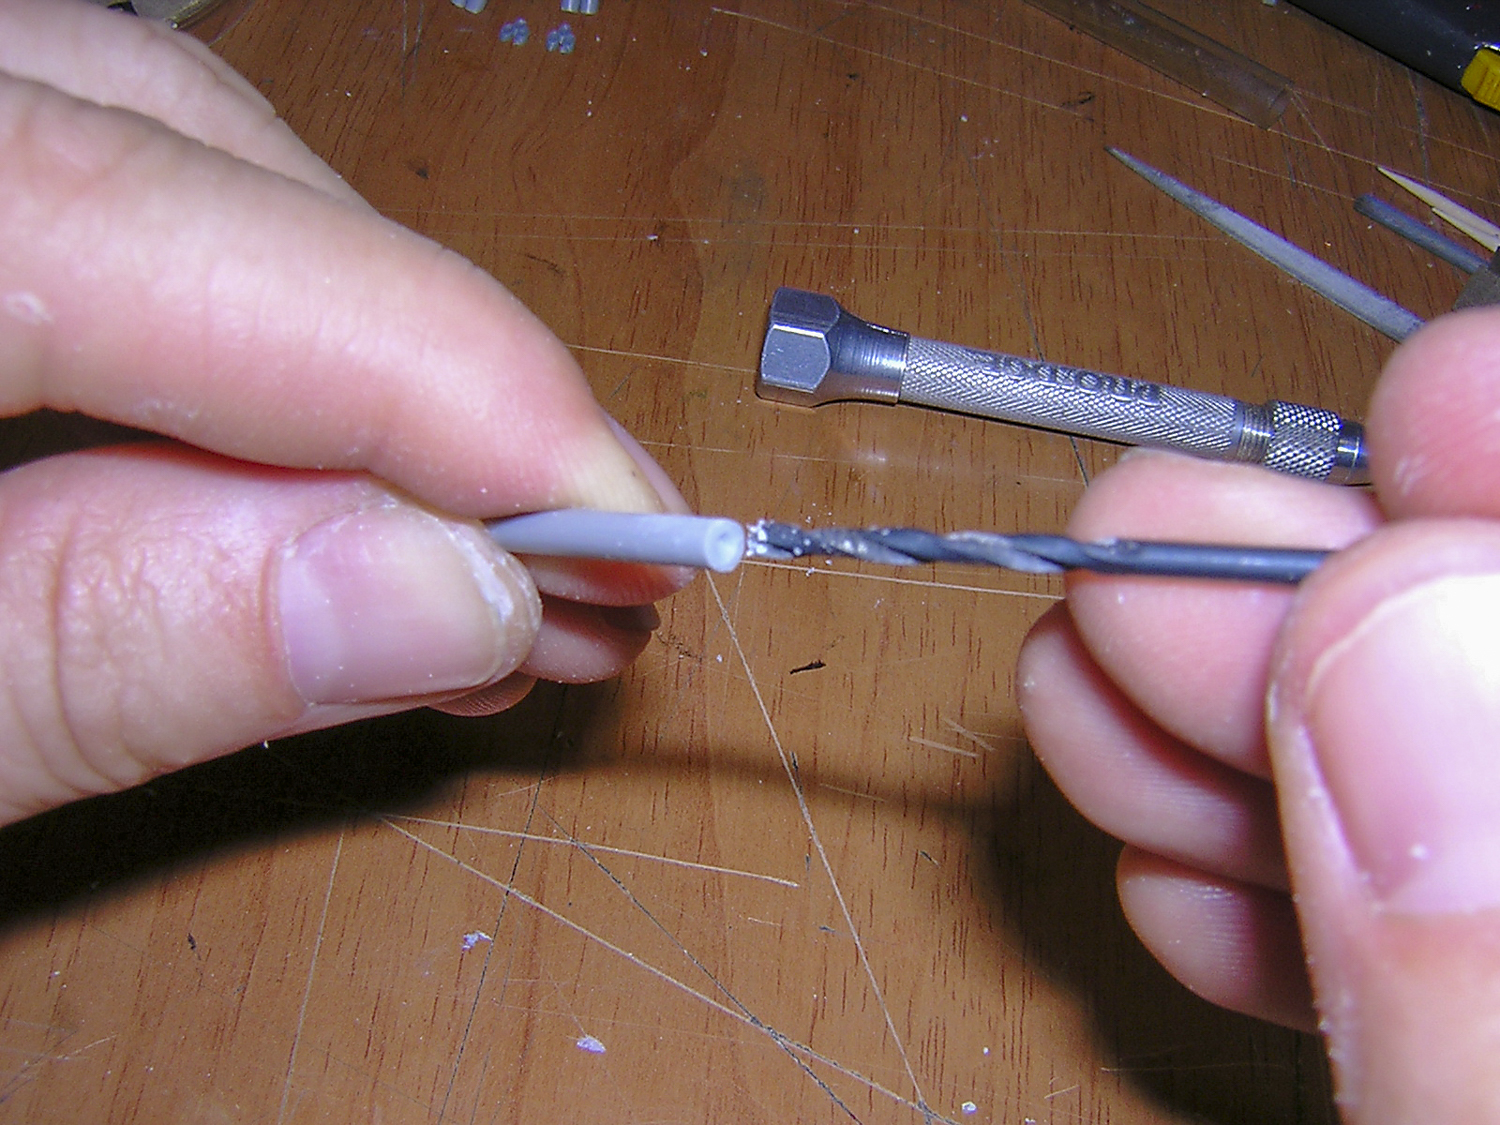
Carmine improved the engine exhaust pipes by making new ones from bored-out plastic sprue.

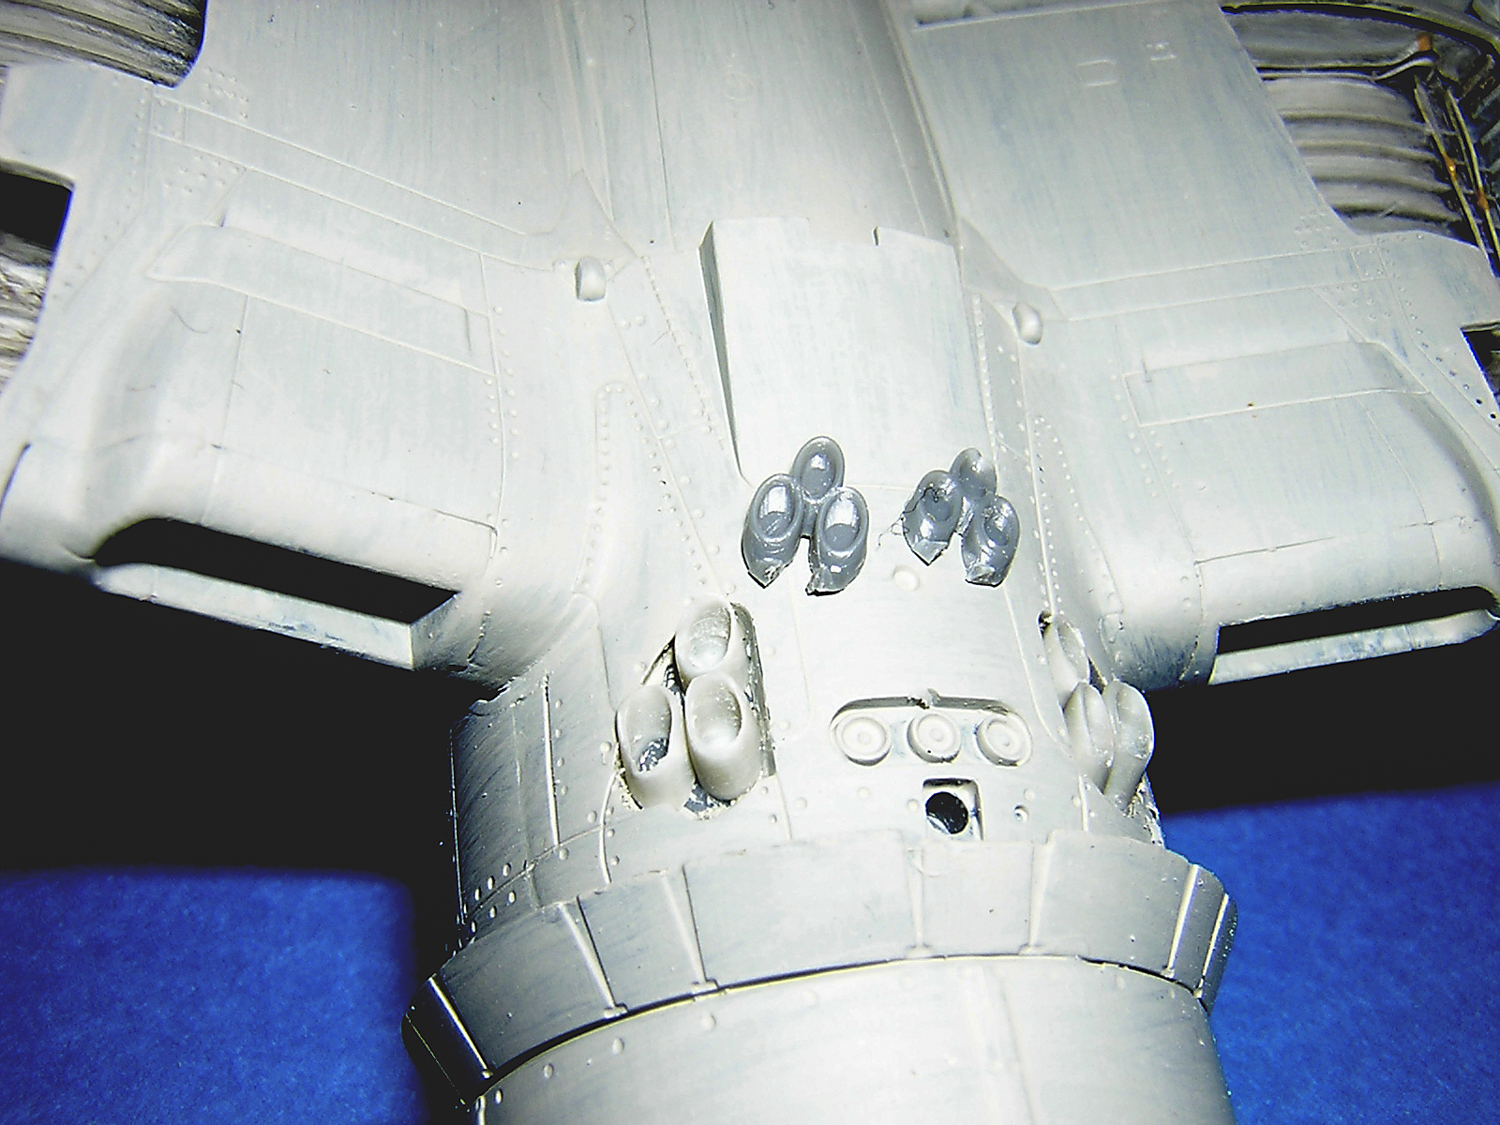
The new pipes are installed on the model (over-painted in white). The kit’s original pipes (in gray) are shown for comparison.

To simulate the ever-present sandy mud of Bougainville, Carmine smeared filler putty on the kit tires and allowed it to dry.


The tires are now painted and weathered, looking pretty grungy.


The tail-wheel well was painted interior green, then washed with dark gray oil paint.
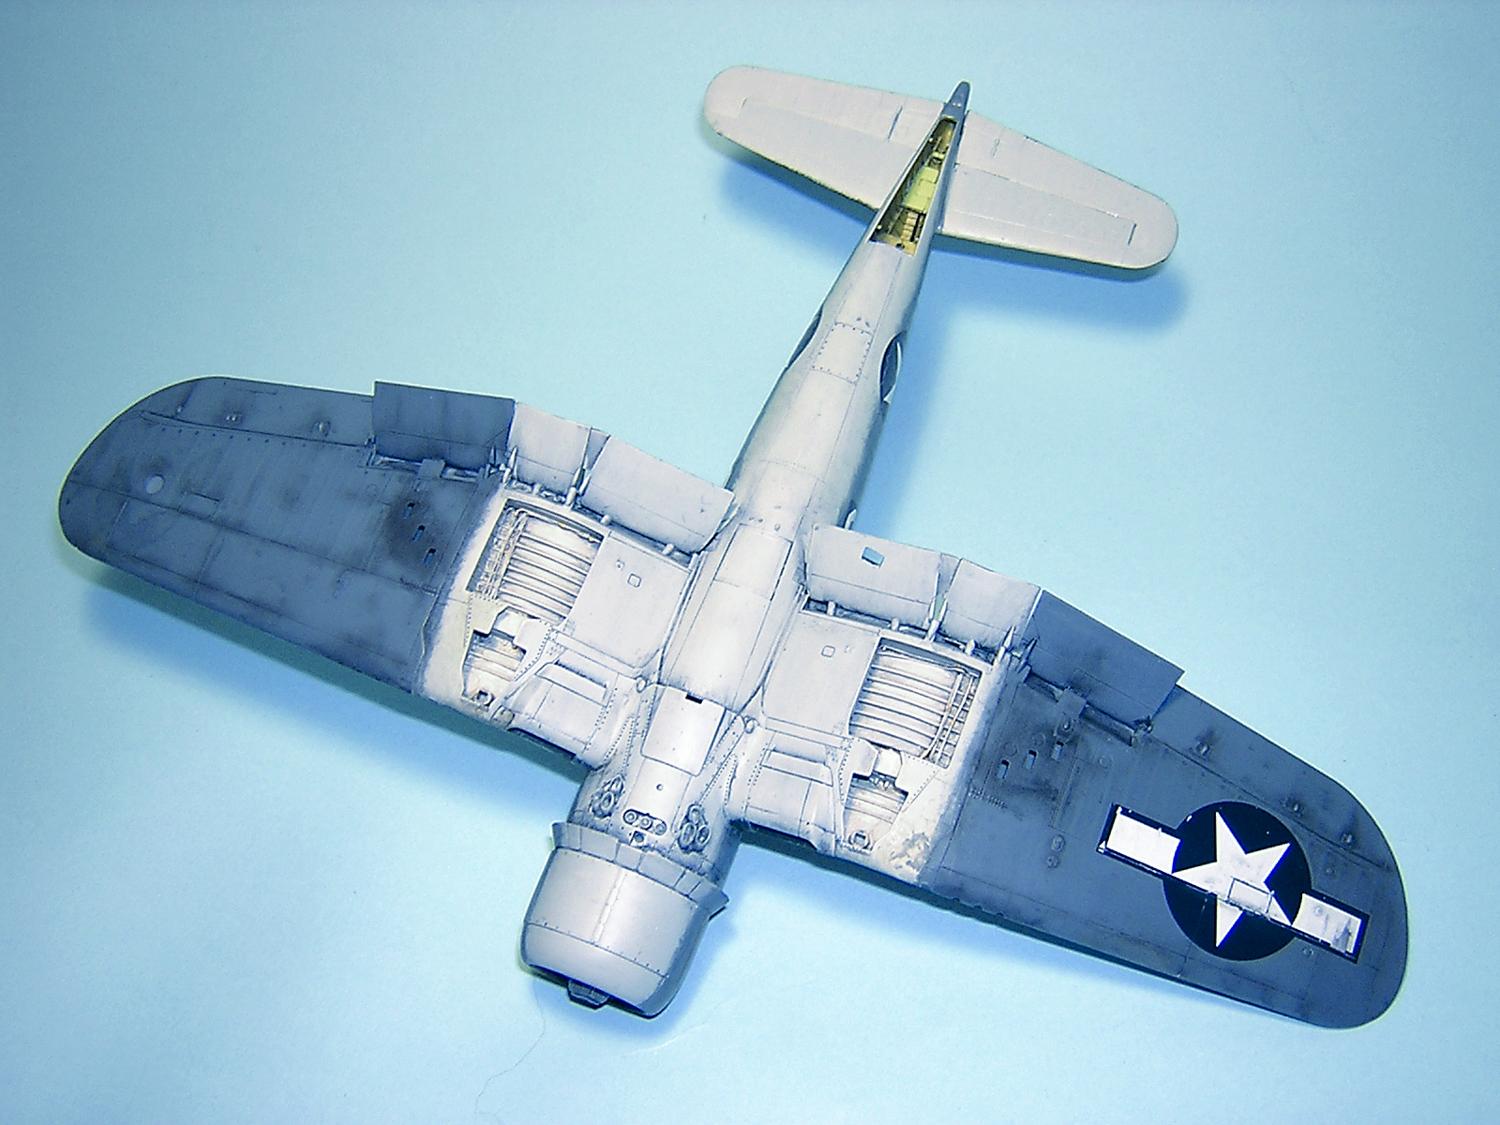
Carmine added copper wire detail to the main-gear wells.
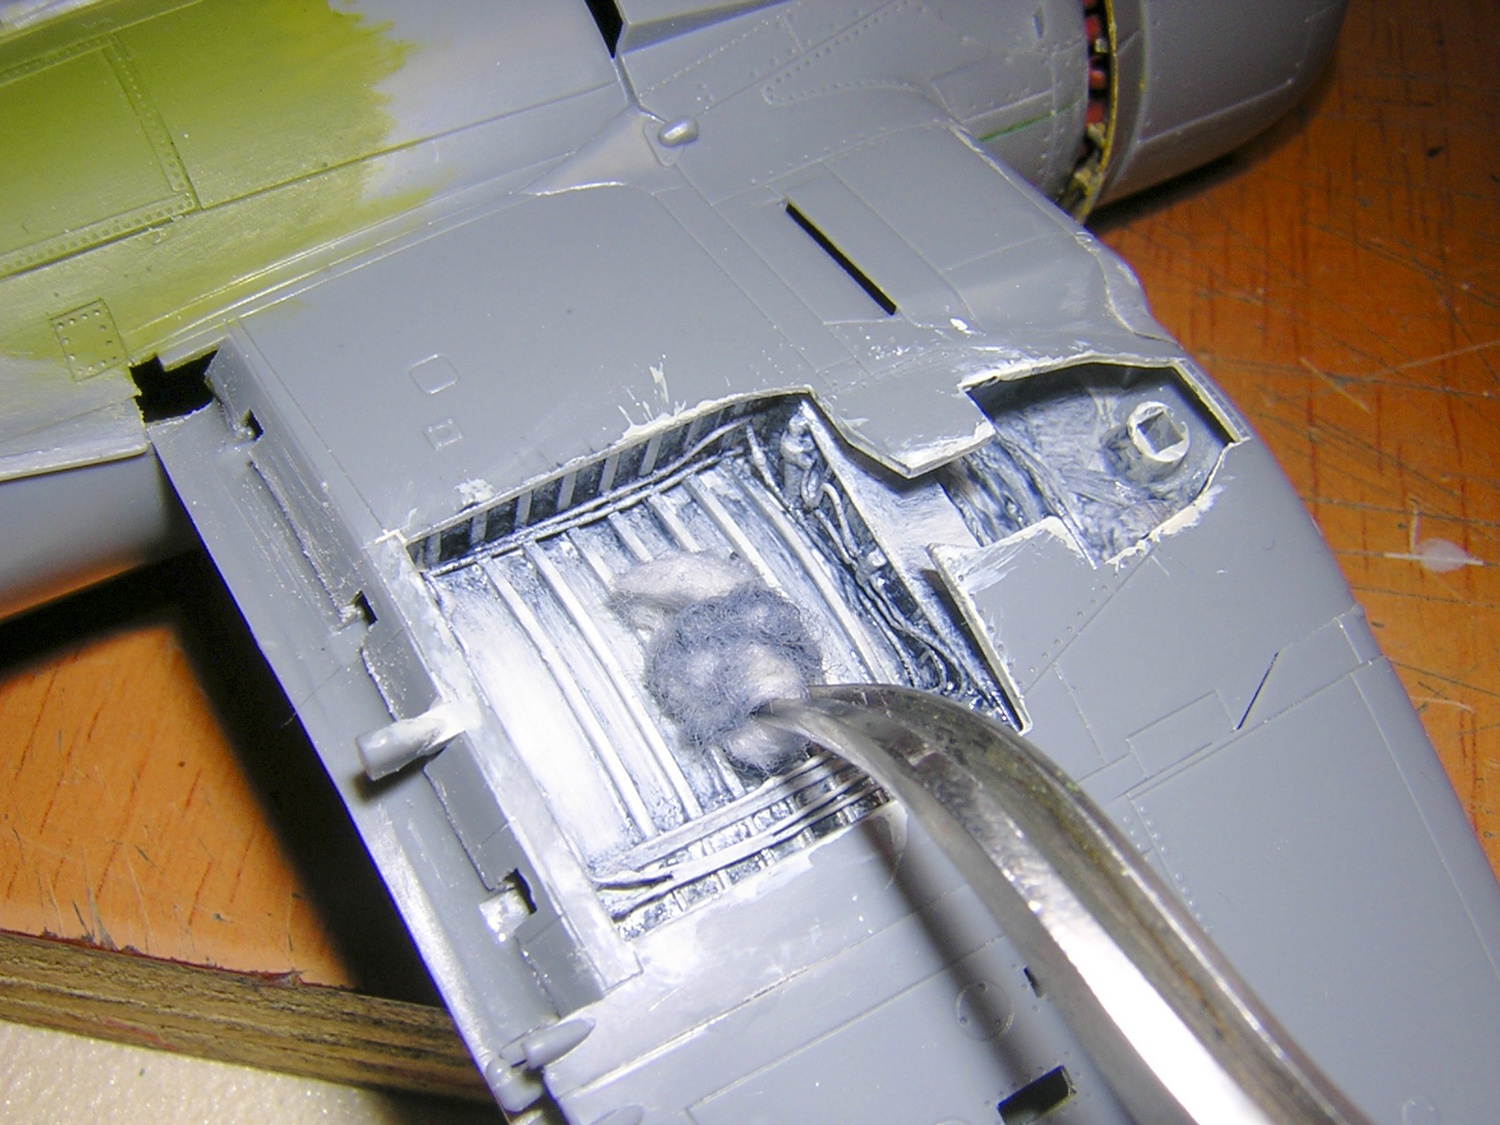
The first step in painting the wells was a coat of gloss white enamel. When it was dry, a dark gray wash was applied.


When the wash was dry, excess was rubbed away with a bit of cotton held by tweezers.
The wash simulates grime and enhances the “shadows” of the deep corners of the interior.
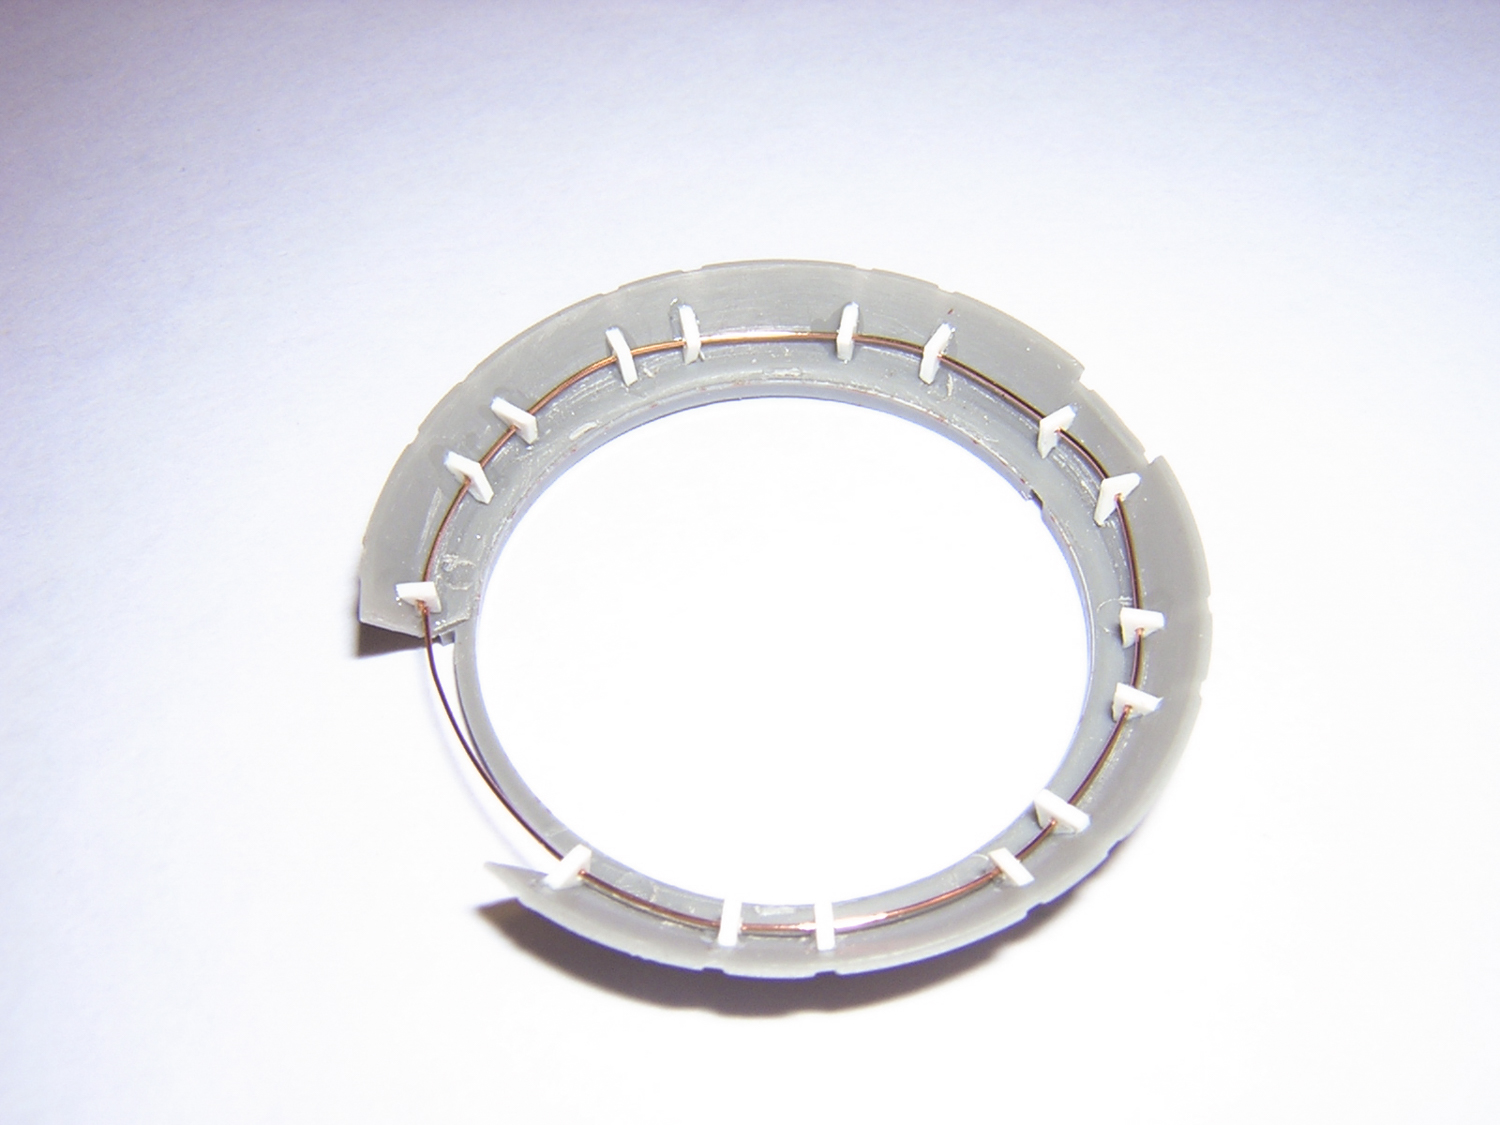
Carmine added coiled copper wire for the main landing gear springs.
A coat of white paint gives a uniform appearance, but it’s not the final step.
A thin dark gray oil-paint wash was applied to the entire landing gear unit.
With the excess wash wiped off, the gear looks a lot more like the real thing.
Carmine dropped the elevators on the model for a more candid appearance. He cut the elevators free from the stabilizers and then added styrene rod to the leading edges of the elevators.
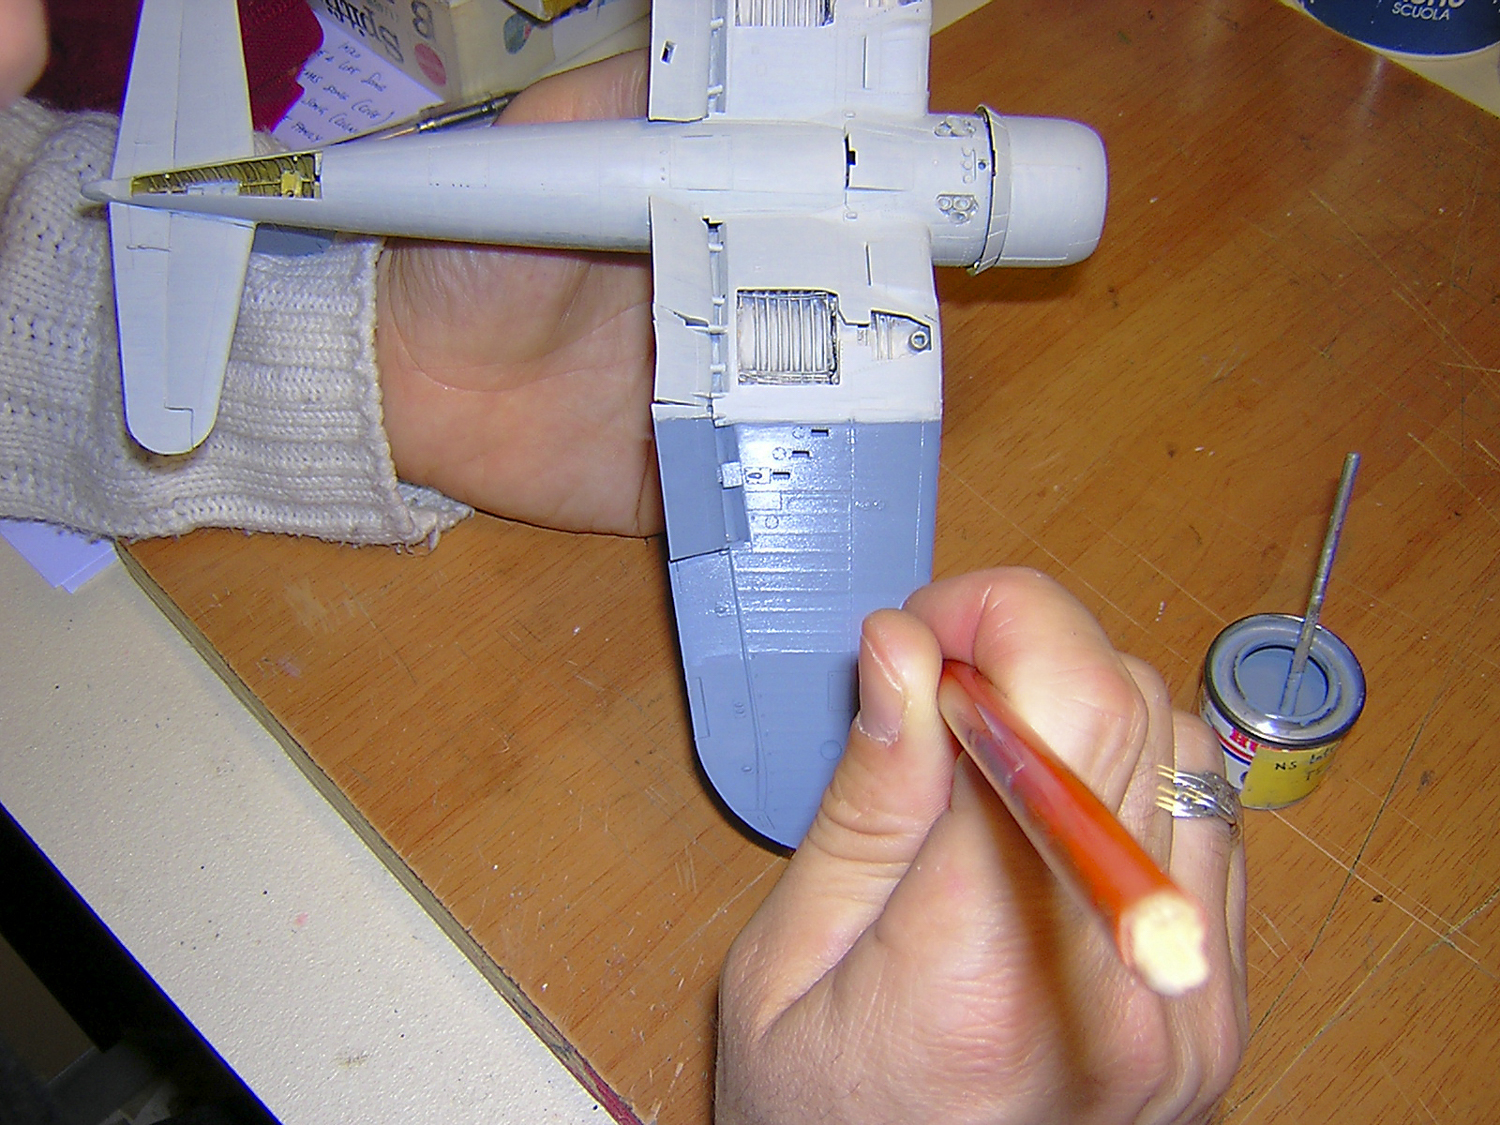
Look closely now, as Carmine starts the overall painting process – without an airbrush! He hand-brushes several coats of Humbrol enamels with a small, flat brush. The first coat usually looks awful, but it’s only a start.
The second color is the intermediate blue under the folding portions of the wings and the fuselage sides.
Adding a few drops of thinner to a capful of enamel is enough to help the paint spread evenly with a brush.
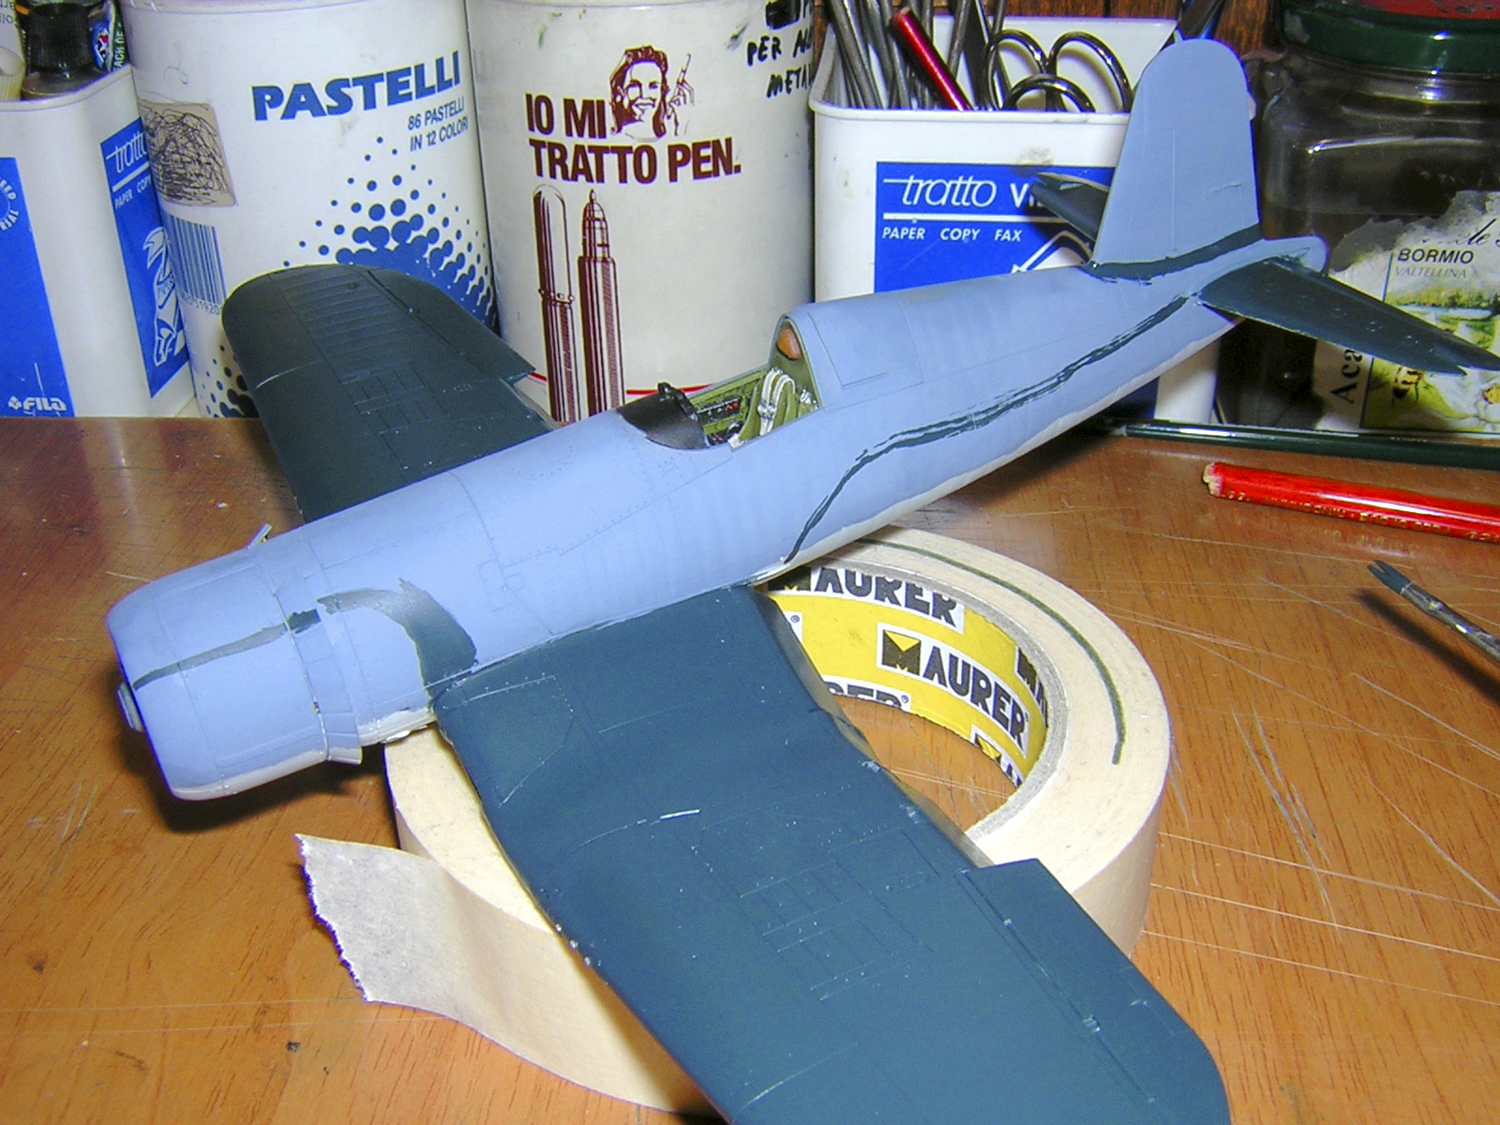
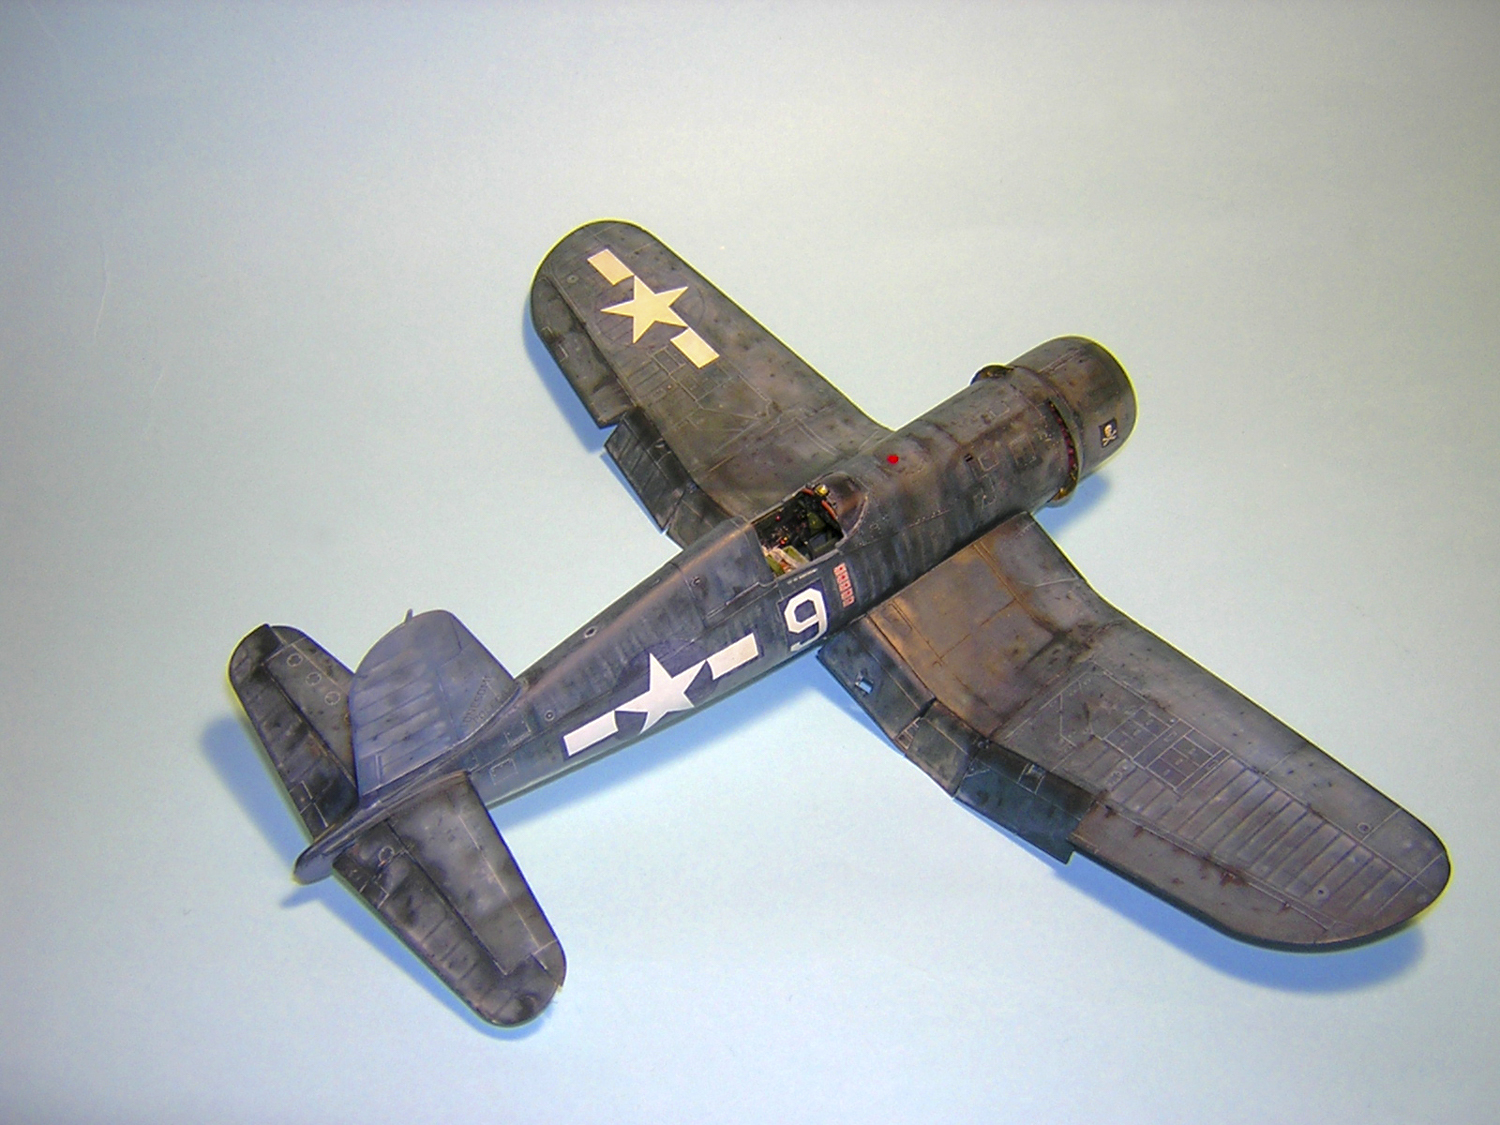
On goes the non-specular sea blue for the upper surfaces of the wings and fuselage.
Carmine outlines the sea blue areas of the fuselage and then goes back and fills to the outlines.
All the base colors are now on the model. Carmine brushed on clear gloss to aid in decaling and weathering.
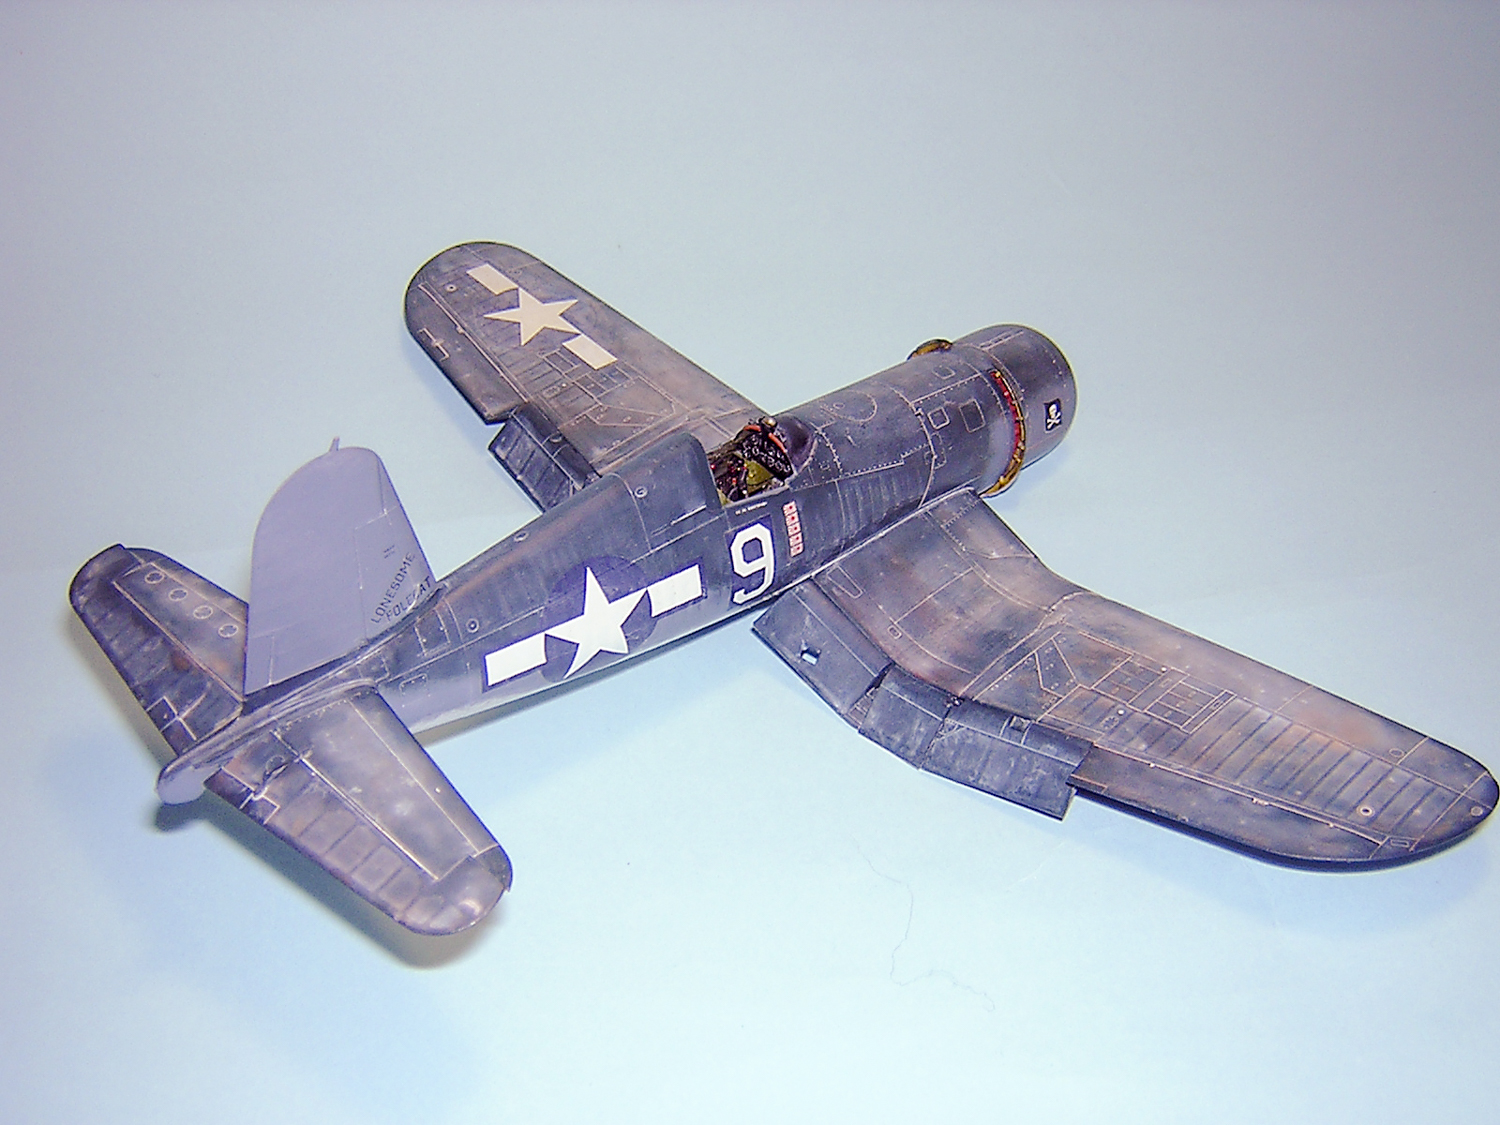
With the markings applied from Eagle Strike sheet No. 48-093, the model is ready for the extreme weathering process.
First up is a dark gray enamel wash to enhance the panel lines. It won’t look this messy for long. Carmine makes washes that are 90% thinner, 10% color.
Wiping away the excess wash reveals the much better appearance of the accented panel lines. Carmine advises modelers to take their time in the weathering process.
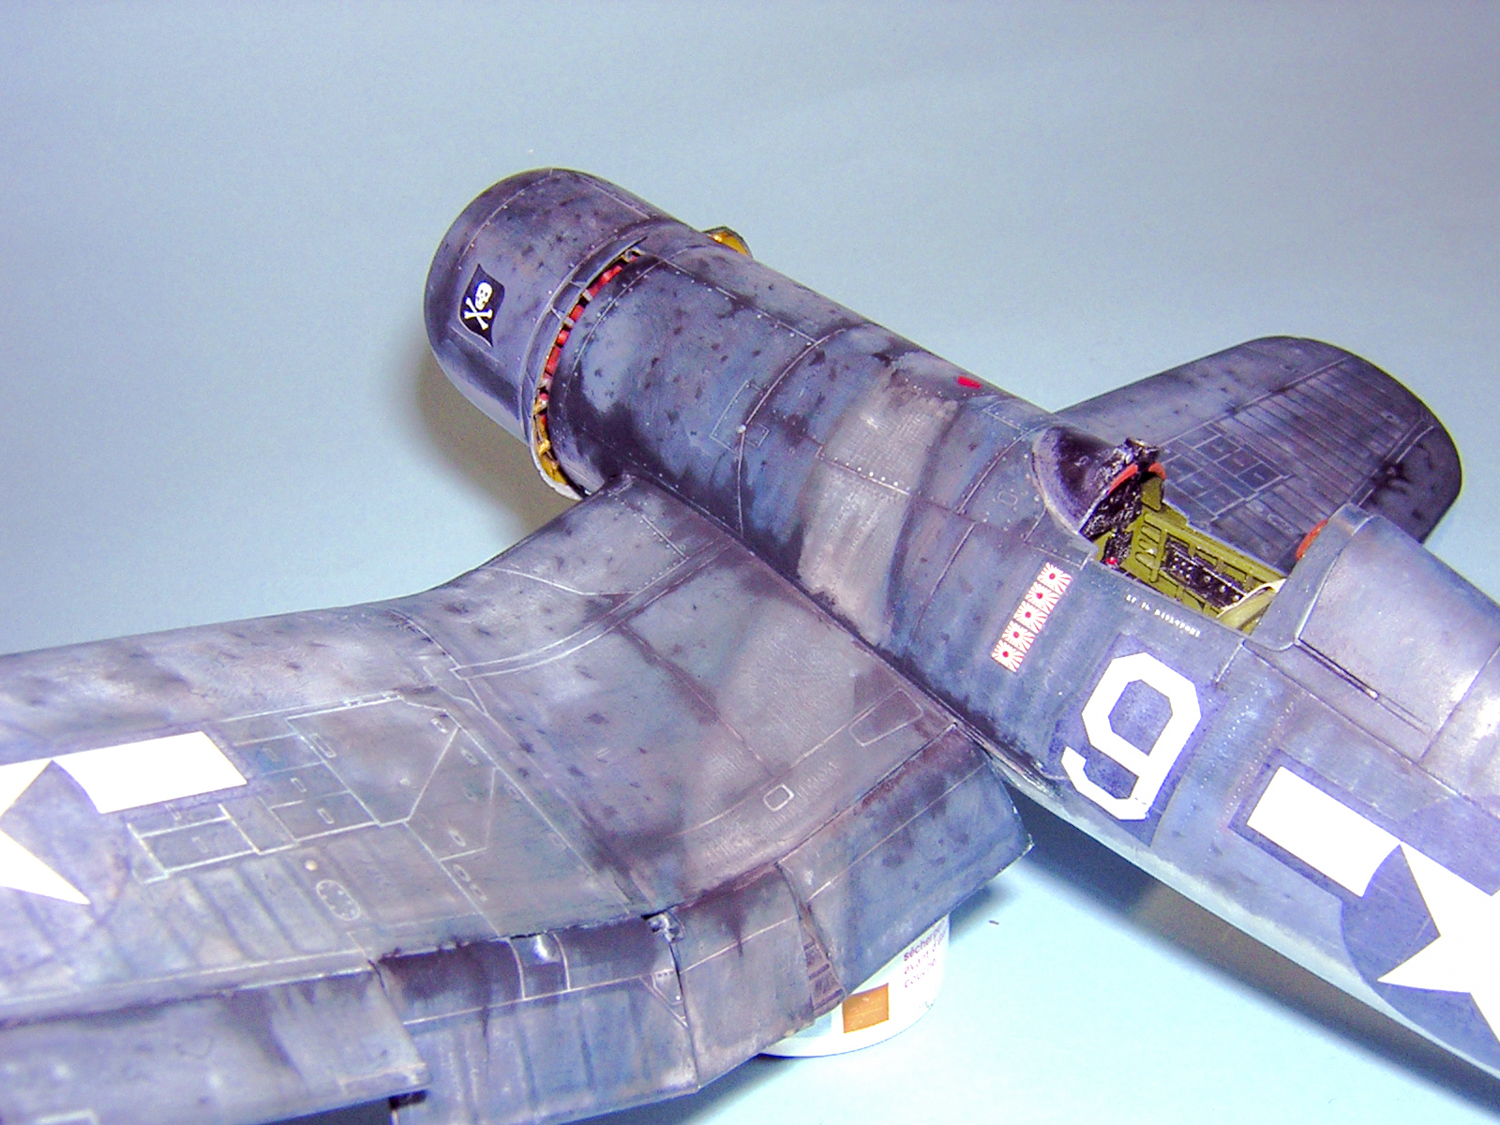
A lighter gray wash adorns the dark upper surface colors. Areas dirtied with pastel chalk dust start to make the airplane look realistically used.
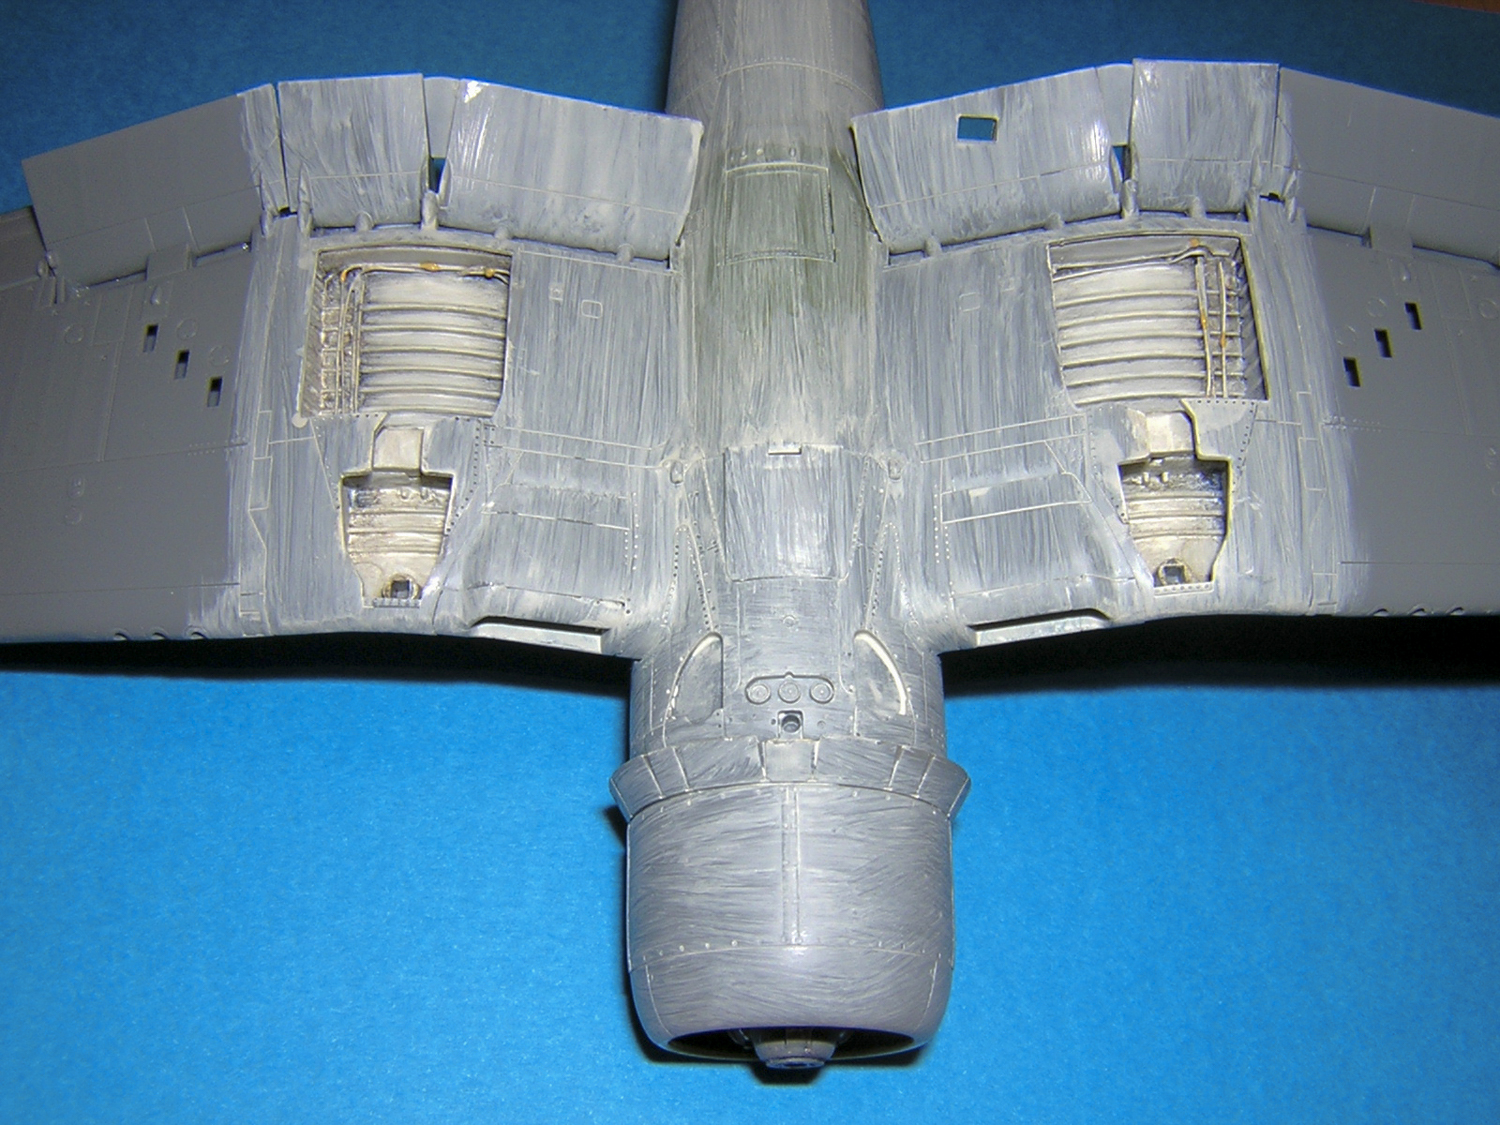
The bottom gets lots of grime. Note the smears at the aileron hinge points and gun smoke stains around the shell-ejector ports.
Careful, localized applications of oil washes build up the grime and fluid stains.
Corsairs typically showed stains coming from the fuel filler hatch in front of the windscreen, so Carmine made sure this old fighter showed them.
A close-up of the finished model’s cockpit illustrates comparable wear inside and out.
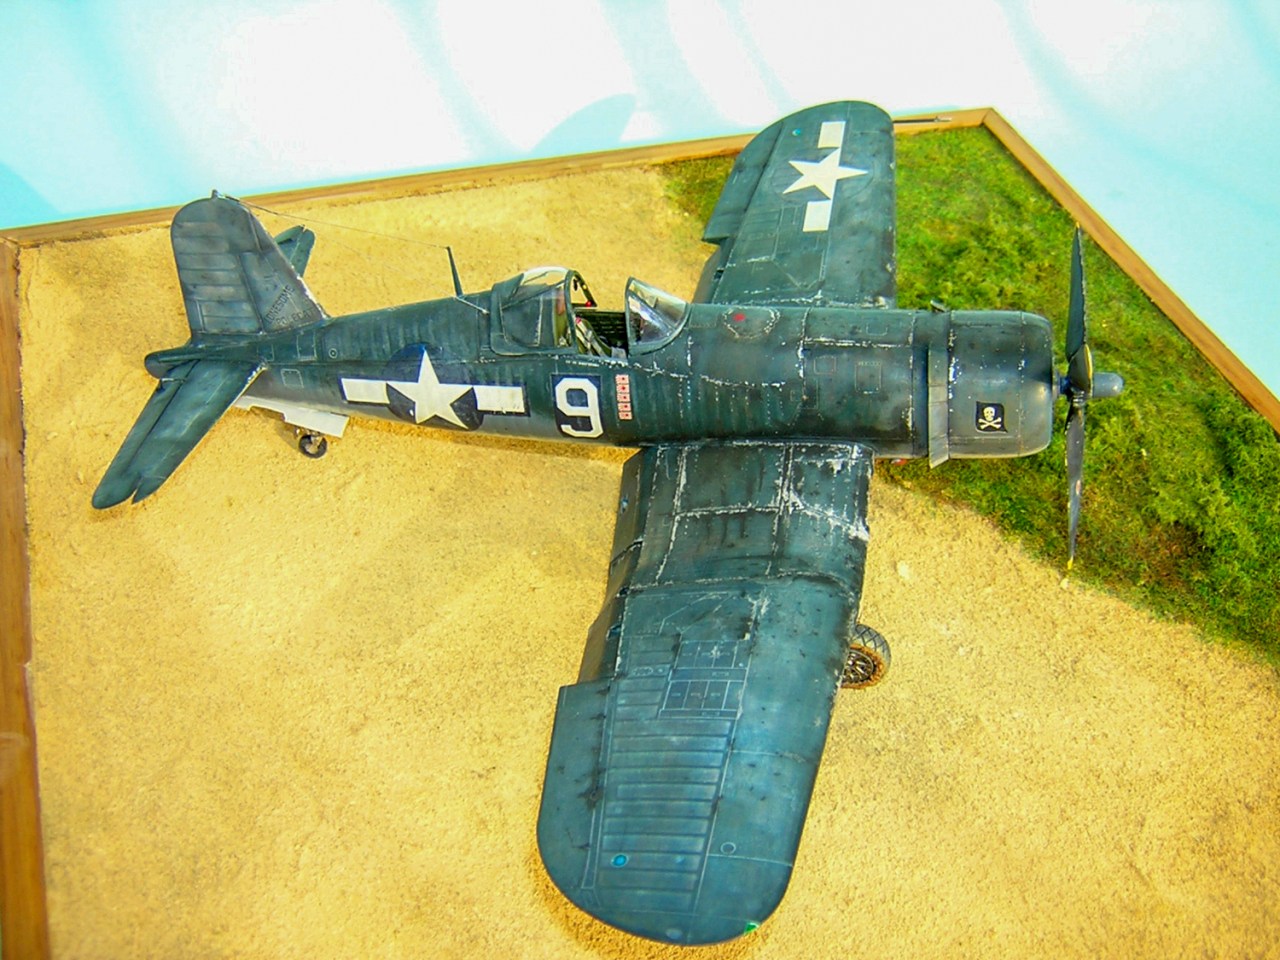
With added detail, dropped flaps, and dirty finish, Carmine’s Tamiya Corsair looks perfect on an airfield diorama base.
This story first appeared in the January 2007 FineScale Modeler magazine.